PicoRC
PicoPSU Adaptor for Apricot PC
| Purchase Link | Official Discord | Table of Contents |
This adaptor lets you use Pico ATX PSU on Apricot PC, PC XI and Apricot PC 286.
It replaces the original PSU, and uses very common 12V power brick instead.
Highlights
- Non-destructive and reversible
- PC fan header for added cooling
- Low cost, efficient and reliable.
Get One / Other Stuff
Also available for Compact Macintosh, Apple IIGS, BBC Micro, Osborne 1, and more.
For more general-purpose diagnostics and retrofitting, check out the full-fat ATX4VC.
Table of Contents
Getting a Pico PSU
PicoPSUs are tiny ATX power supplies for small PCs, but perfect for retro computers as well.
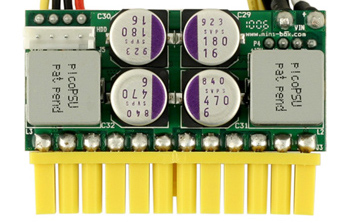
- Official website and distributors.
- The cheapest 80W one should be plenty.
- Avoid generic clones
- They over-rate and are of low quality.
- A power brick with 12V DC and center positive 5.5x2.5mm barrel jack is needed.
- They are very popular and you might already have one.
- Make sure it has enough wattage.
Remember that this solution is only as good as your PicoPSU and 12V Brick, so don’t skimp on them!
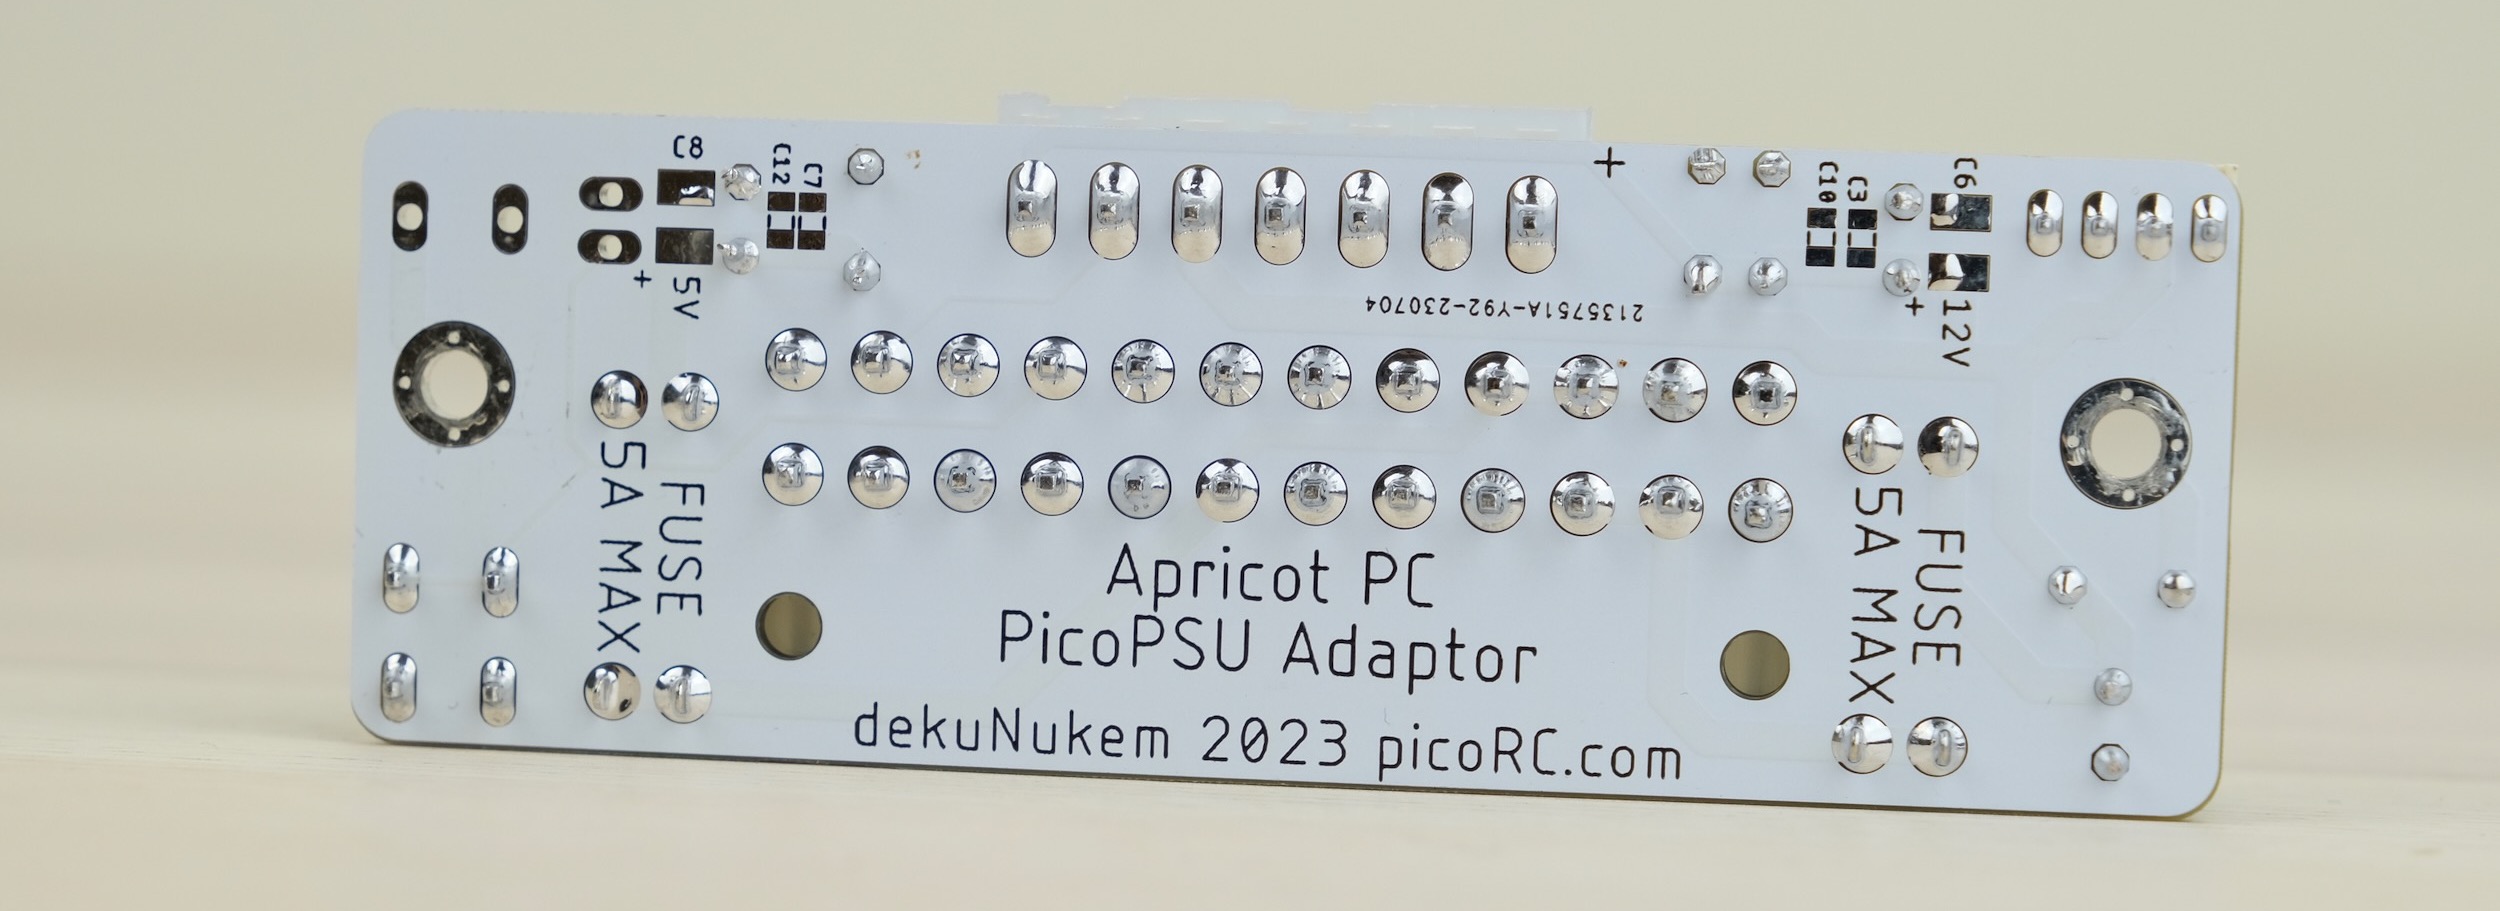
Kit Assembly
DON’T START YET!!! Keep reading :)
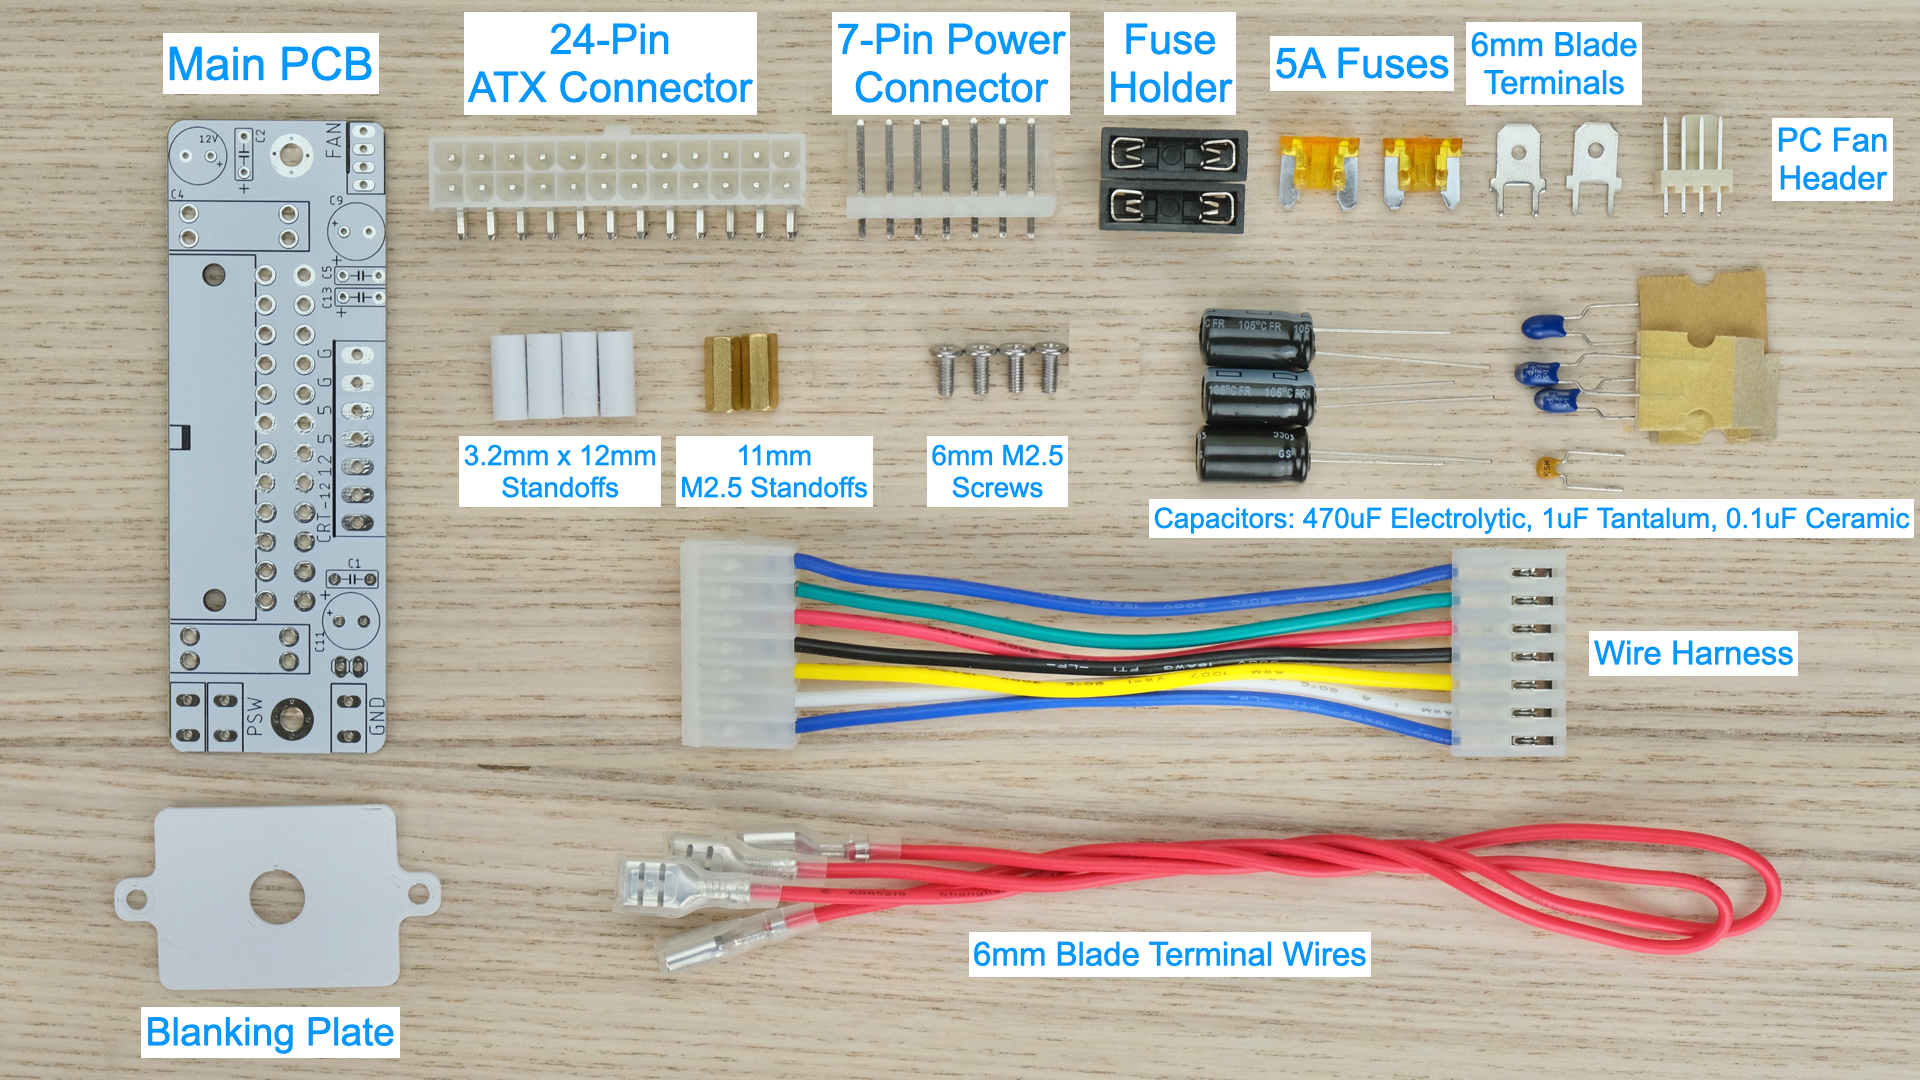
Observe the parts:
Soldering Notes
Nothing too tricky in this kit, all basic through-hole parts.
If this is your first time:
- Ensure your soldering iron has proper temperature control
- Try your local makerspace or university lab
- Use leaded solder and plenty of flux
- Temperature around 350C / 660F.
- This video covers the basics pretty well
- Start from shortest to tallest.
- Solder a single pin first, ensure it is straight, adjust if necessary.
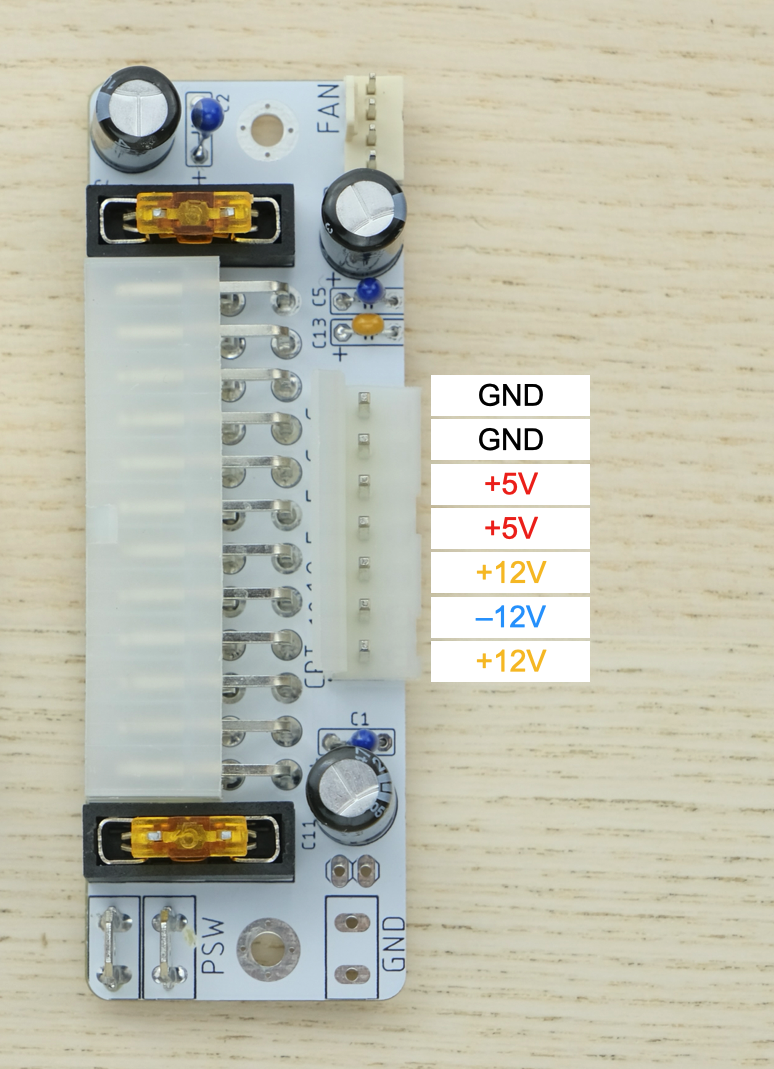
Assembly
Solder the following components as shown below:
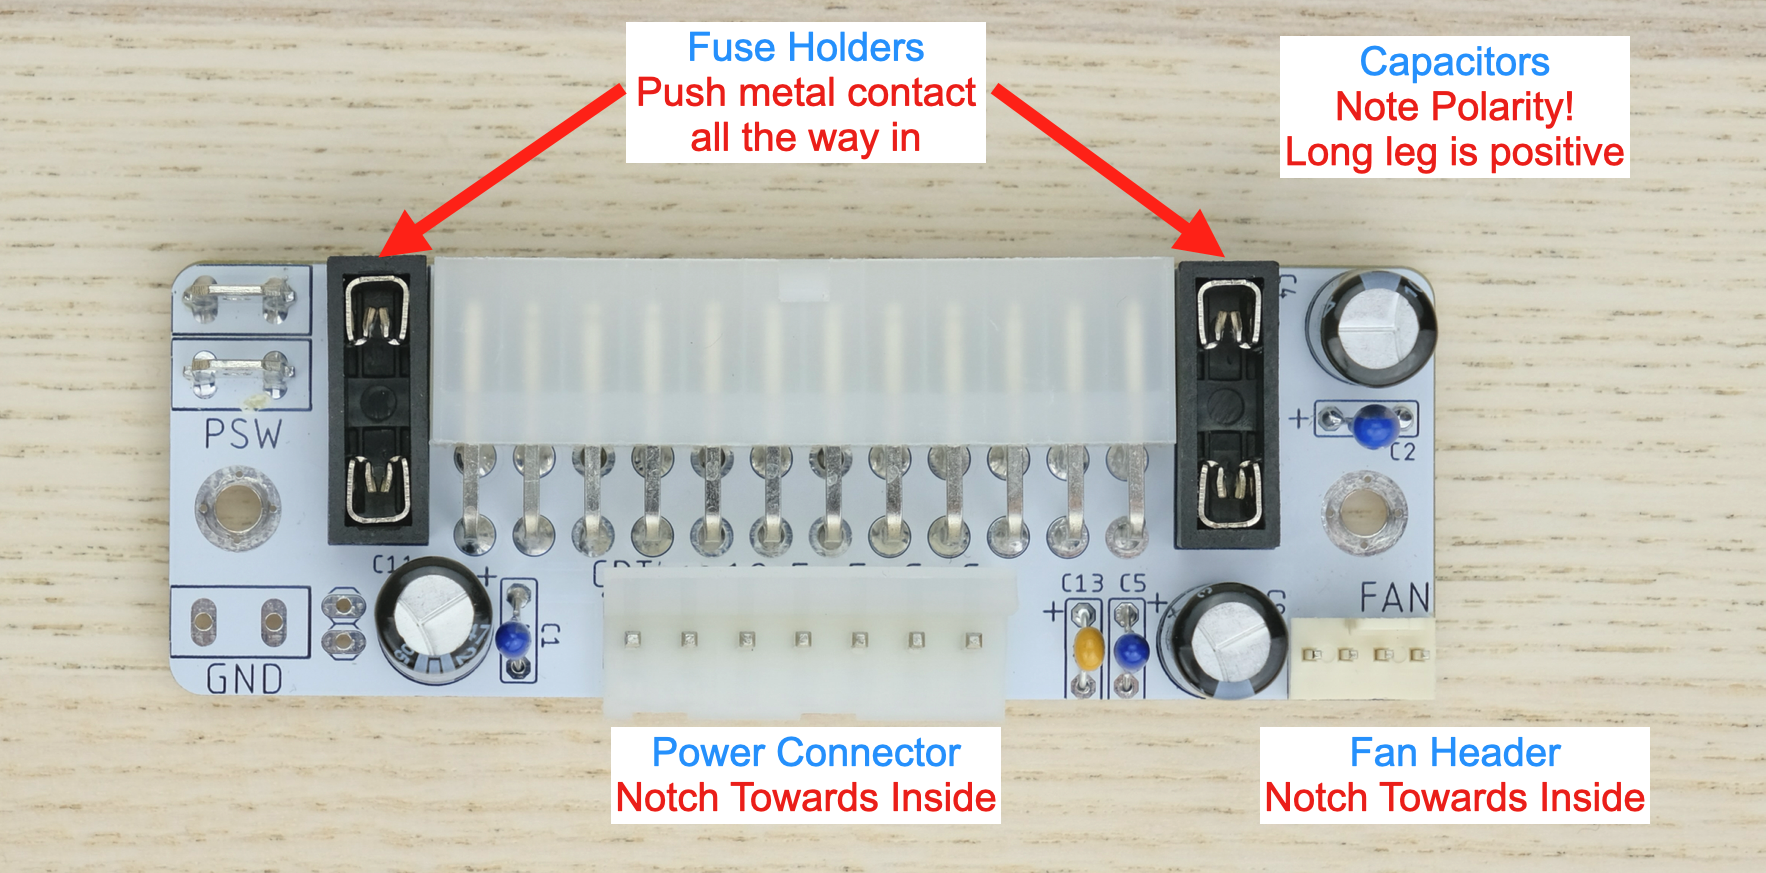
-
Double check capacitor polarity!
-
Black electrolytic caps: White stripe is NEGATIVE.
-
Blue Tantalum caps: White stripe is POSITIVE.
-
Yellow ceramic caps: No polarity.
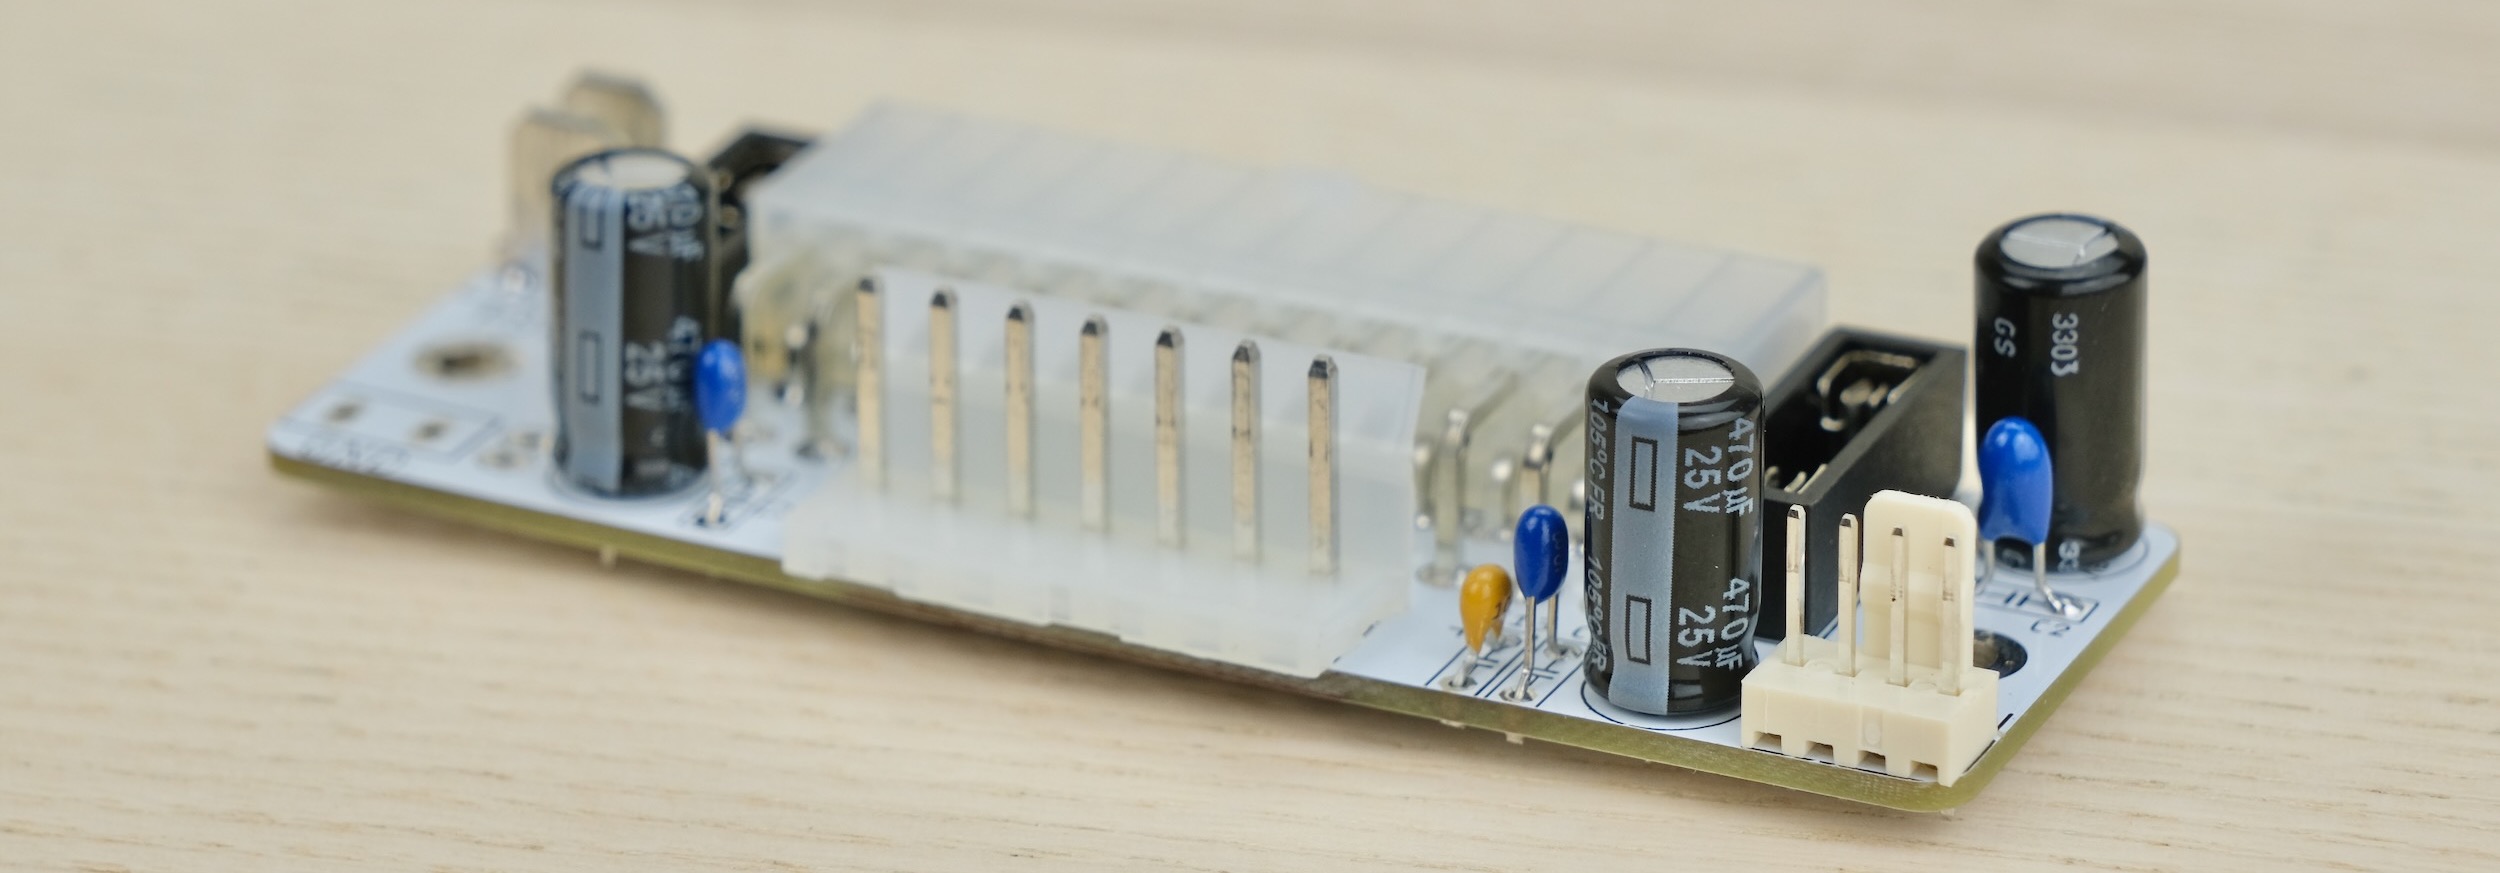
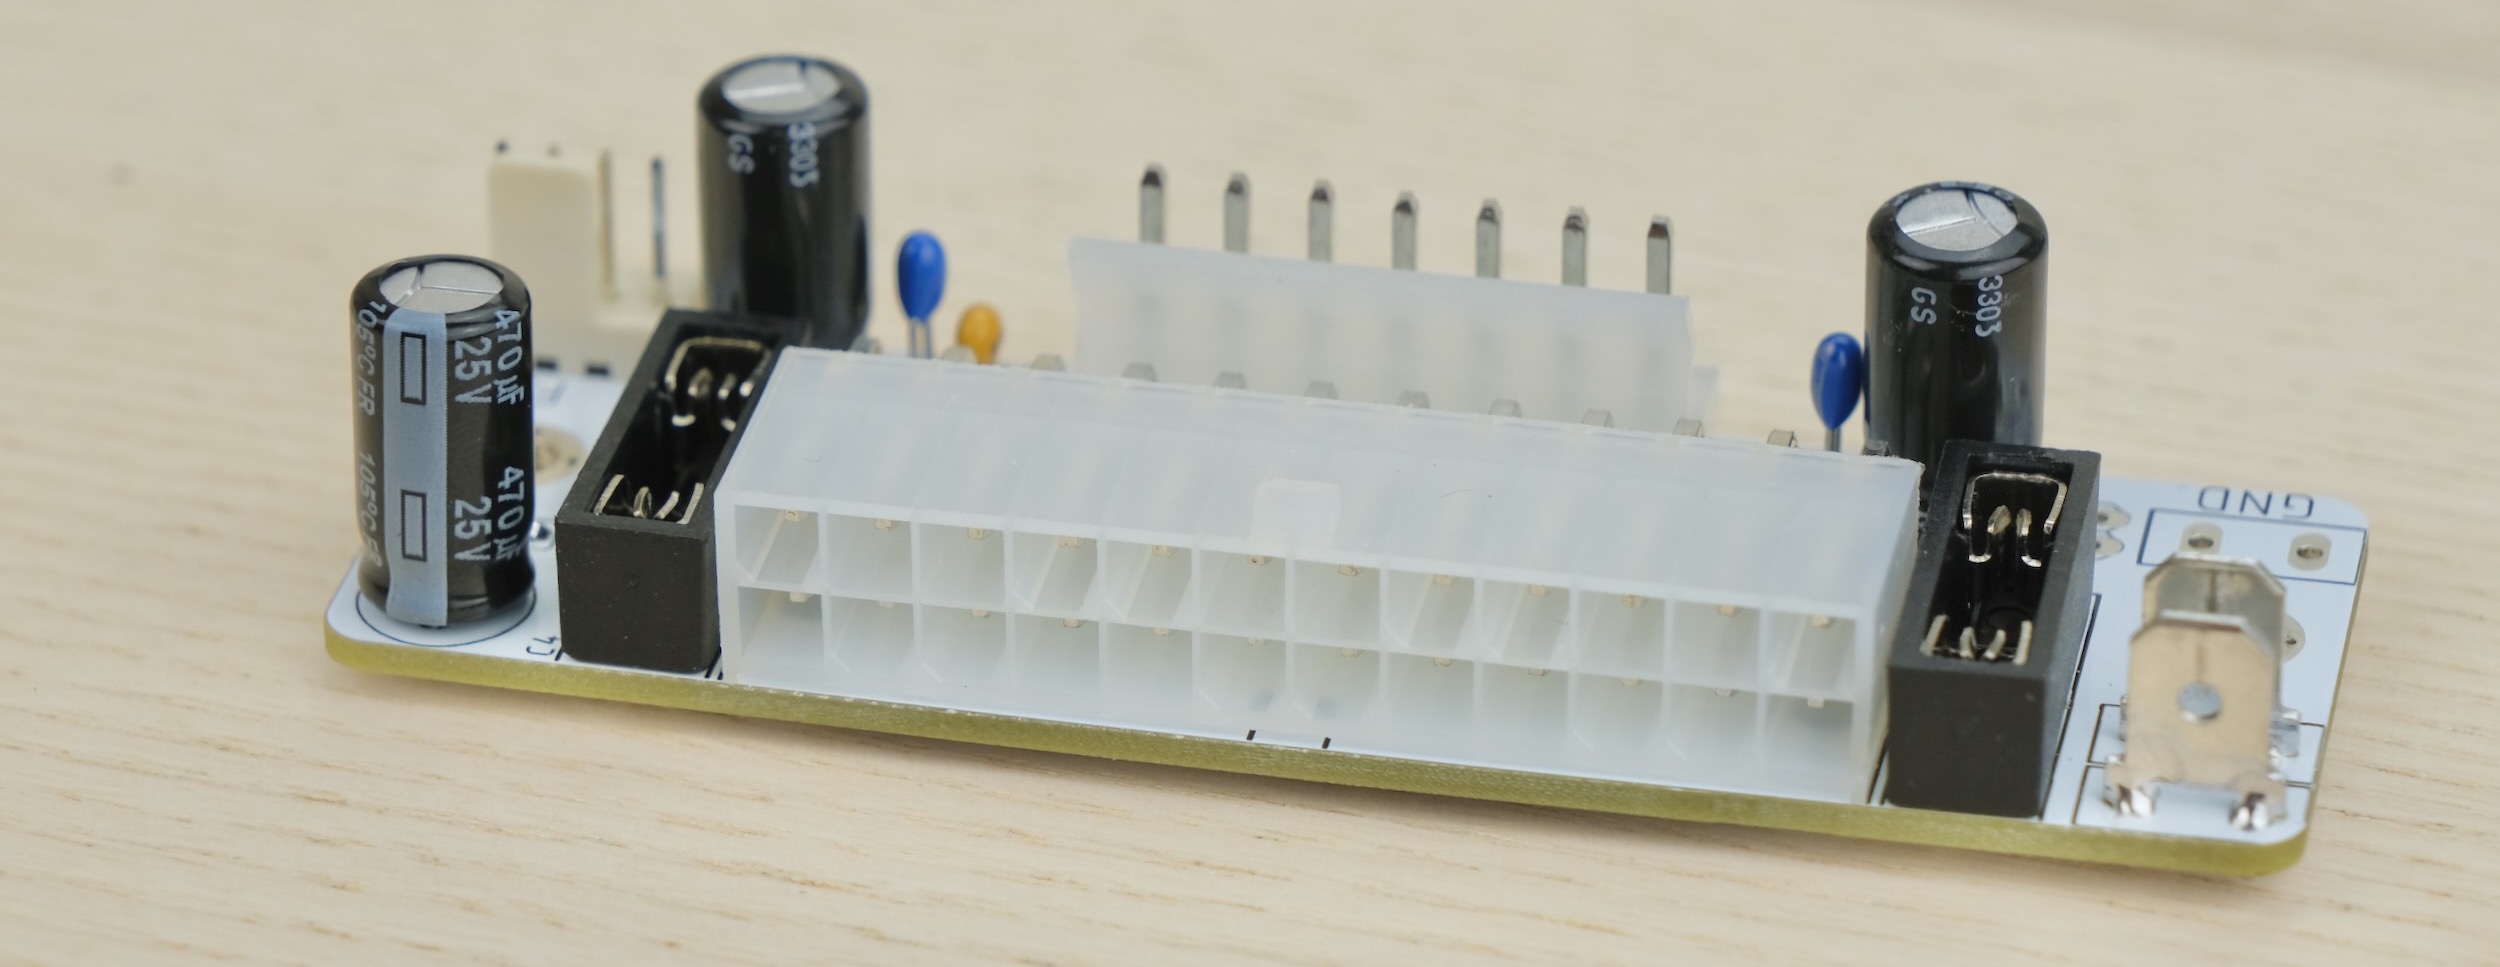
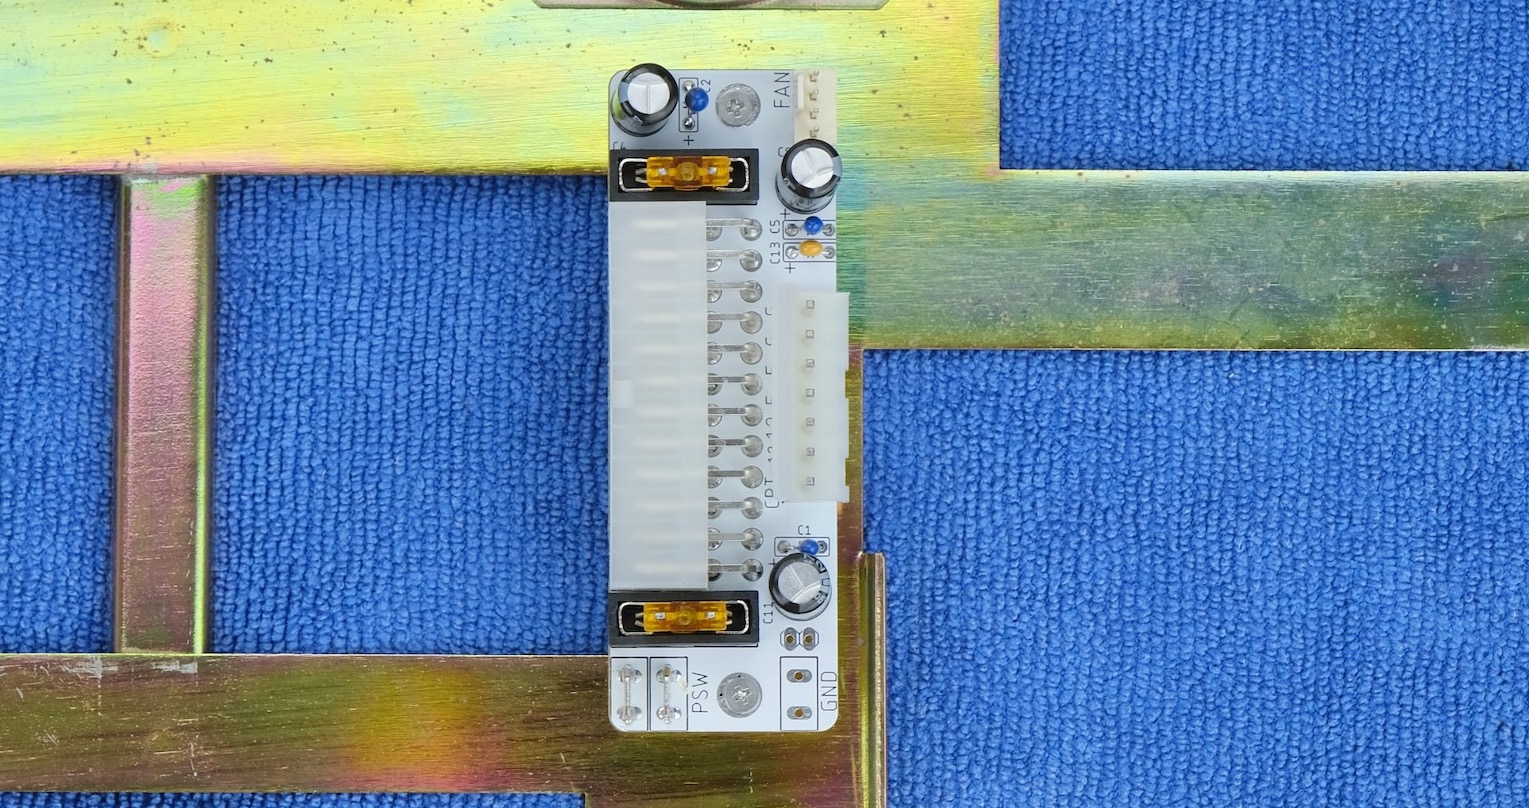
More reference photos:
Cleaning
- Compare with reference photos above/below.
- Solder joints should be shiny and smooth.
- There must be no solder bridges.
- If any, add flux and melt to remove.
Fuse
-
Push in the fuses as shown.
-
Use common 5-amp automotive fuses
-
DO NOT BYPASS FUSES
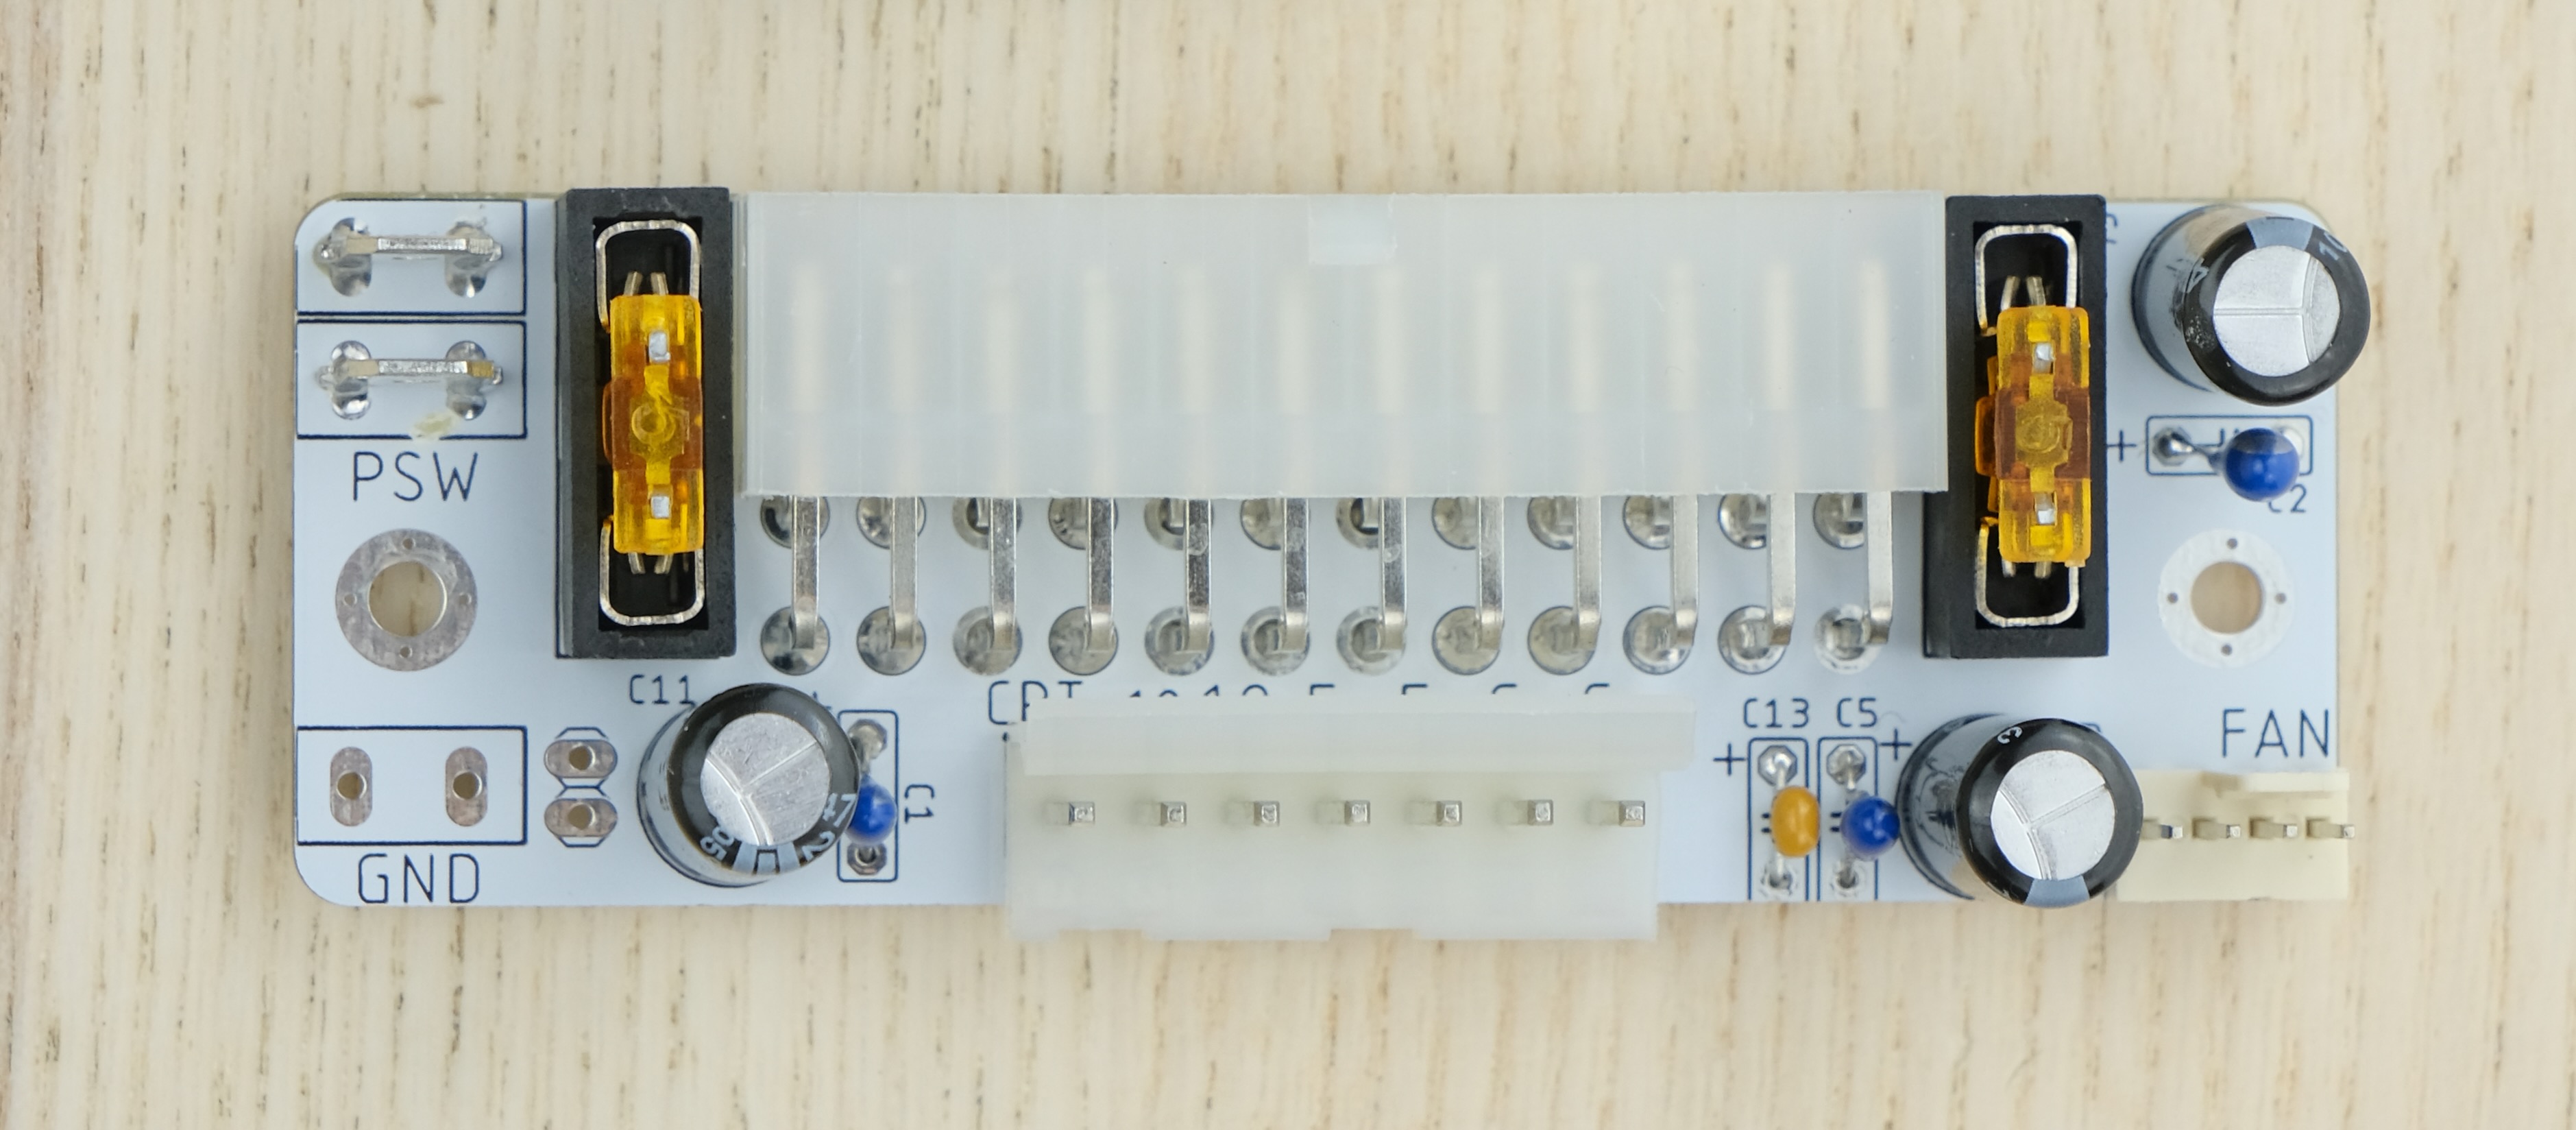
Inspection
-
Compare with the reference photo and notes above. Make sure everything is in correct orientation.
-
Solder joints should be shiny and smooth. If you see spikes, put on more flux and melt it again.
-
There must be no solder bridges. If any, put on flux and melt it to remove.
Pre-flight Checks
Use a multimeter to check for dead shorts between each power pin and GND:
Installation
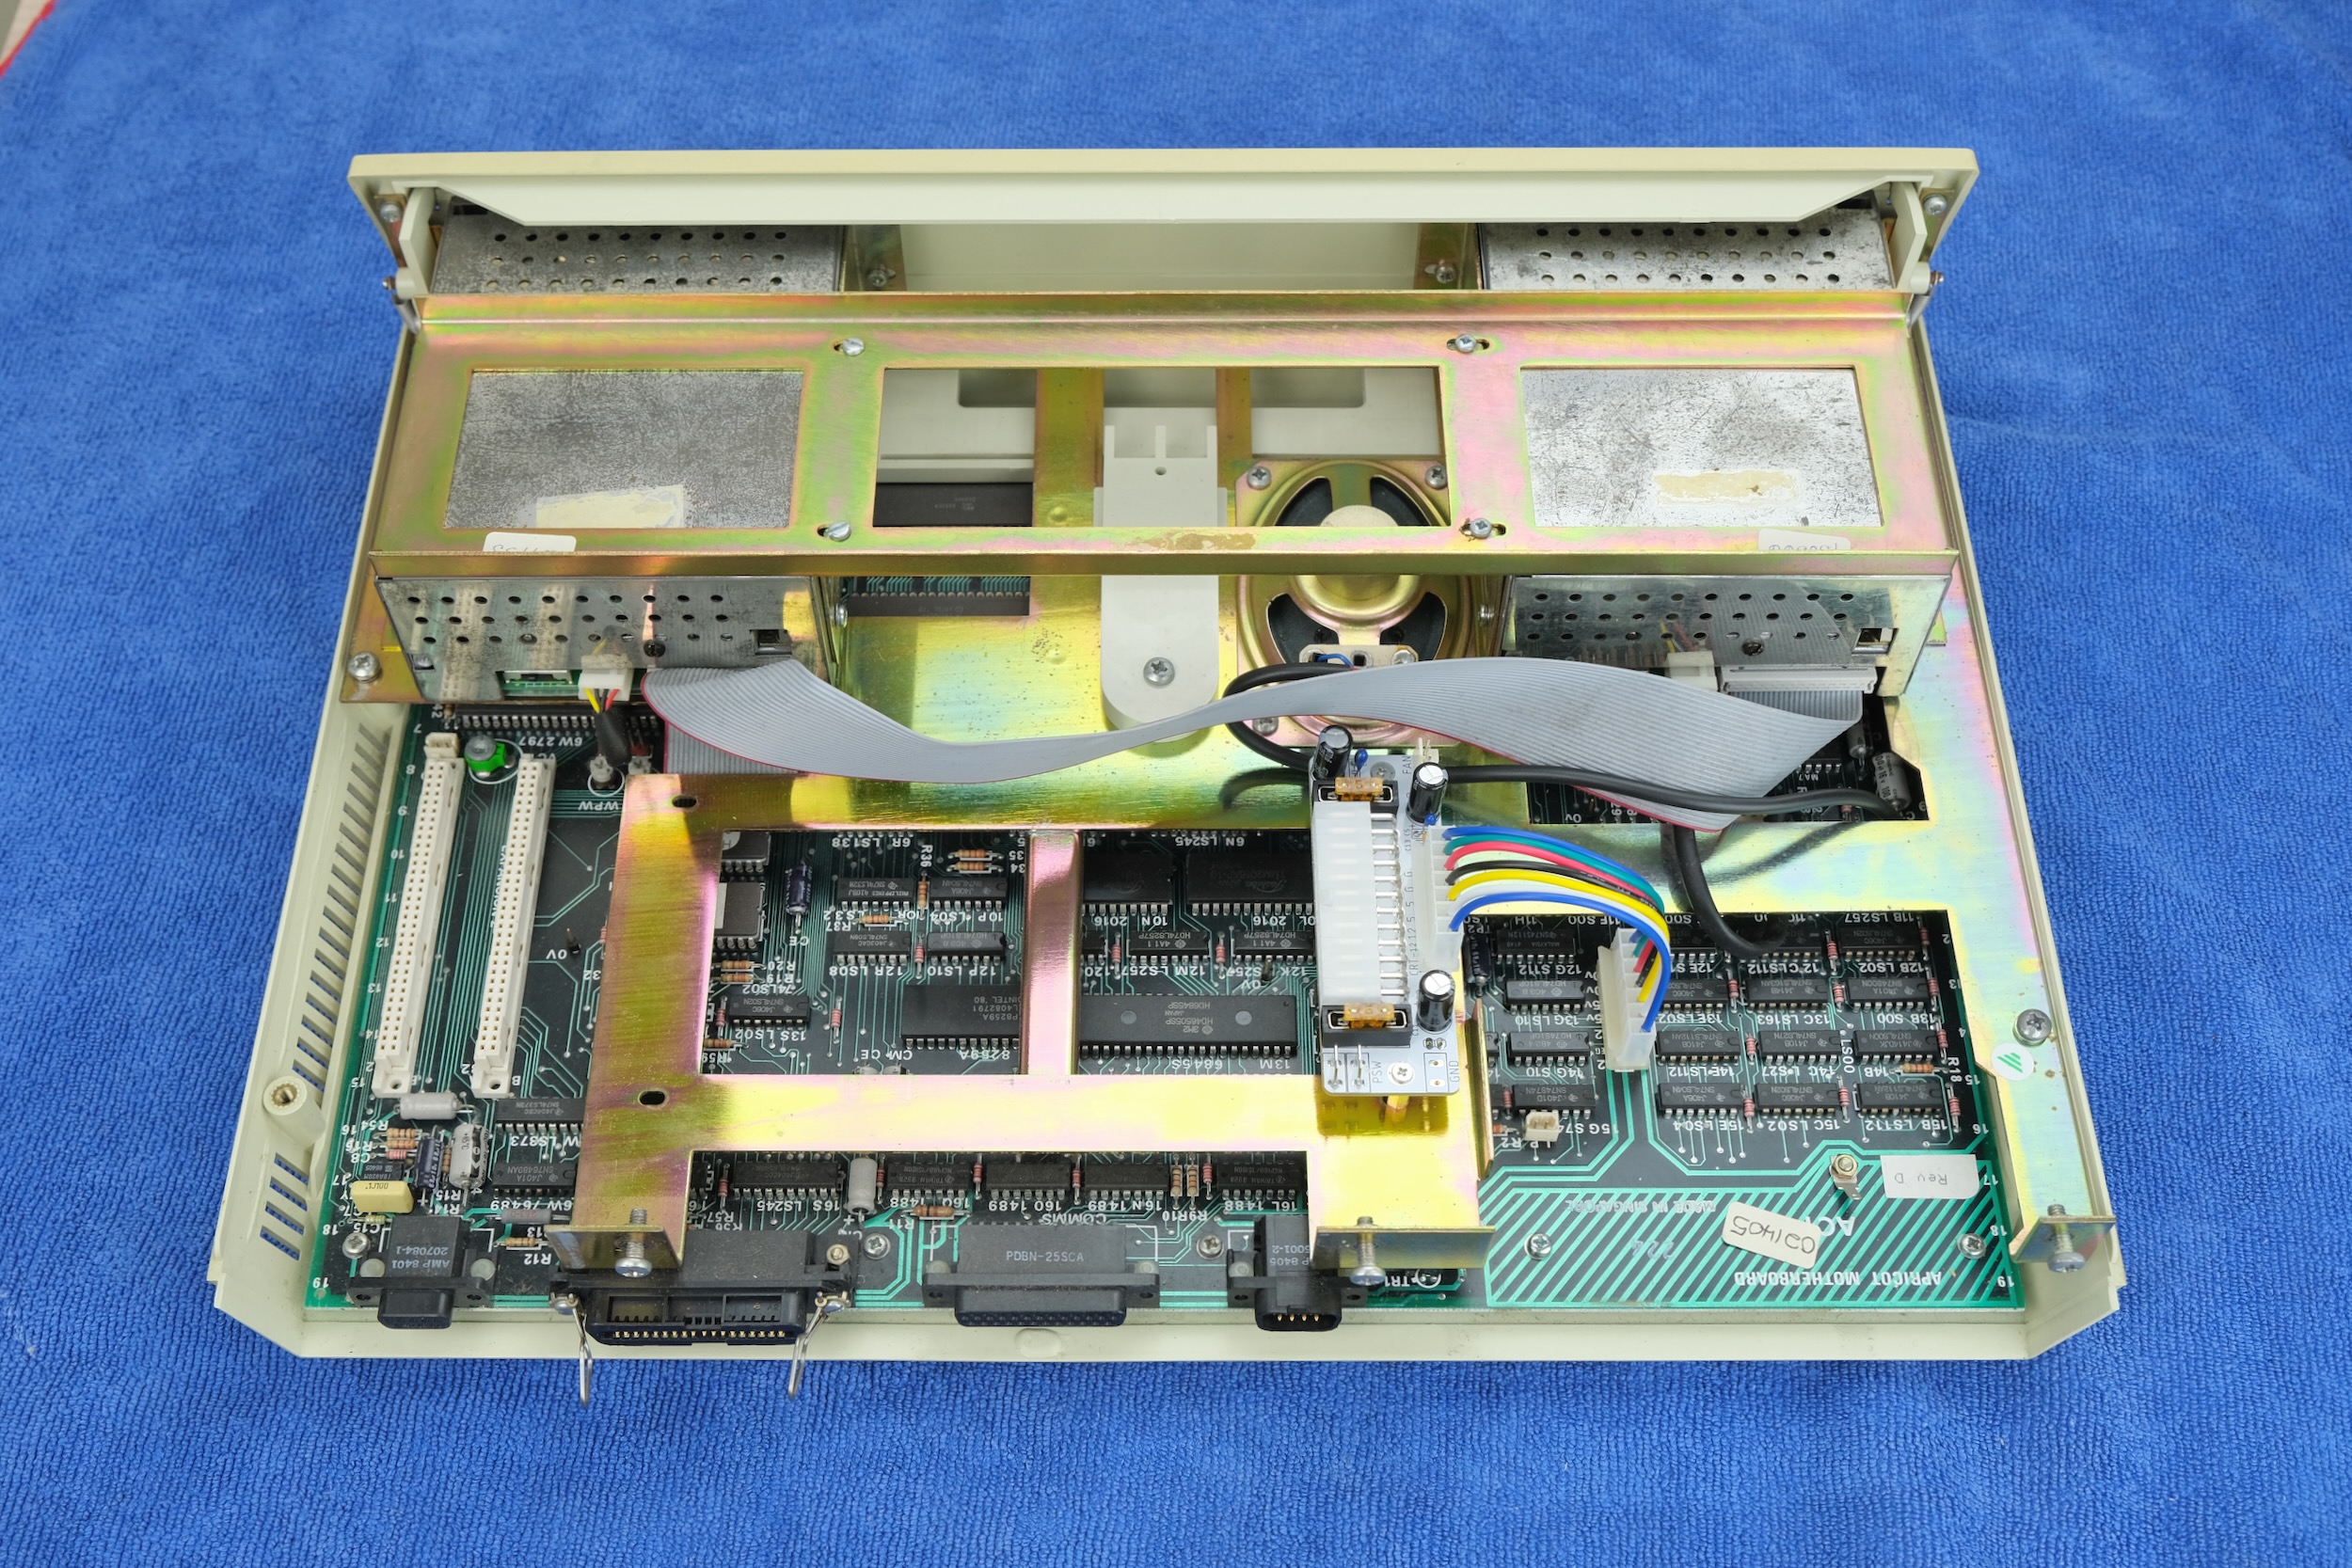
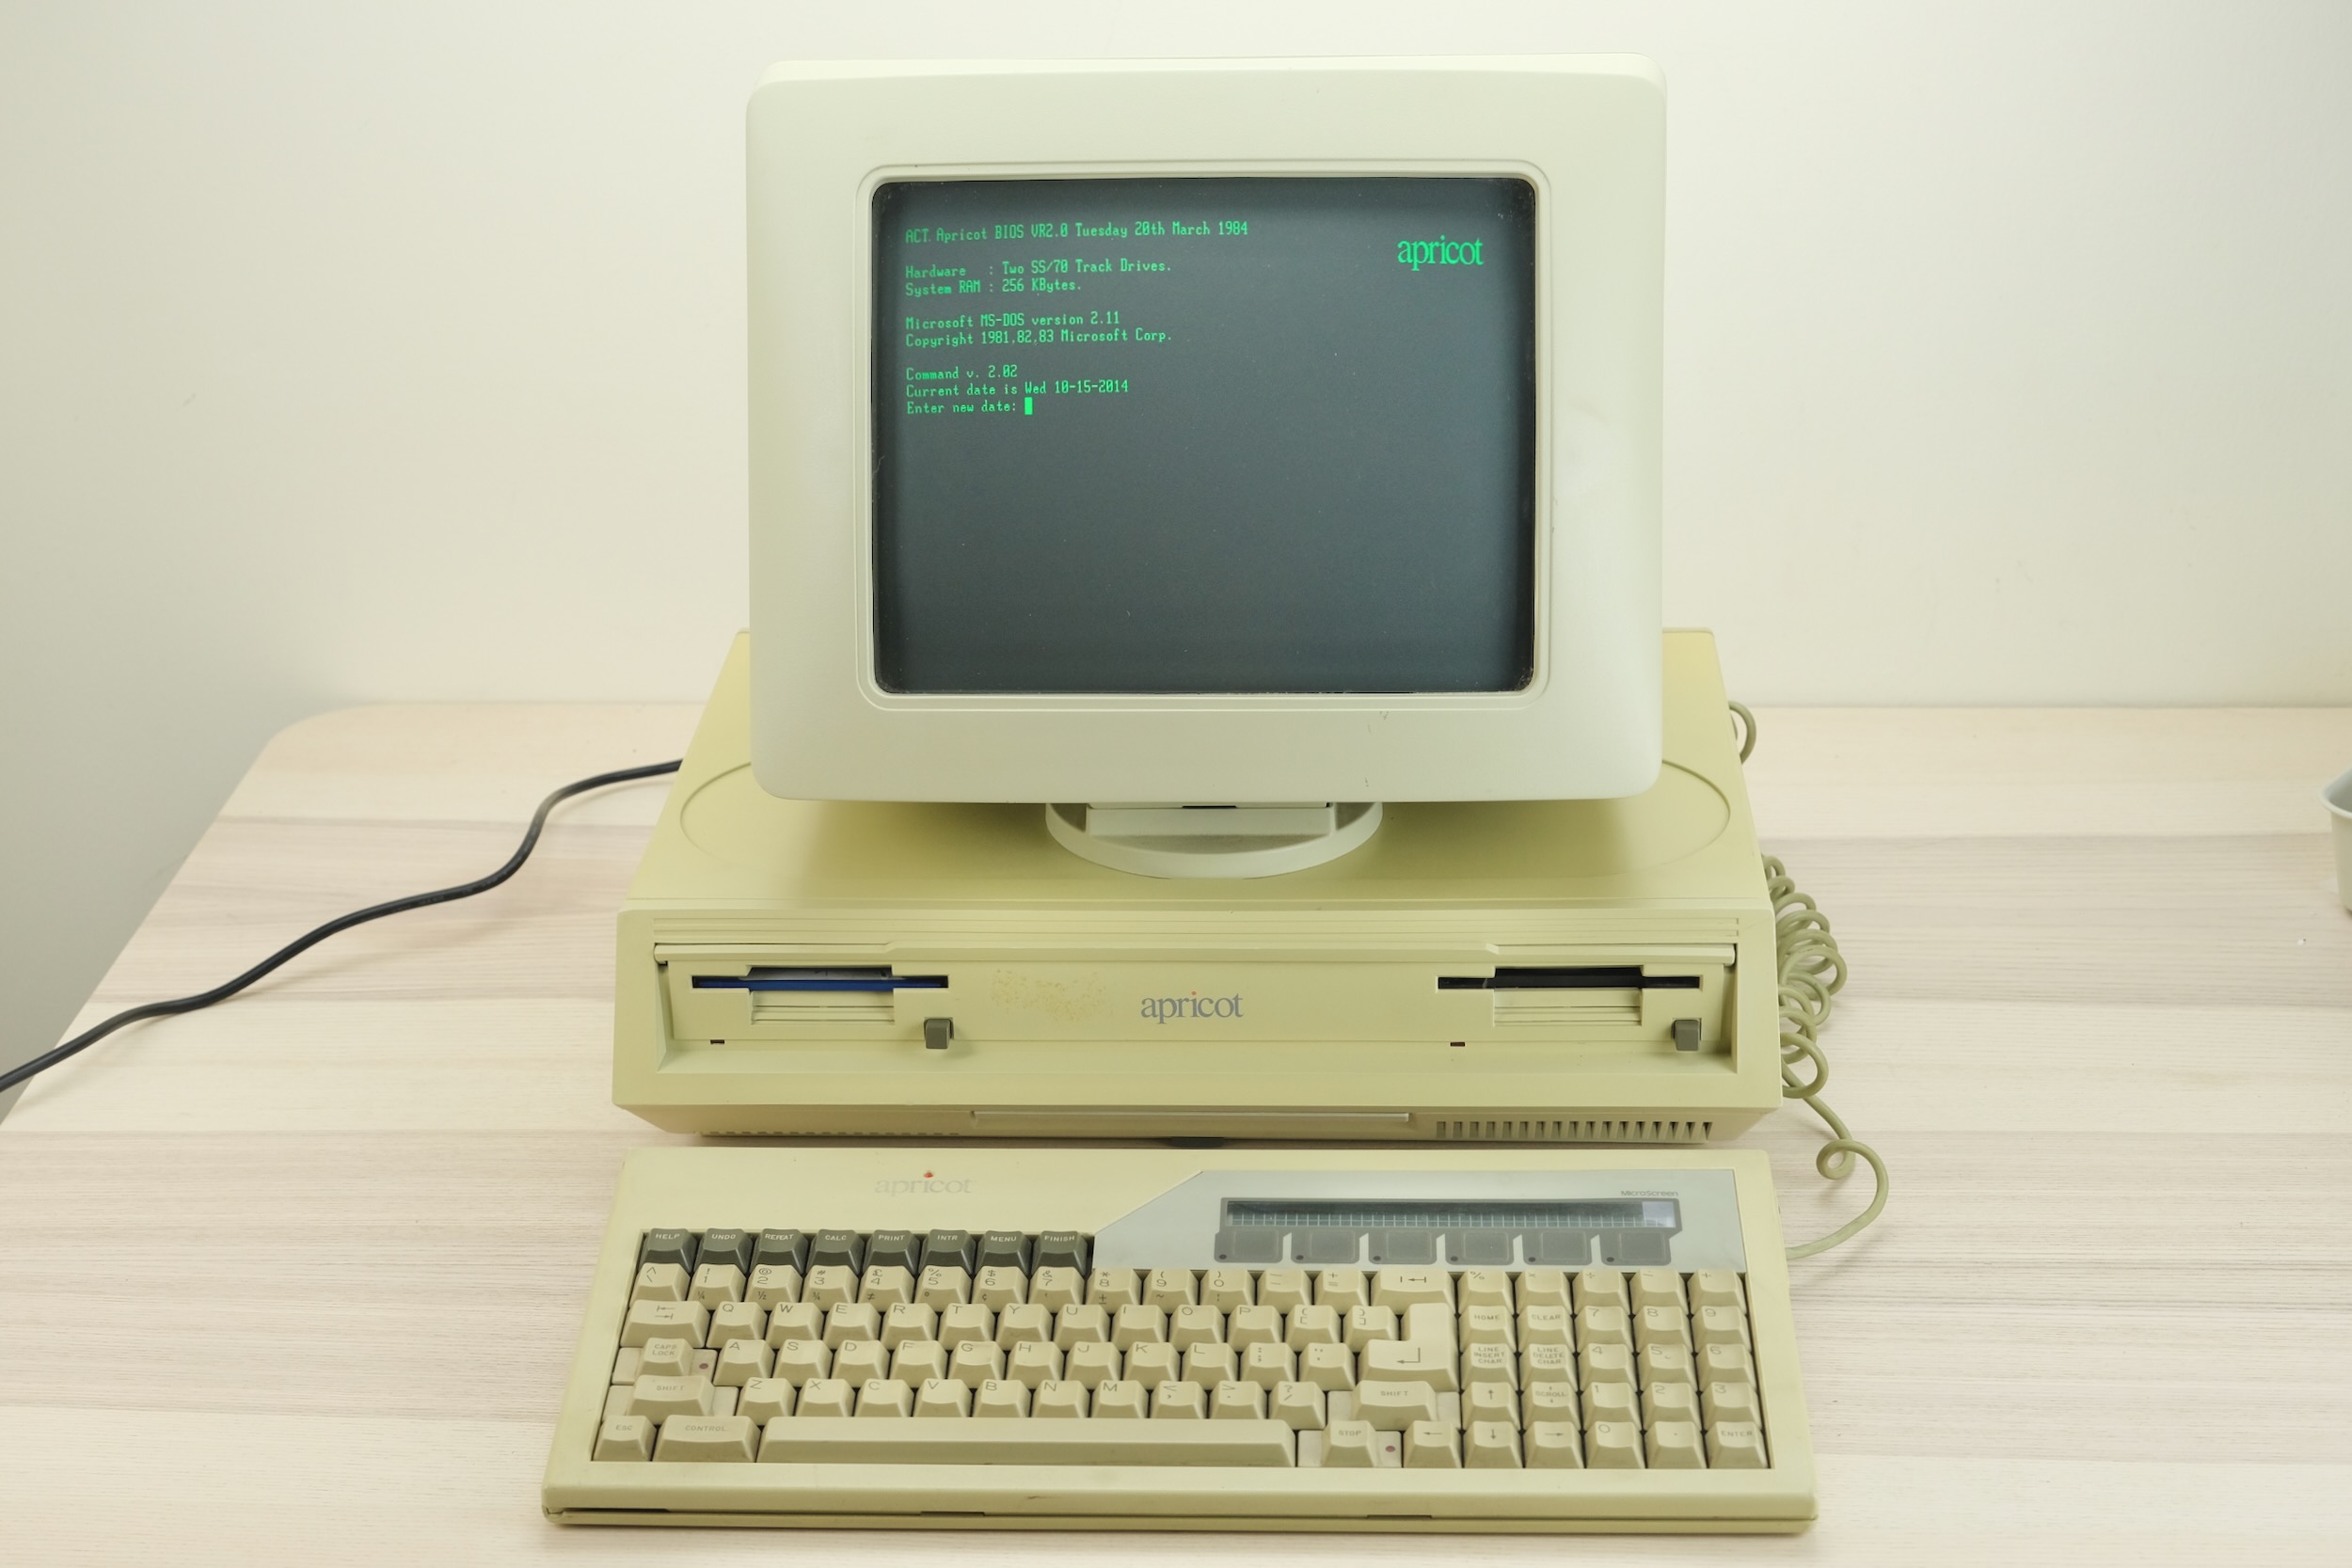
I’m using a new-to-me and untested Apricot PC for this guide, excuse the dust!
-
Rest the PC on a soft towel.
-
Remove the 3 screws from the back cover.

-
Remove the top cover.
-
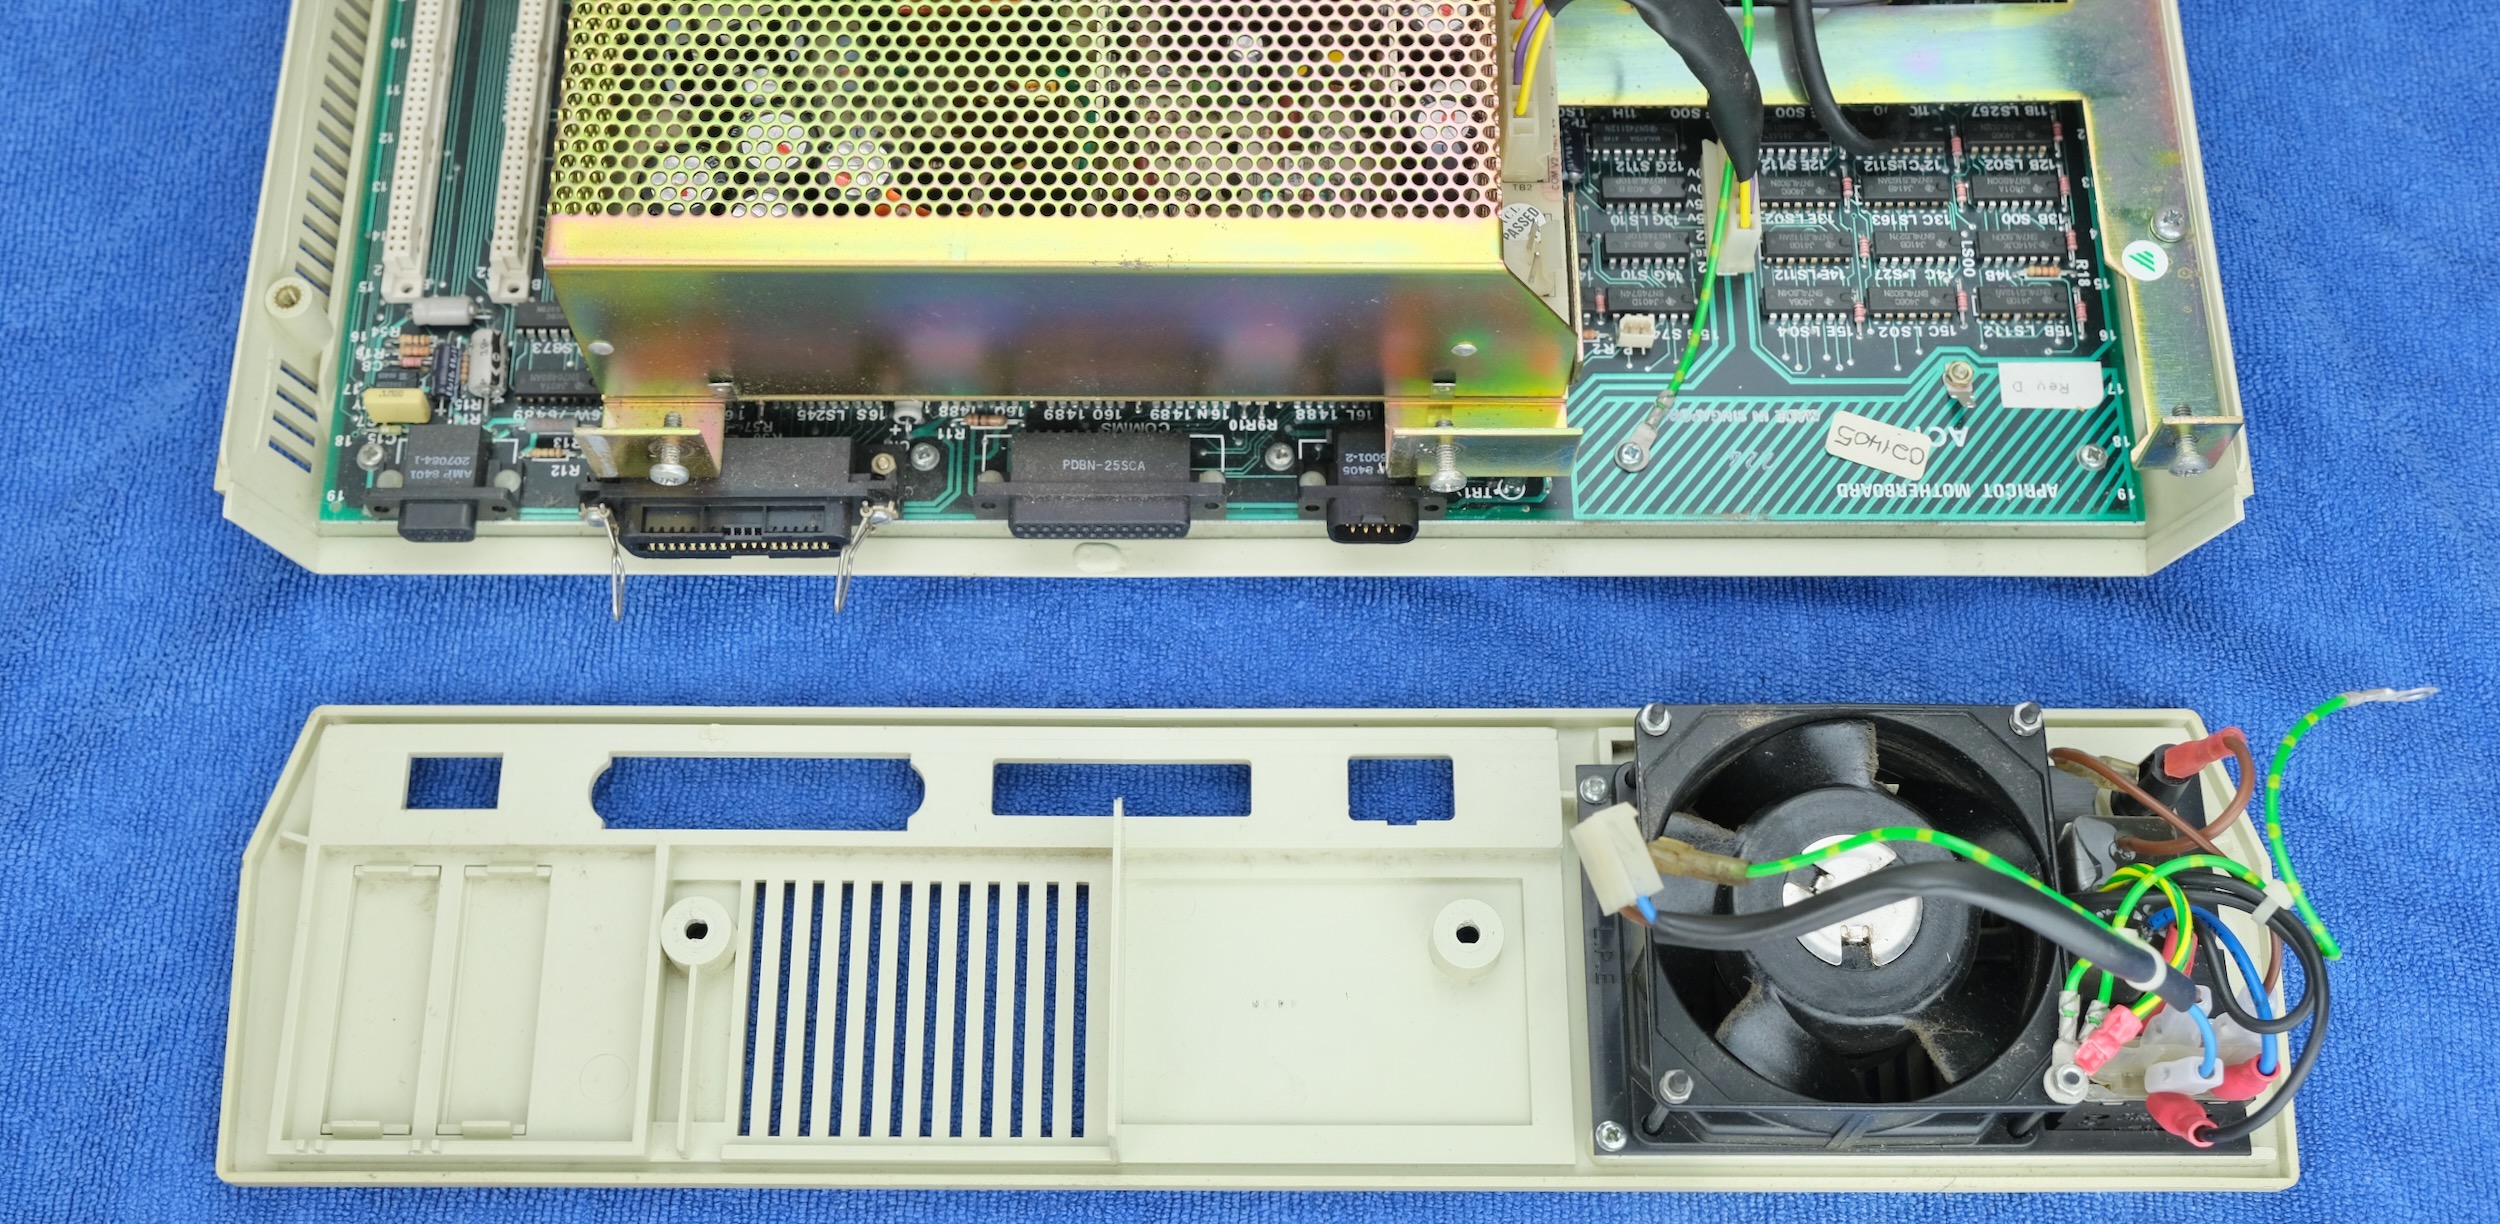
Unplug / remove the connectors and grounding lugs shown below.

- Separate the back assembly and put aside.
-
Unplug the power and data cable of floppy/hard drives.
-
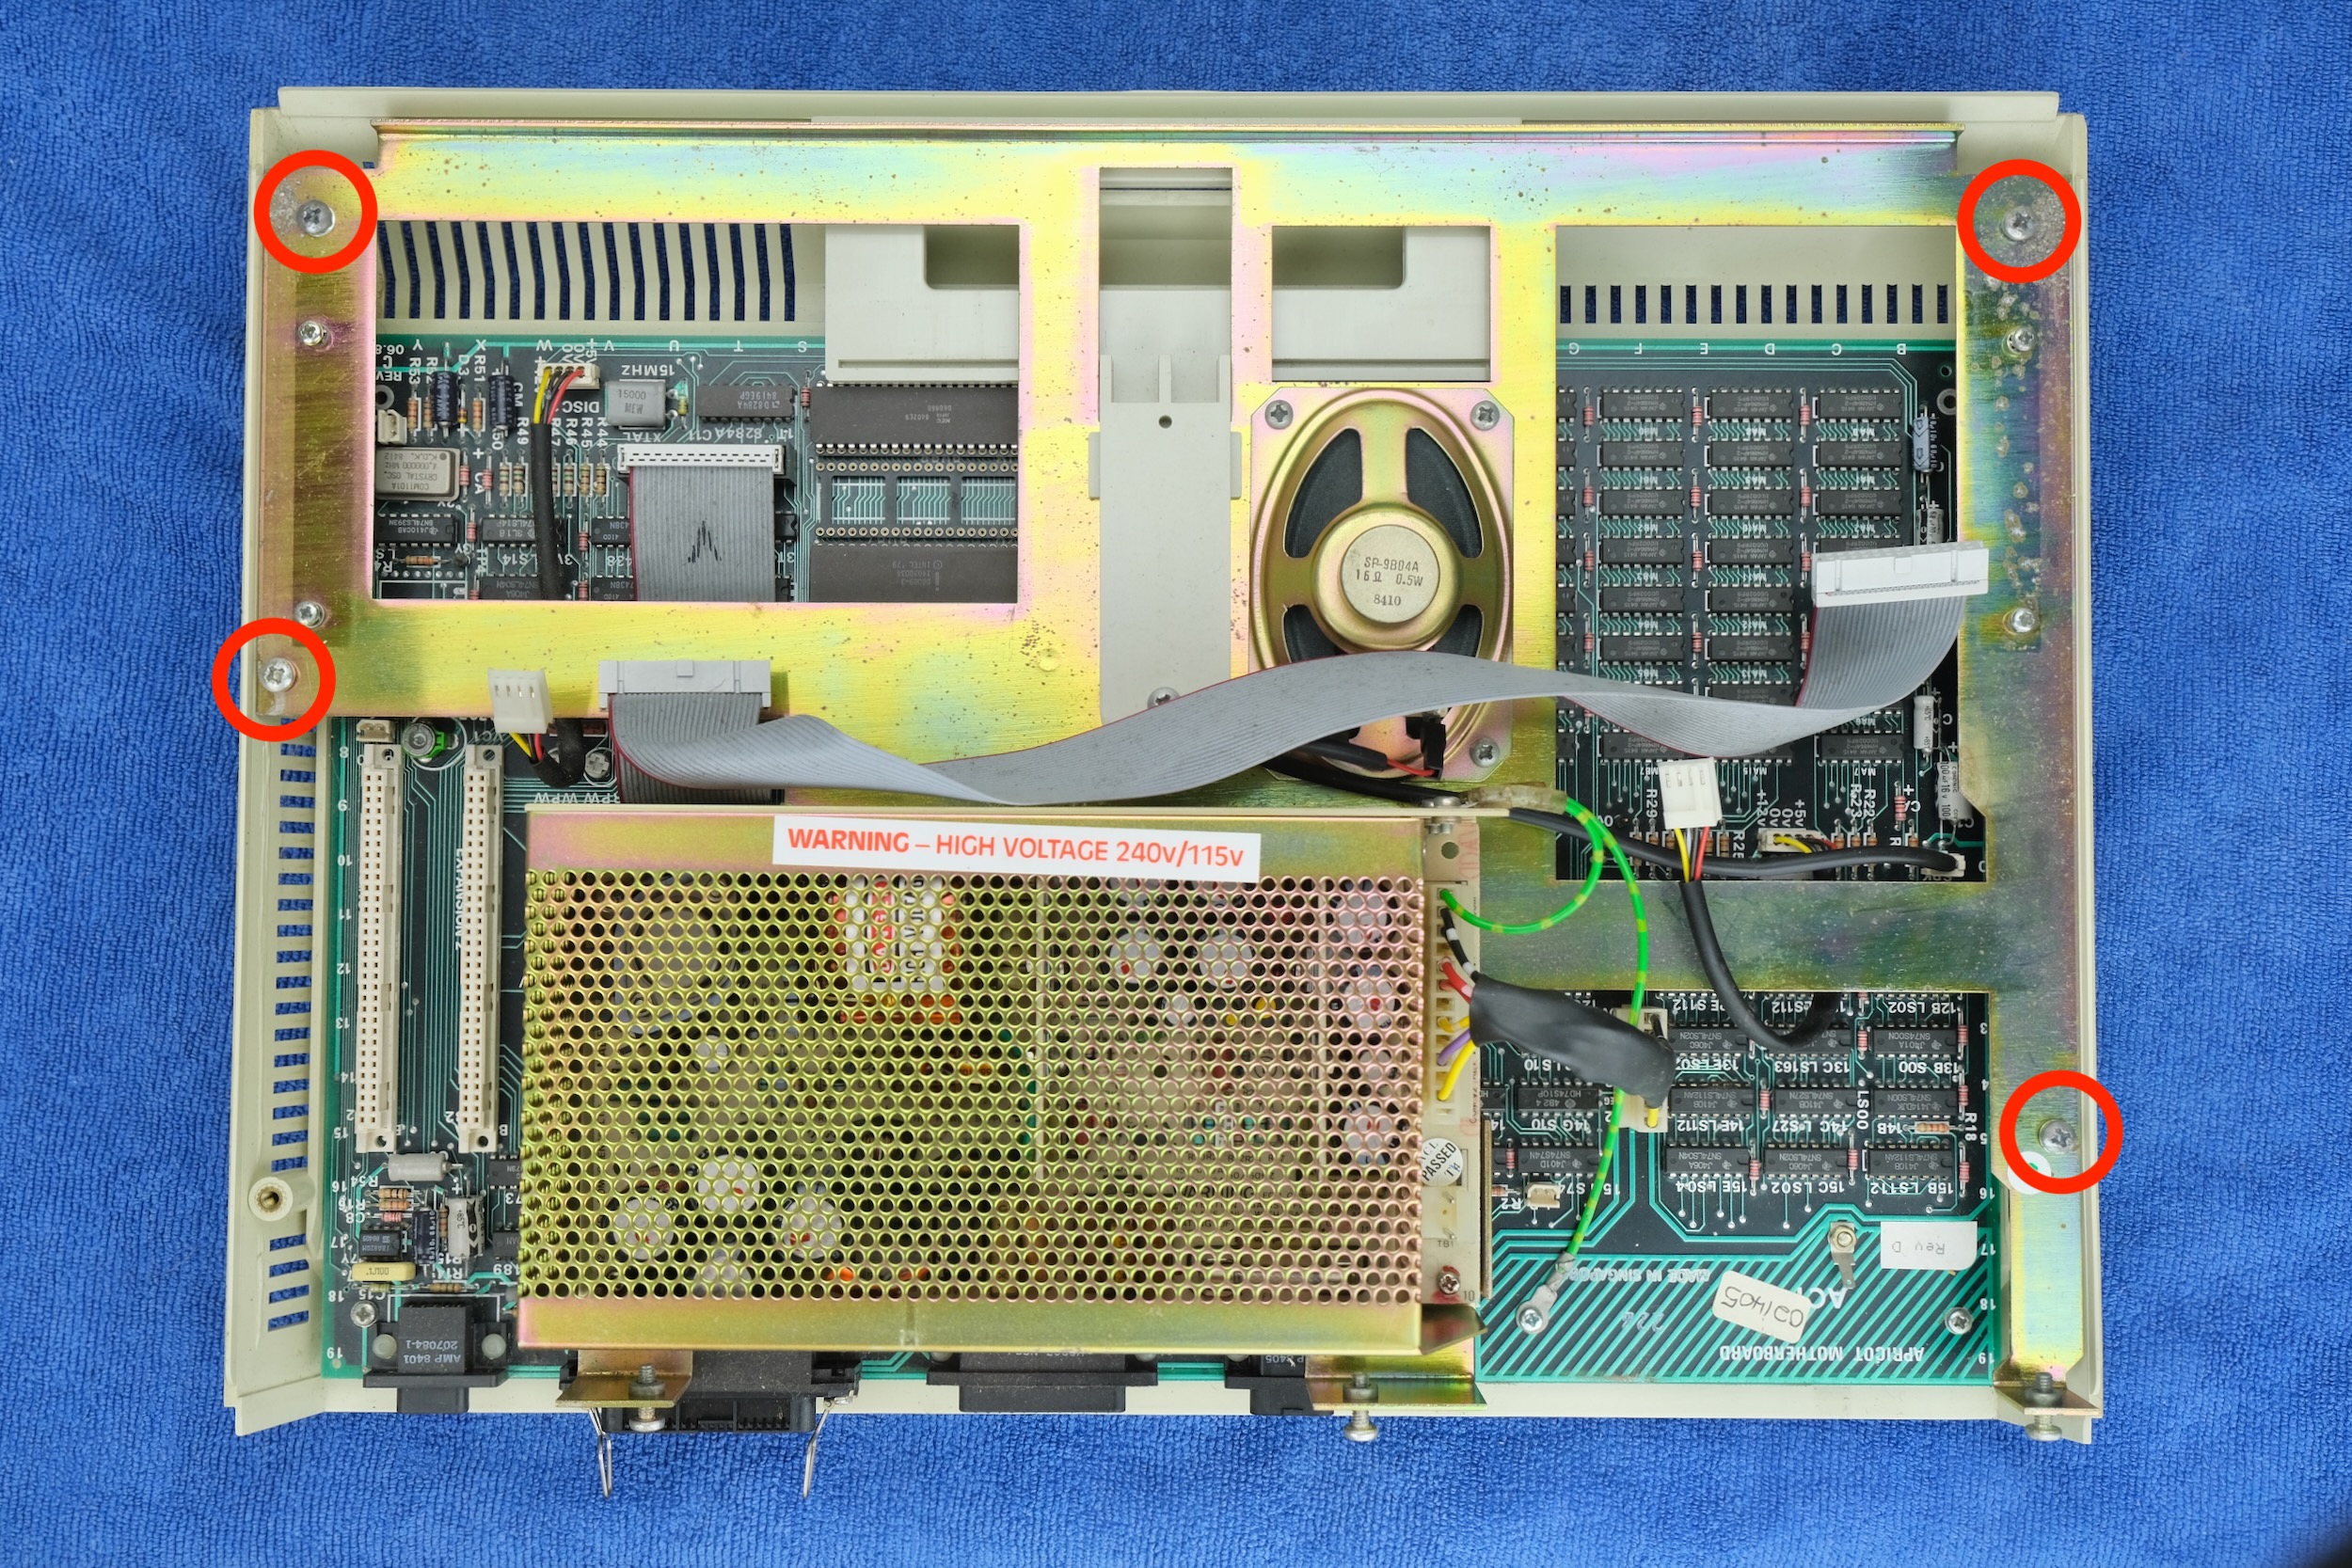
Remove the 4 screws shown

-
Now you can lift off the “bridge” assembly containing the drives. Put it aside.
-
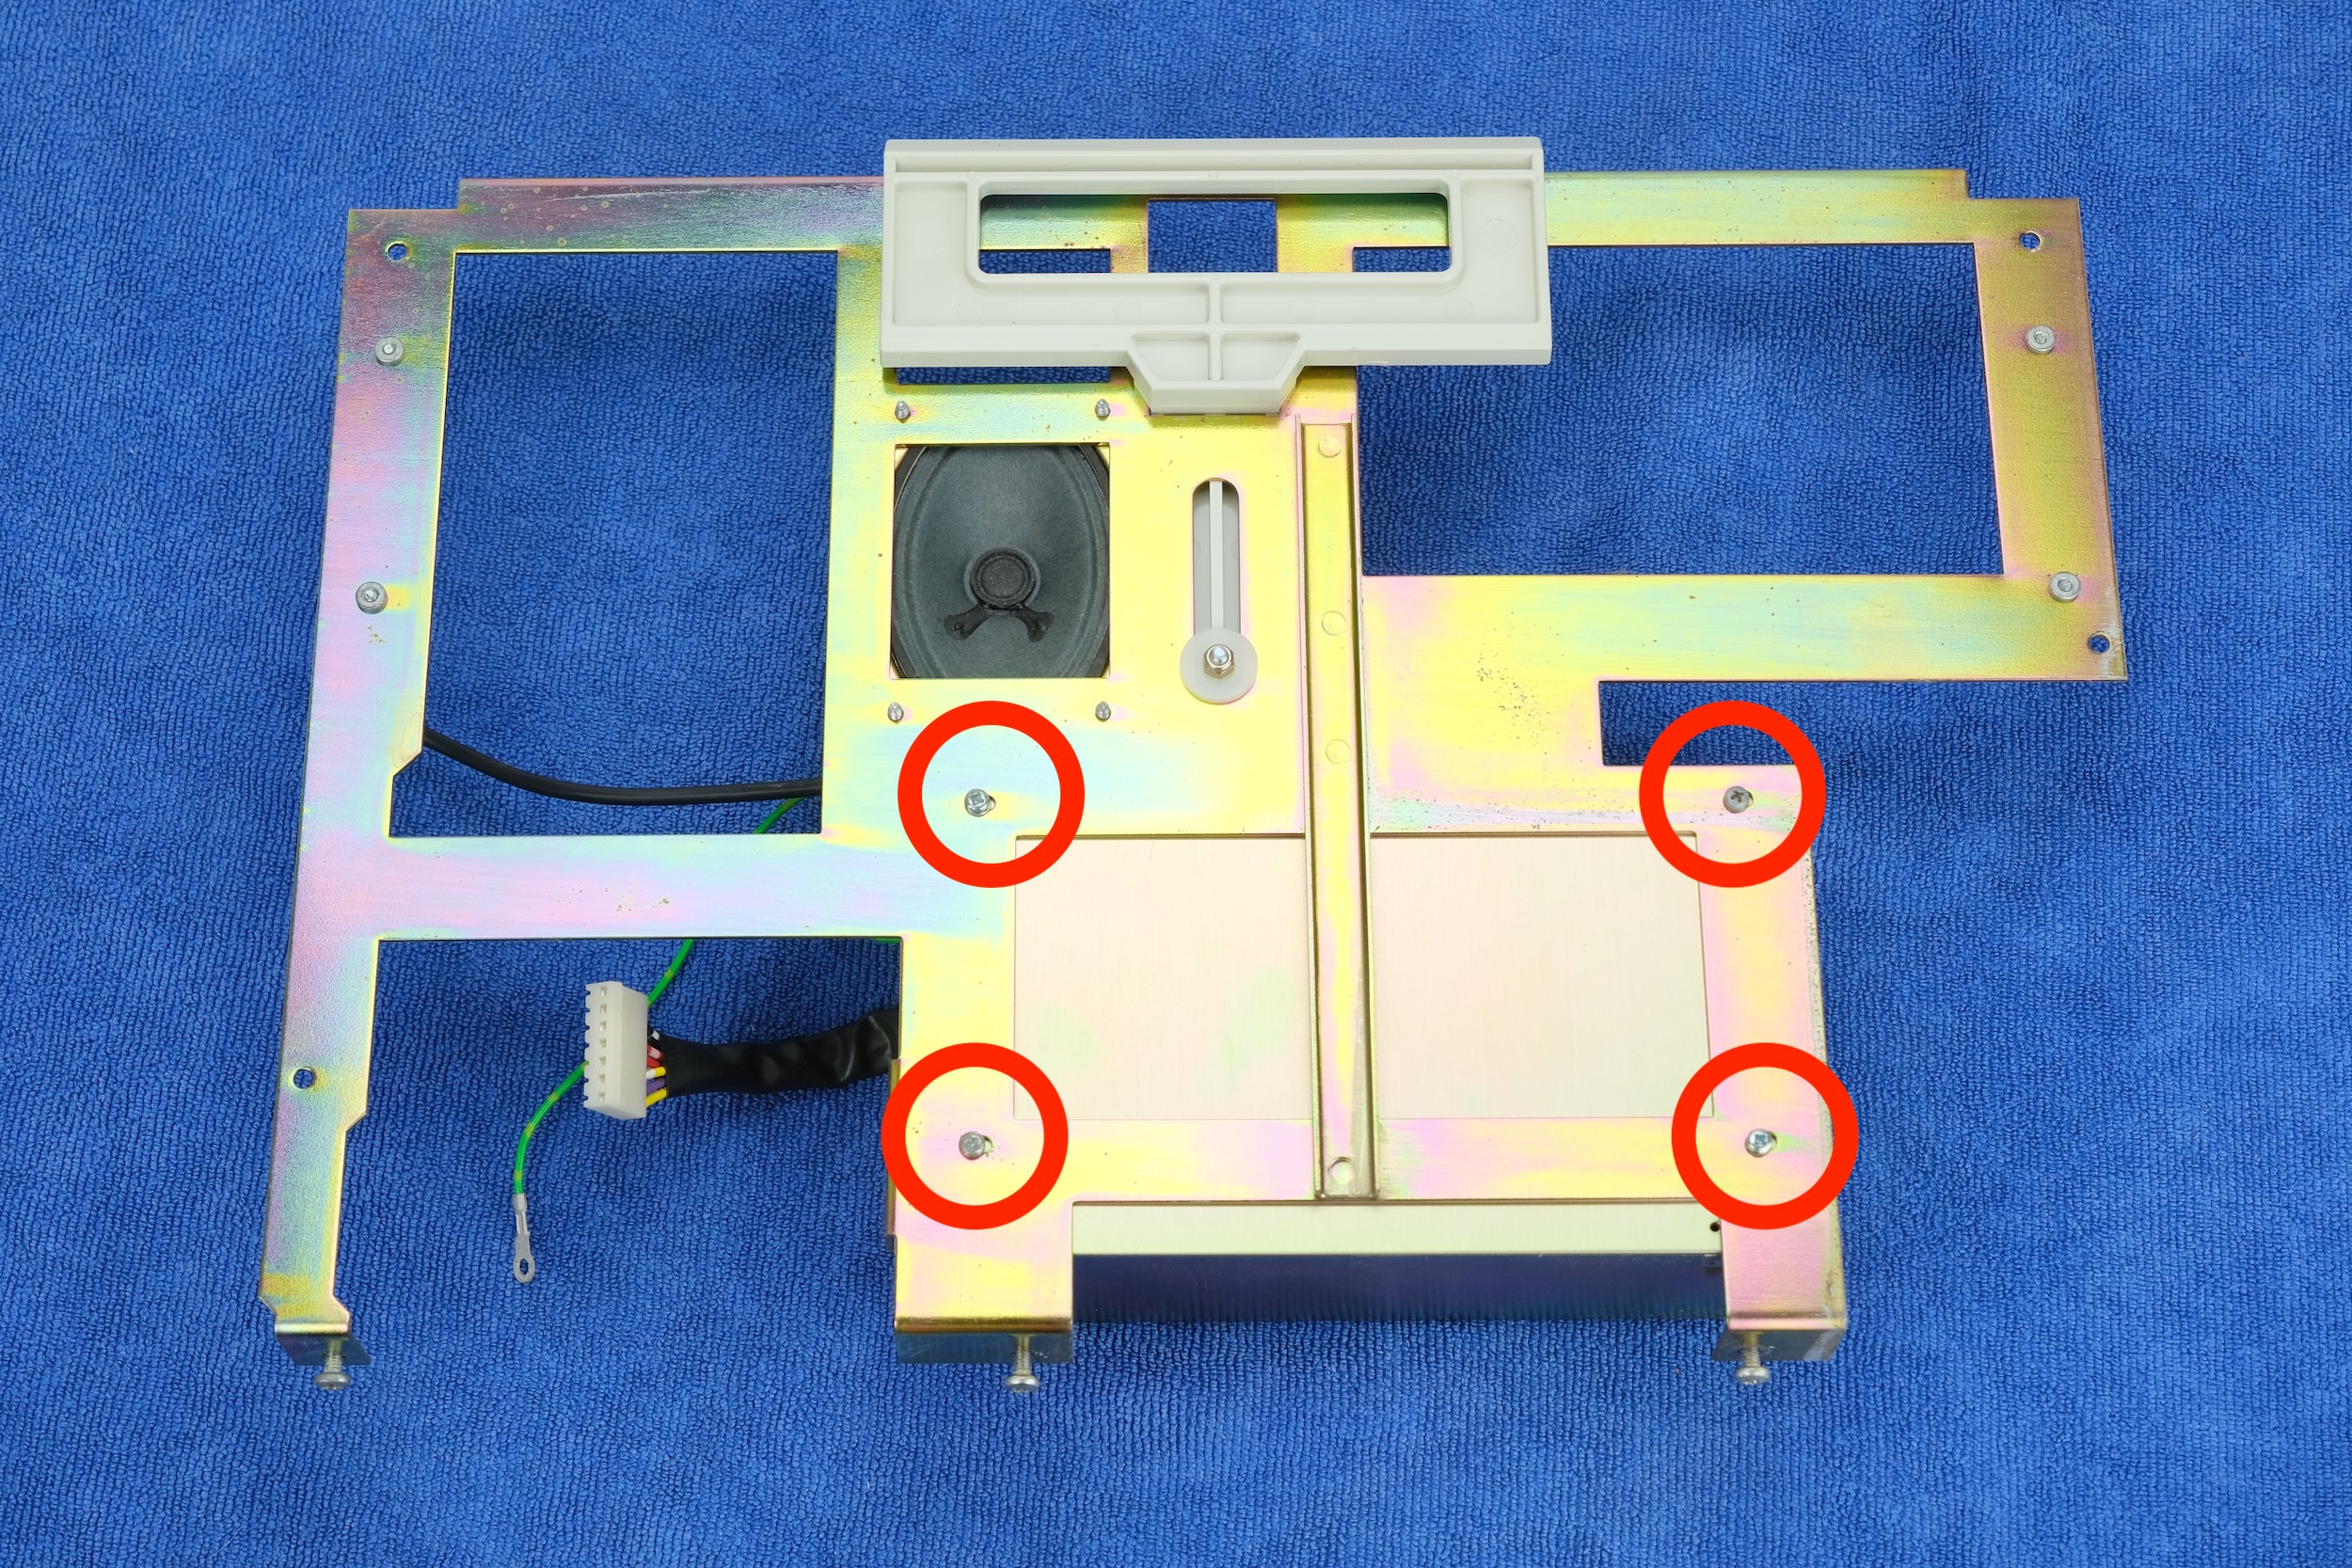
Remove the 4 screws shown.
-
Unplug motherboard power cable
-
Unplug speaker cable
-
Slide the metal plate backwards to remove it.
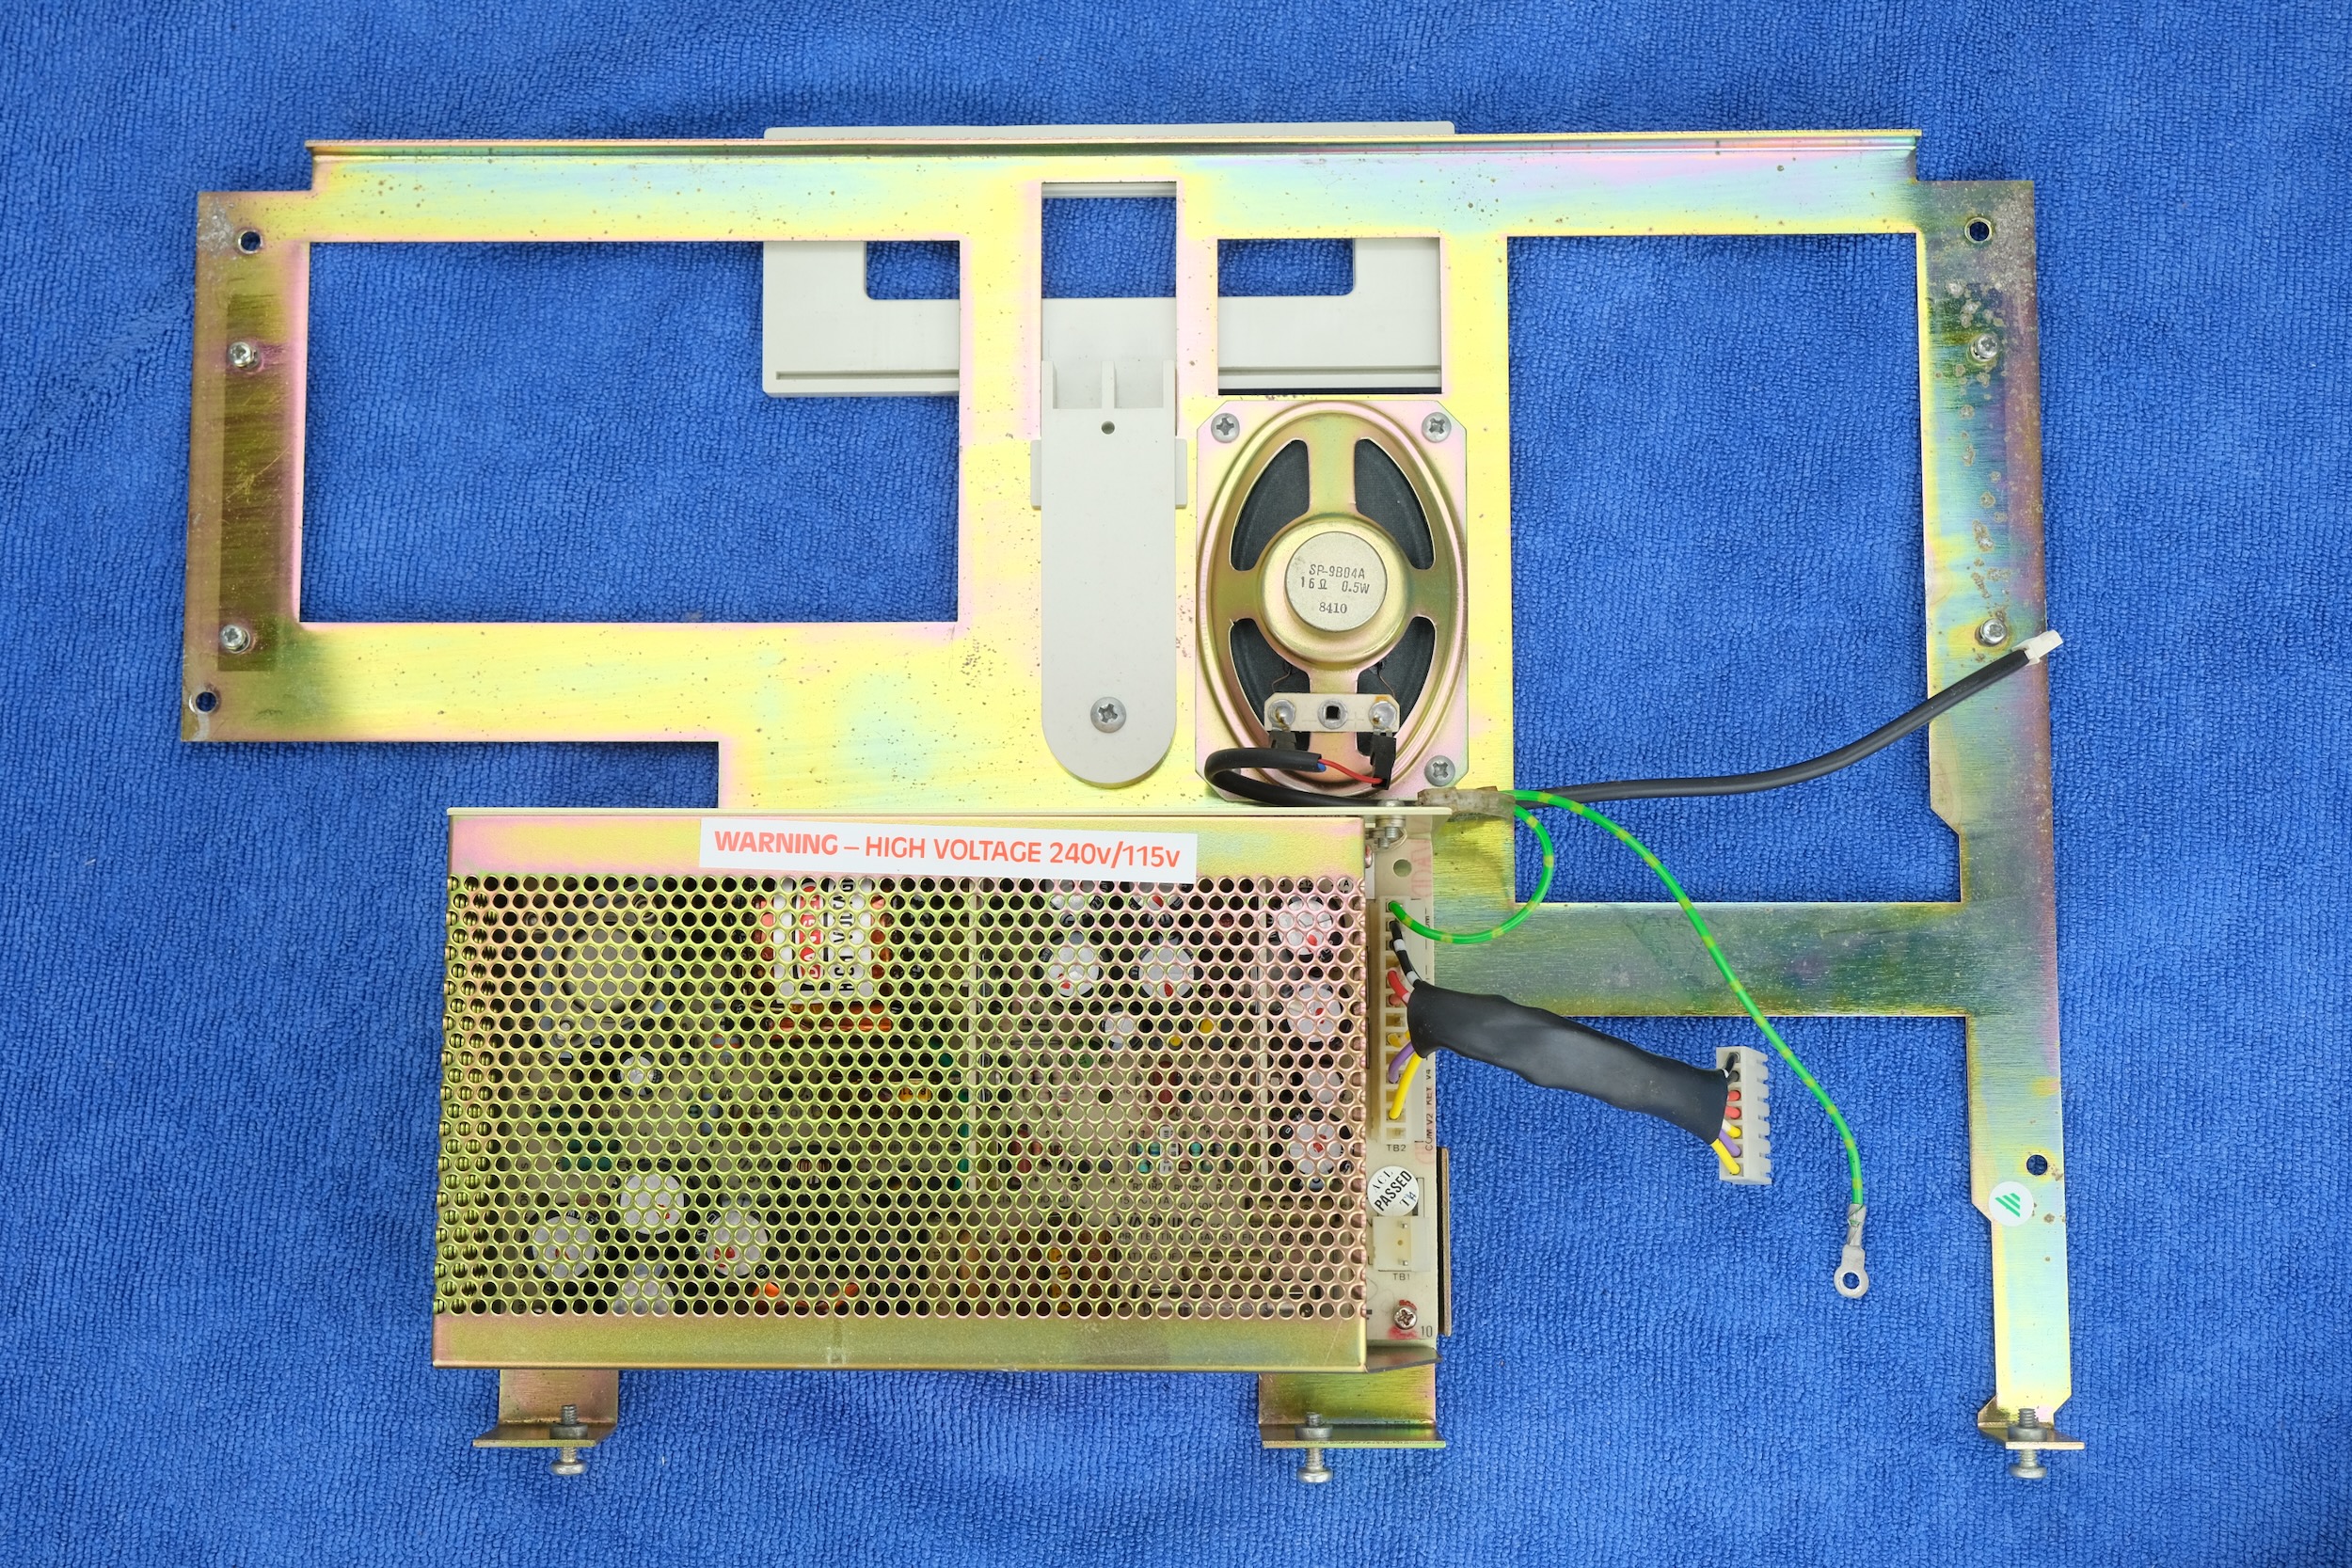
-
Flip it over, remove the four screws to release the old PSU.
-
Put the screws back on the PSU casing, put it aside. Don’t throw it away!
-
Flip back again.
-
Insert two screws from the bottom, then the washers, then the standoffs from top.
-
Use 5mm socket bit to tighten.
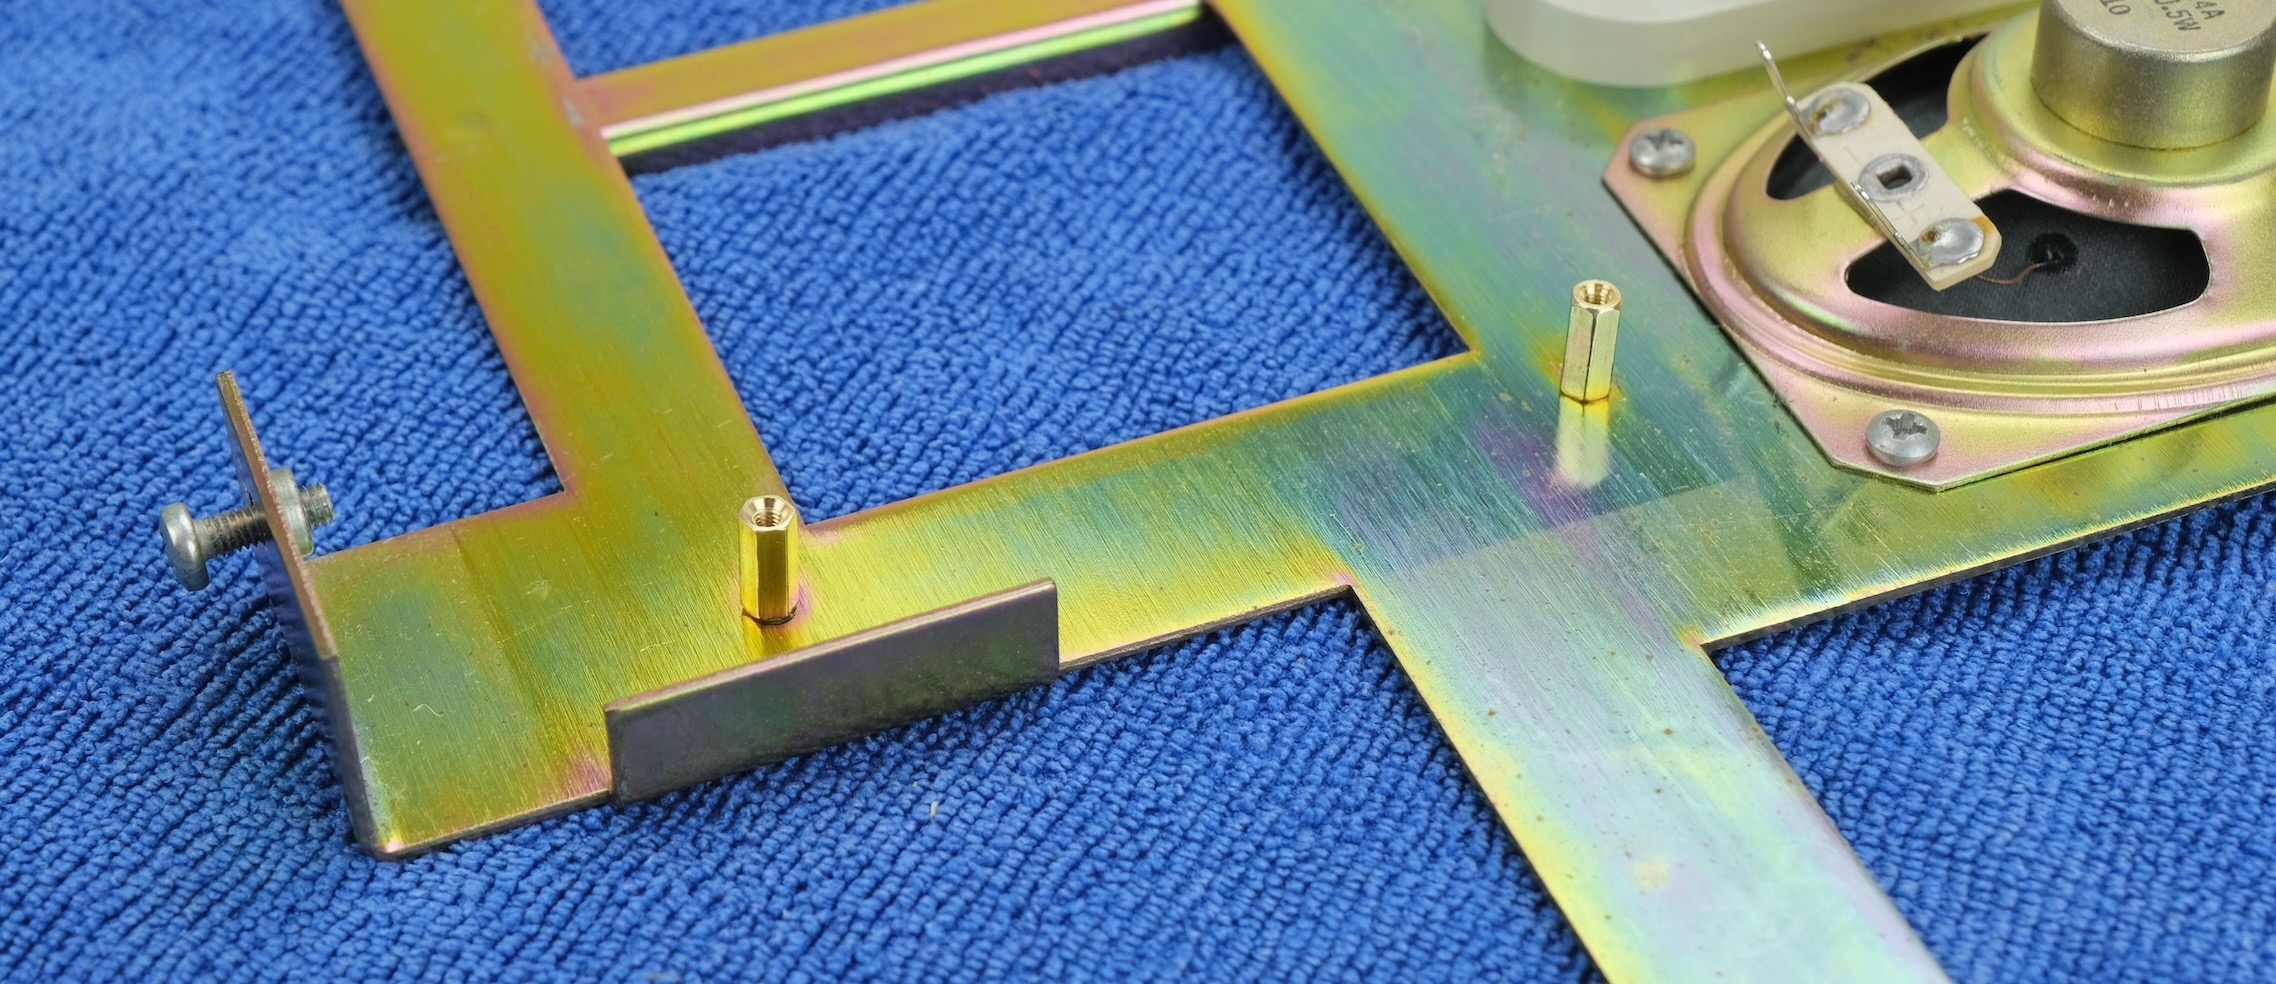
- Install the adaptor, secure with two more screws.
-
Halfway there!
-
Now reassemble the metal plate, then the drive bridge, and the drive cables.
-
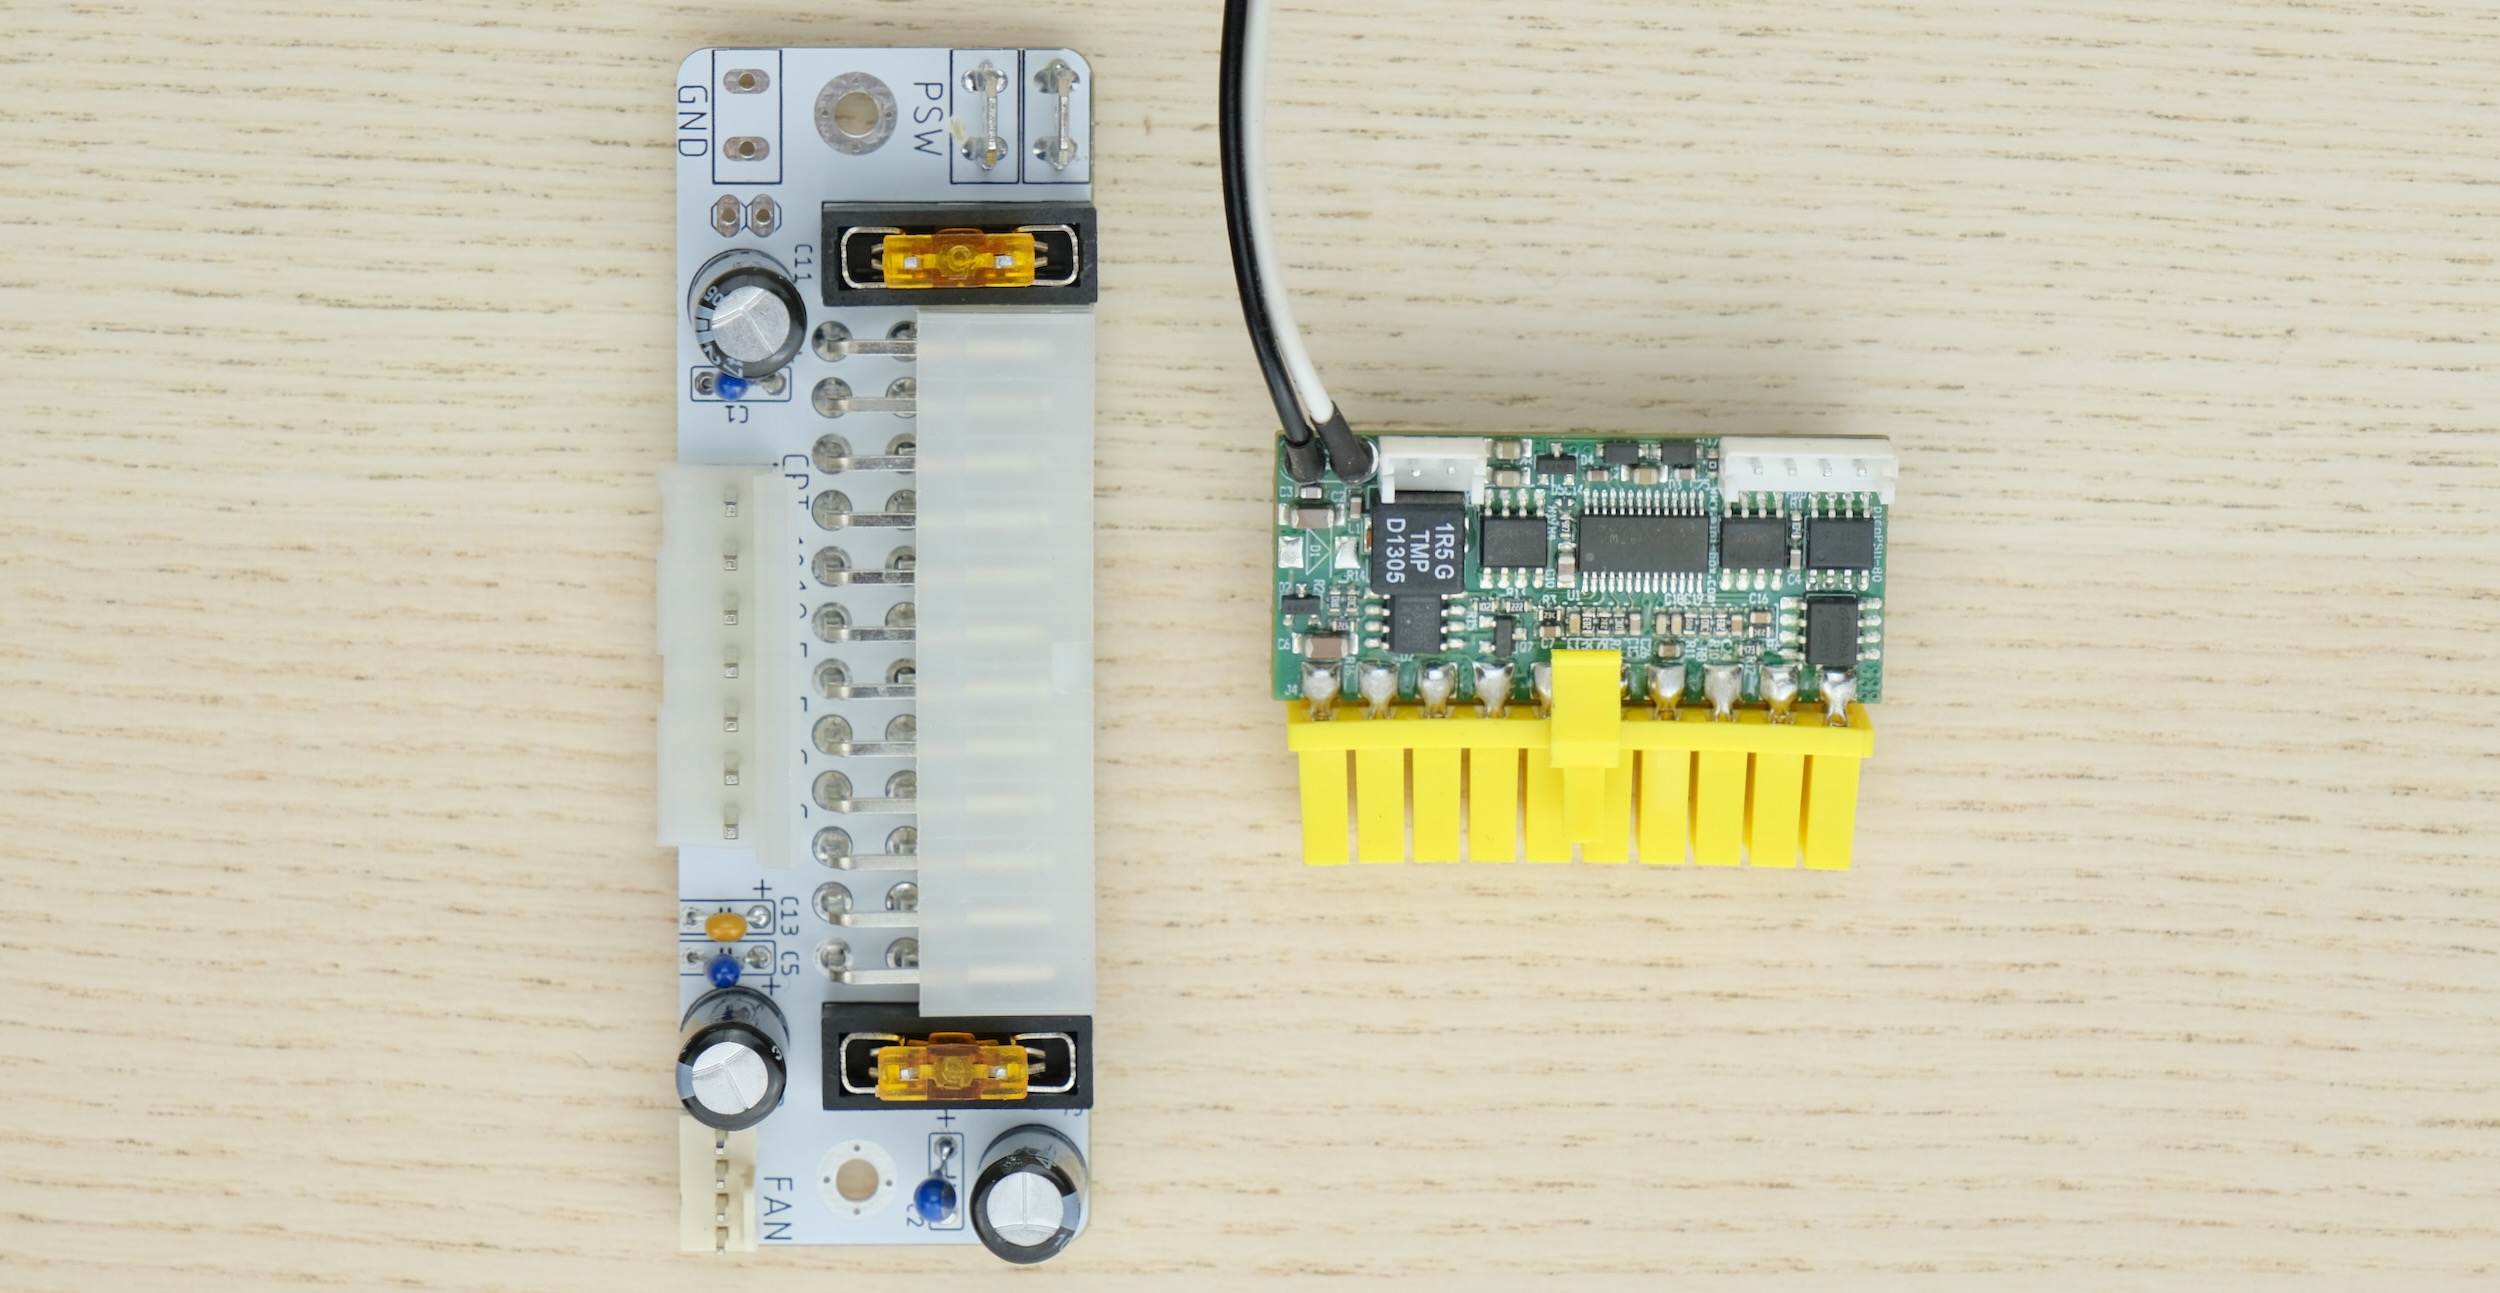
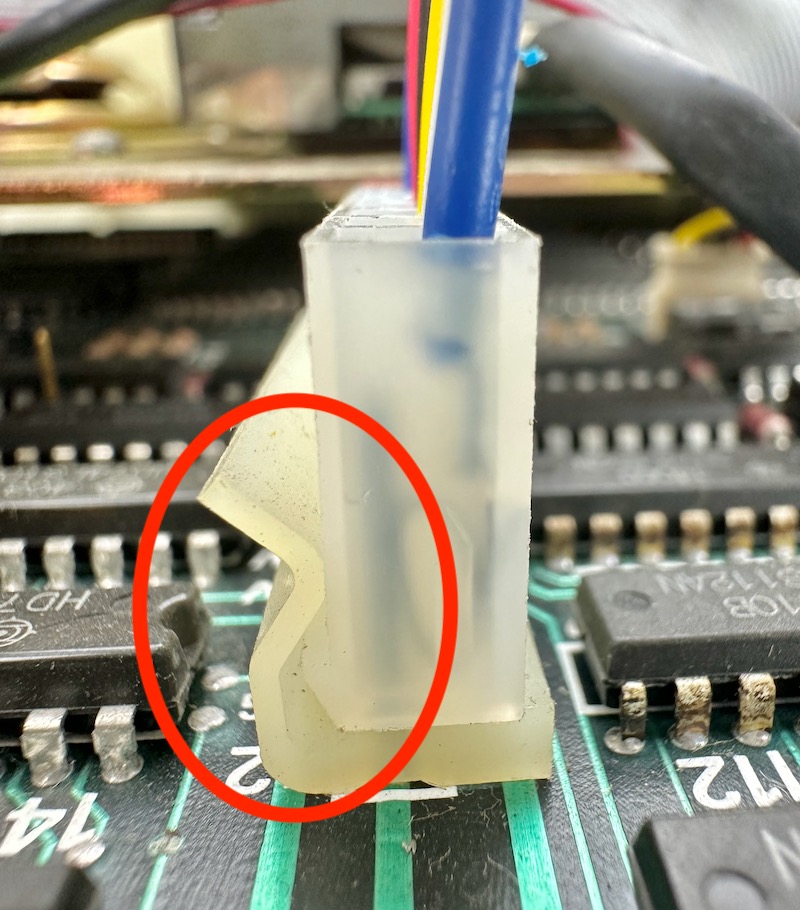
Also connect the new wire harness from the adaptor to motherboard.
- Make sure the notch on the wire harness meshes with the indent on the connector on both ends!
-
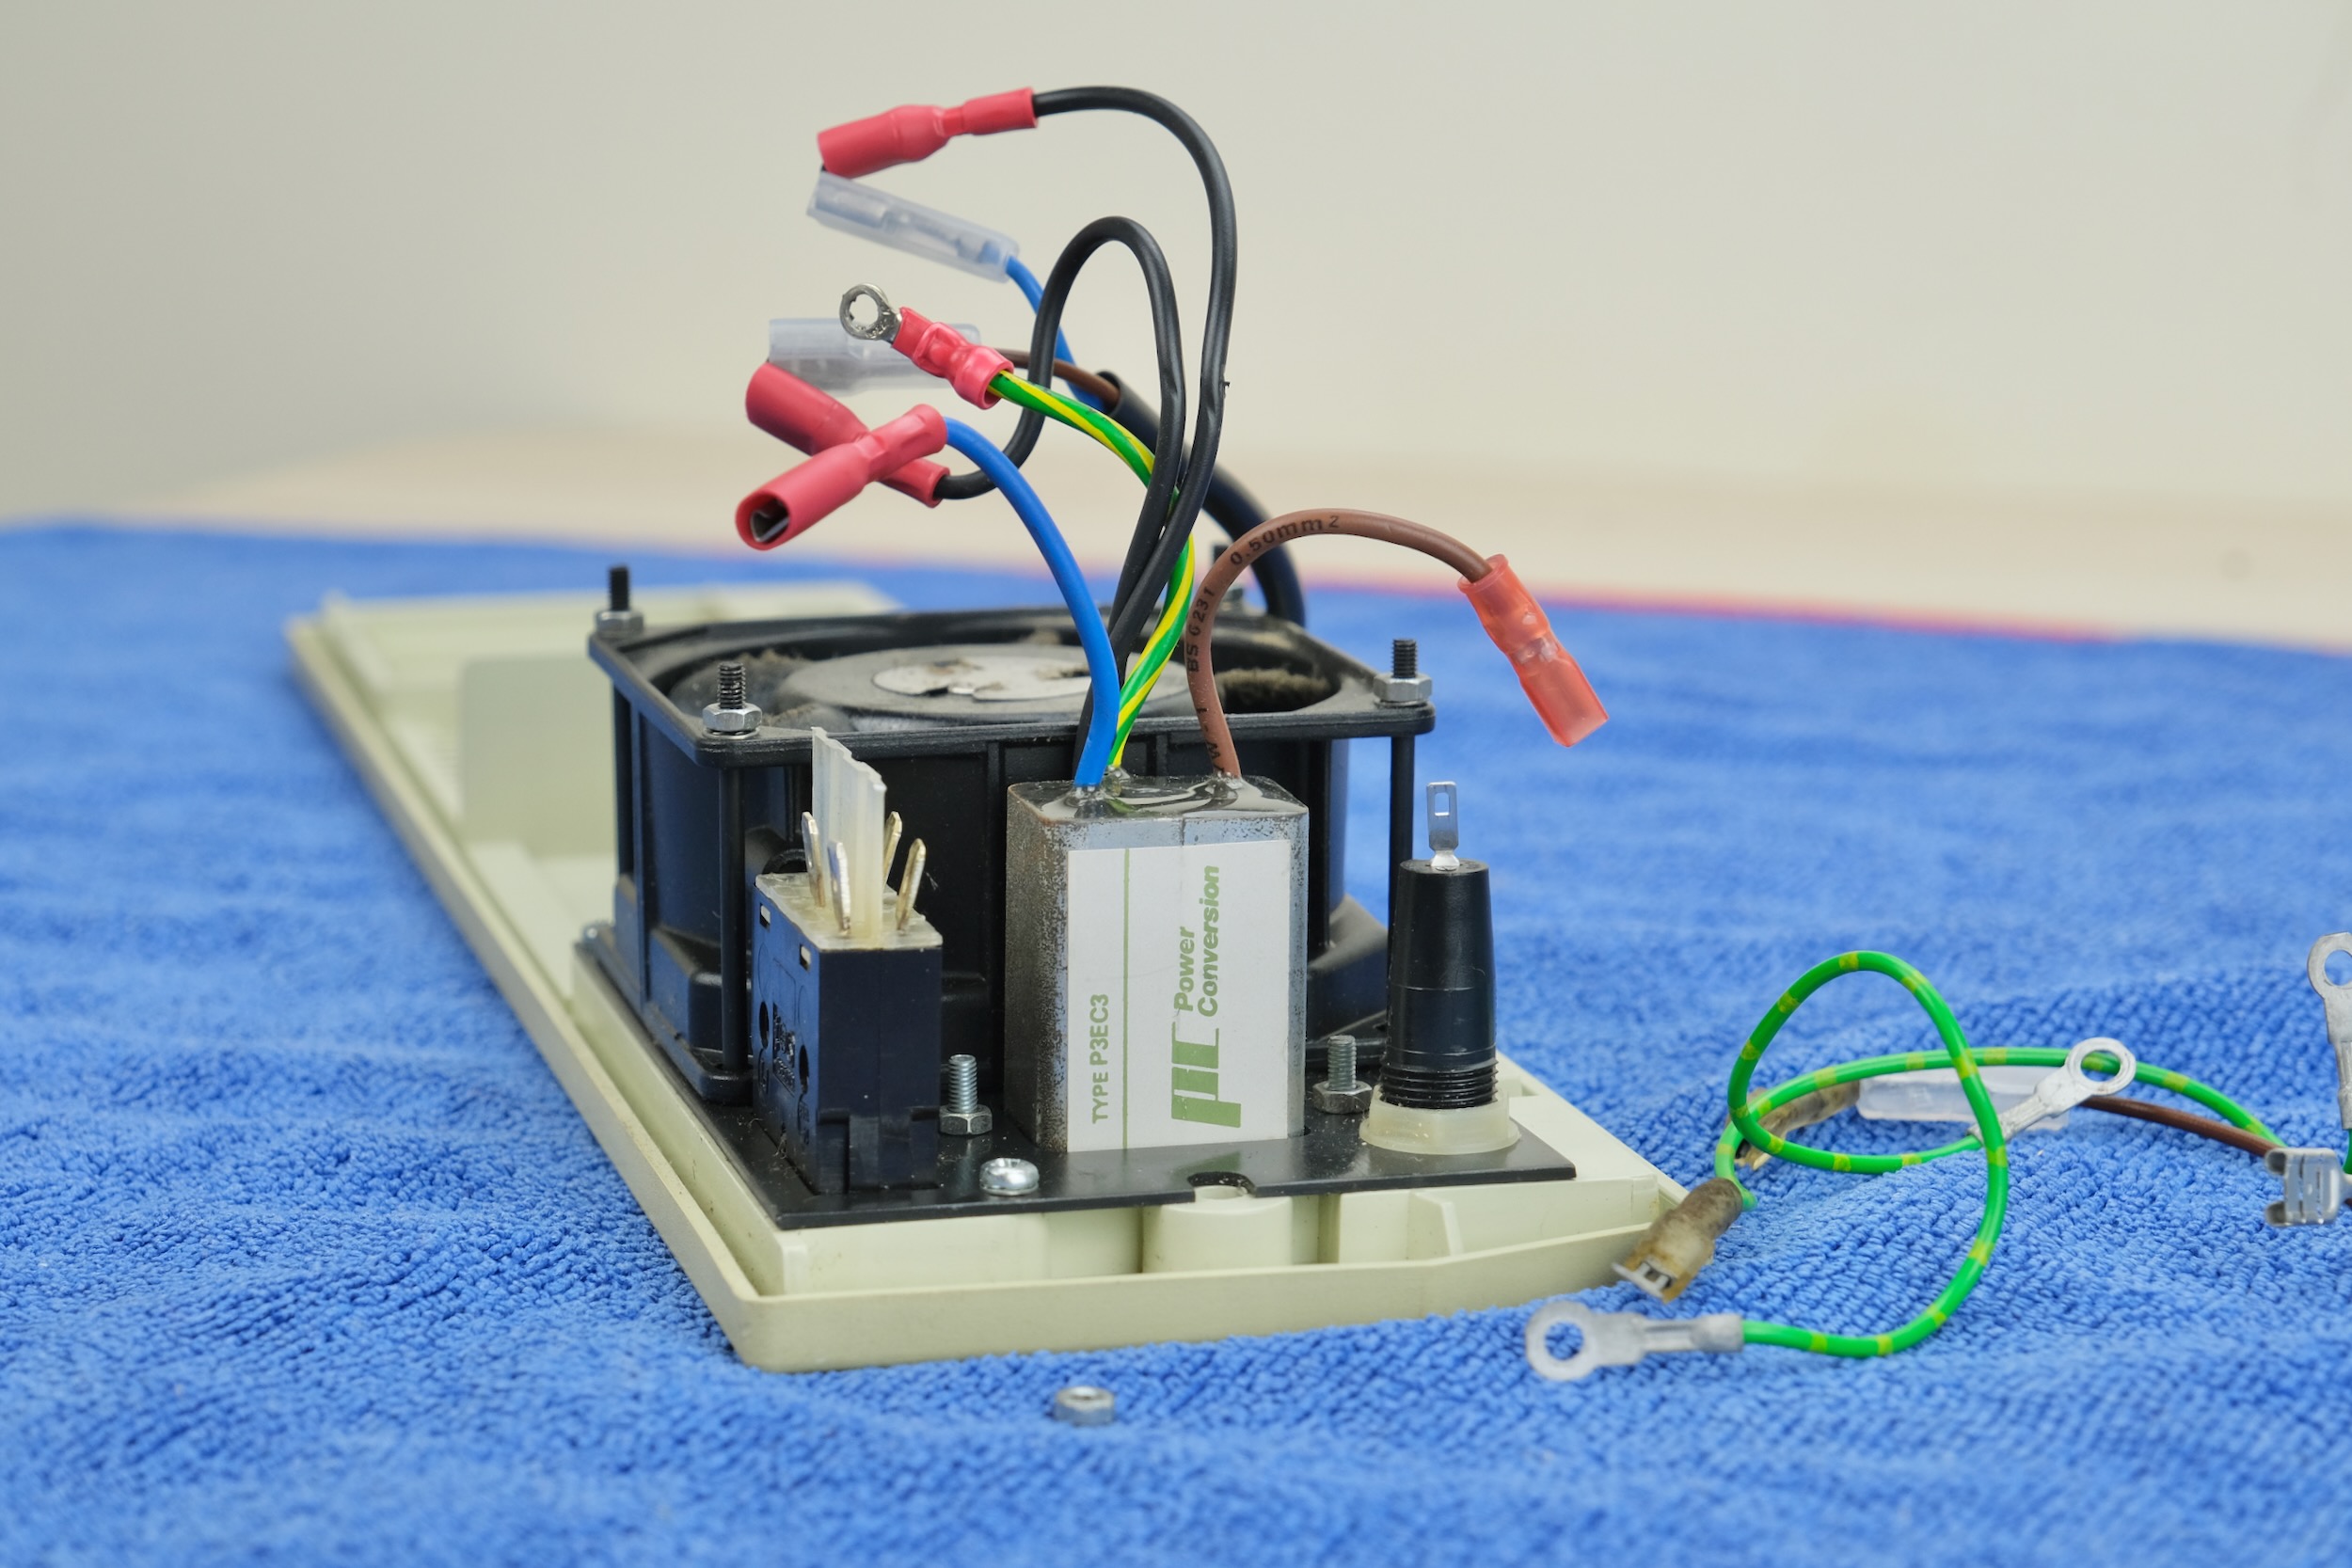
Bring out the back cover assembly.
-
Cut off the zipties, and unplug all the blade terminal connectors.
-
Don’t pull on the cable! Use a pair of pliers, grab the neck and pull.
-
Undo the nuts and bolts and remove the IEC socket
-
Also remove the fan
-
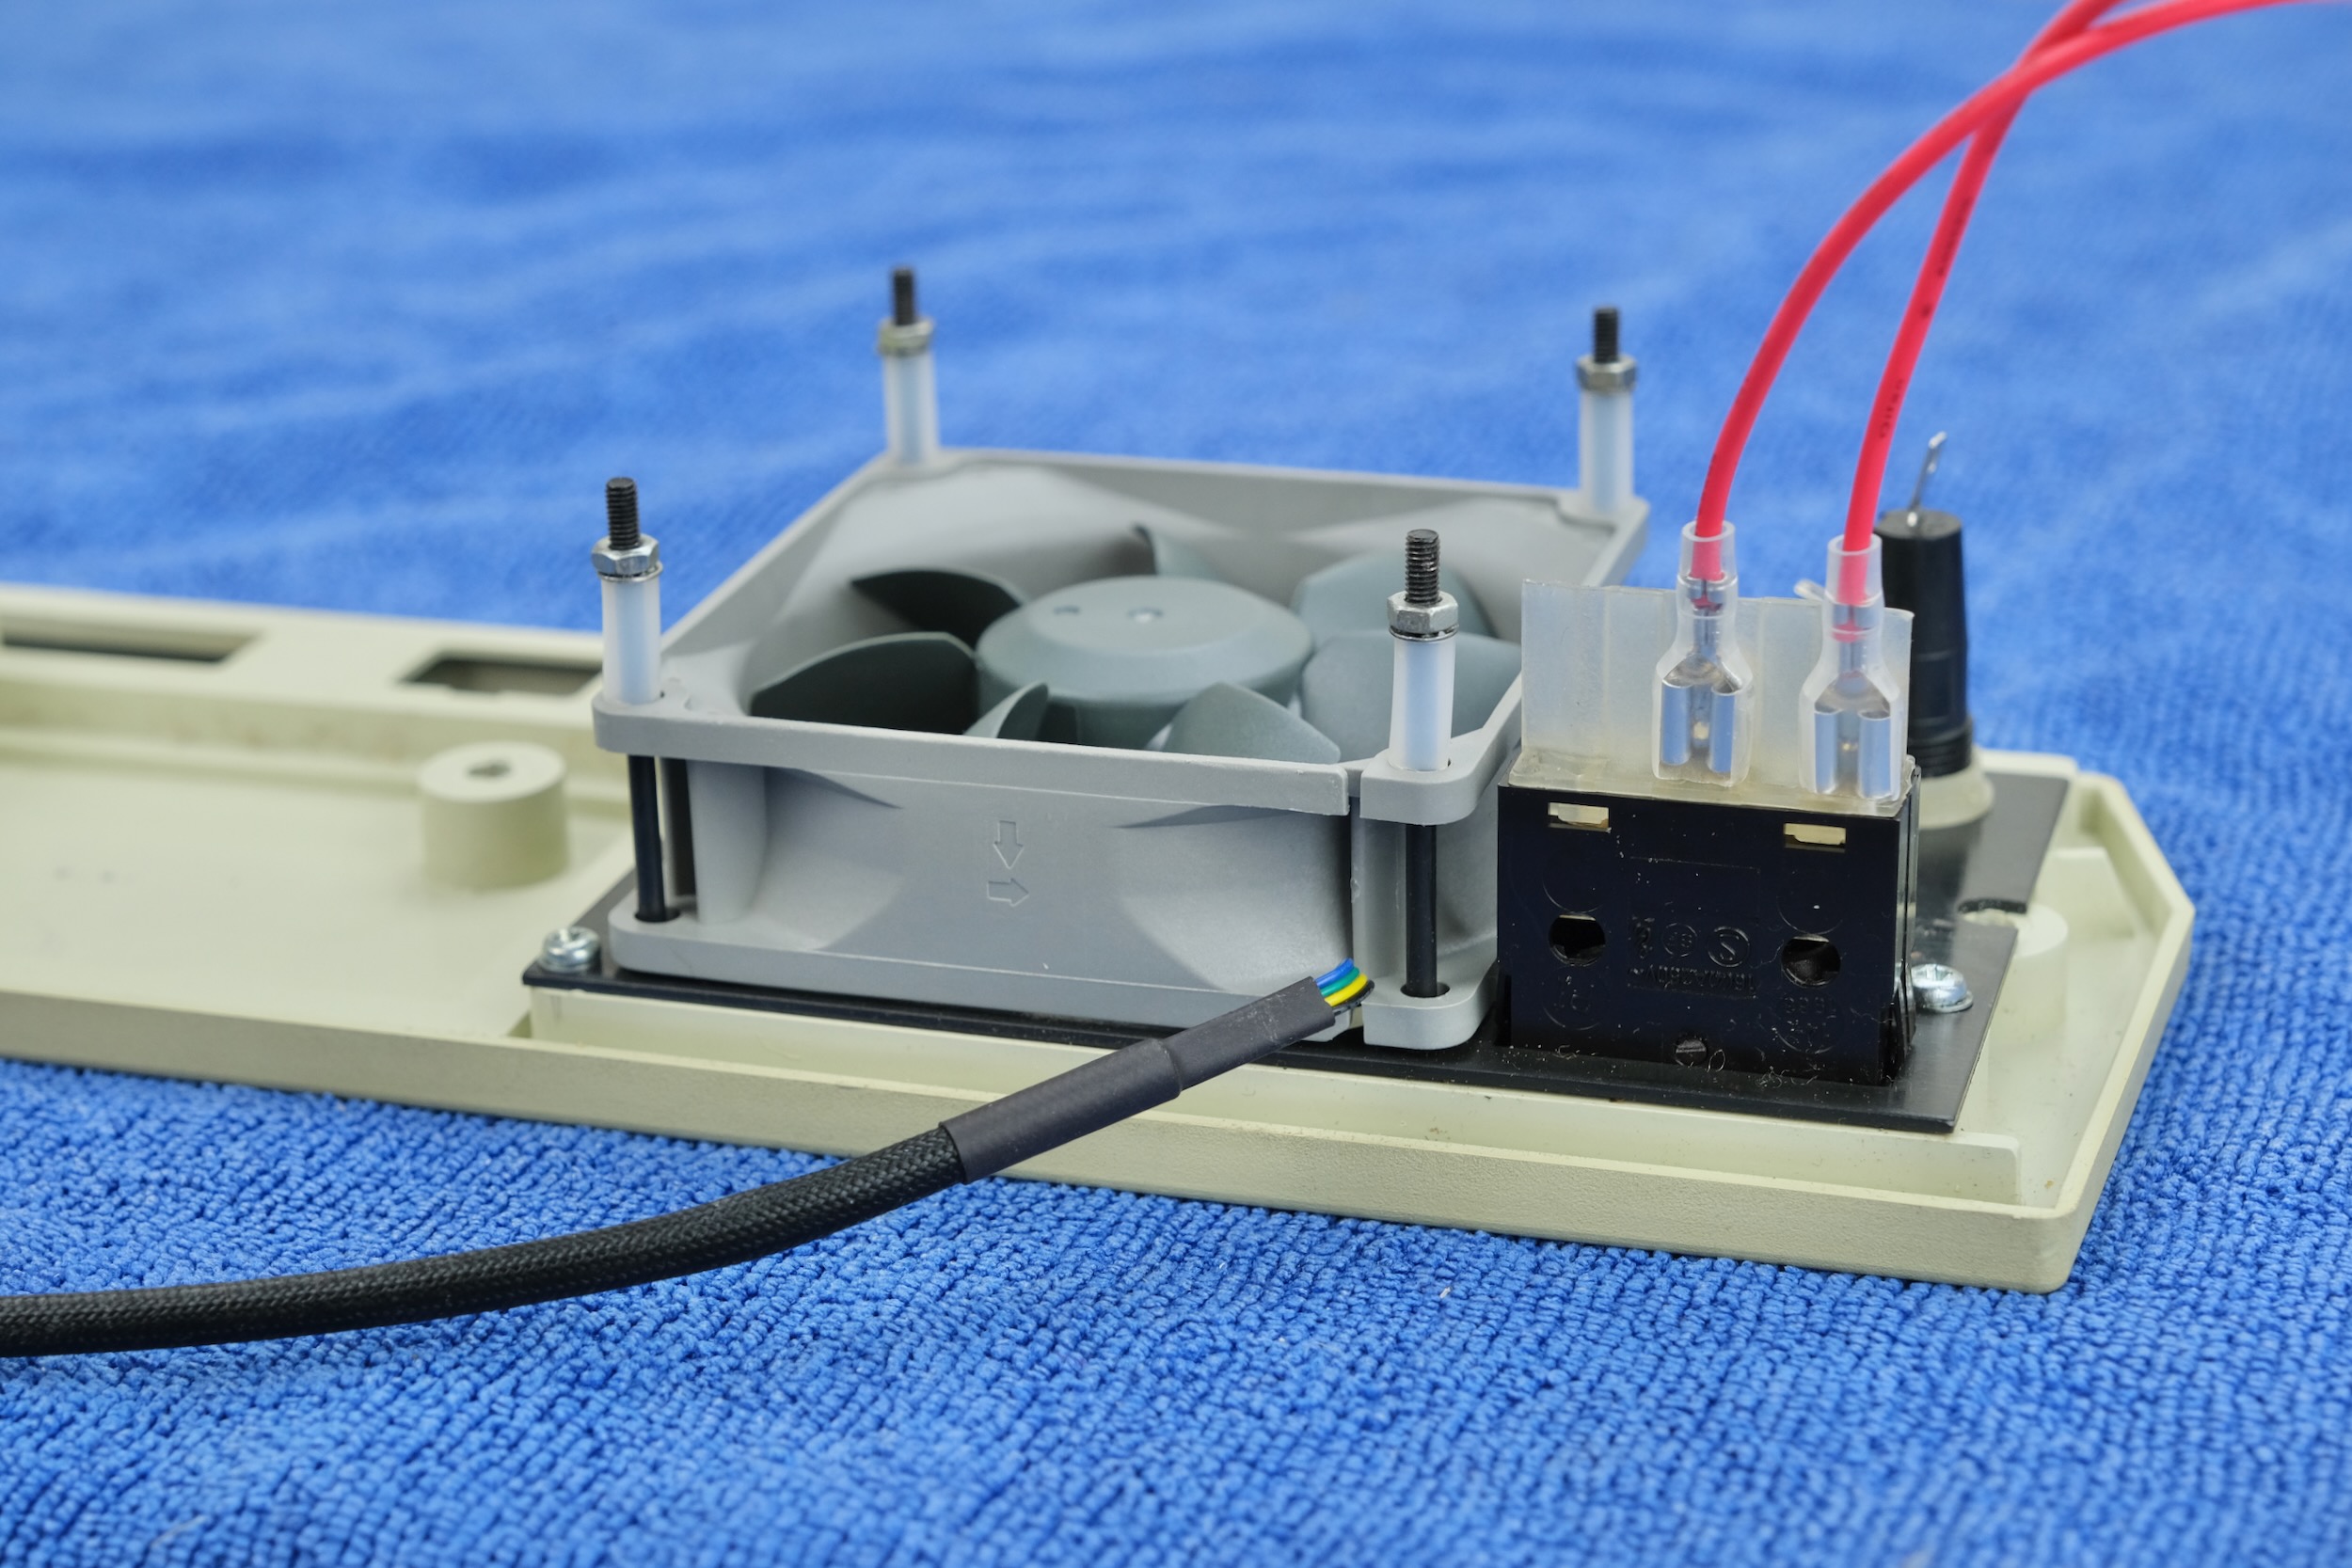
Plug the new cable into the power switch as shown, polarity doesn’t matter.
-
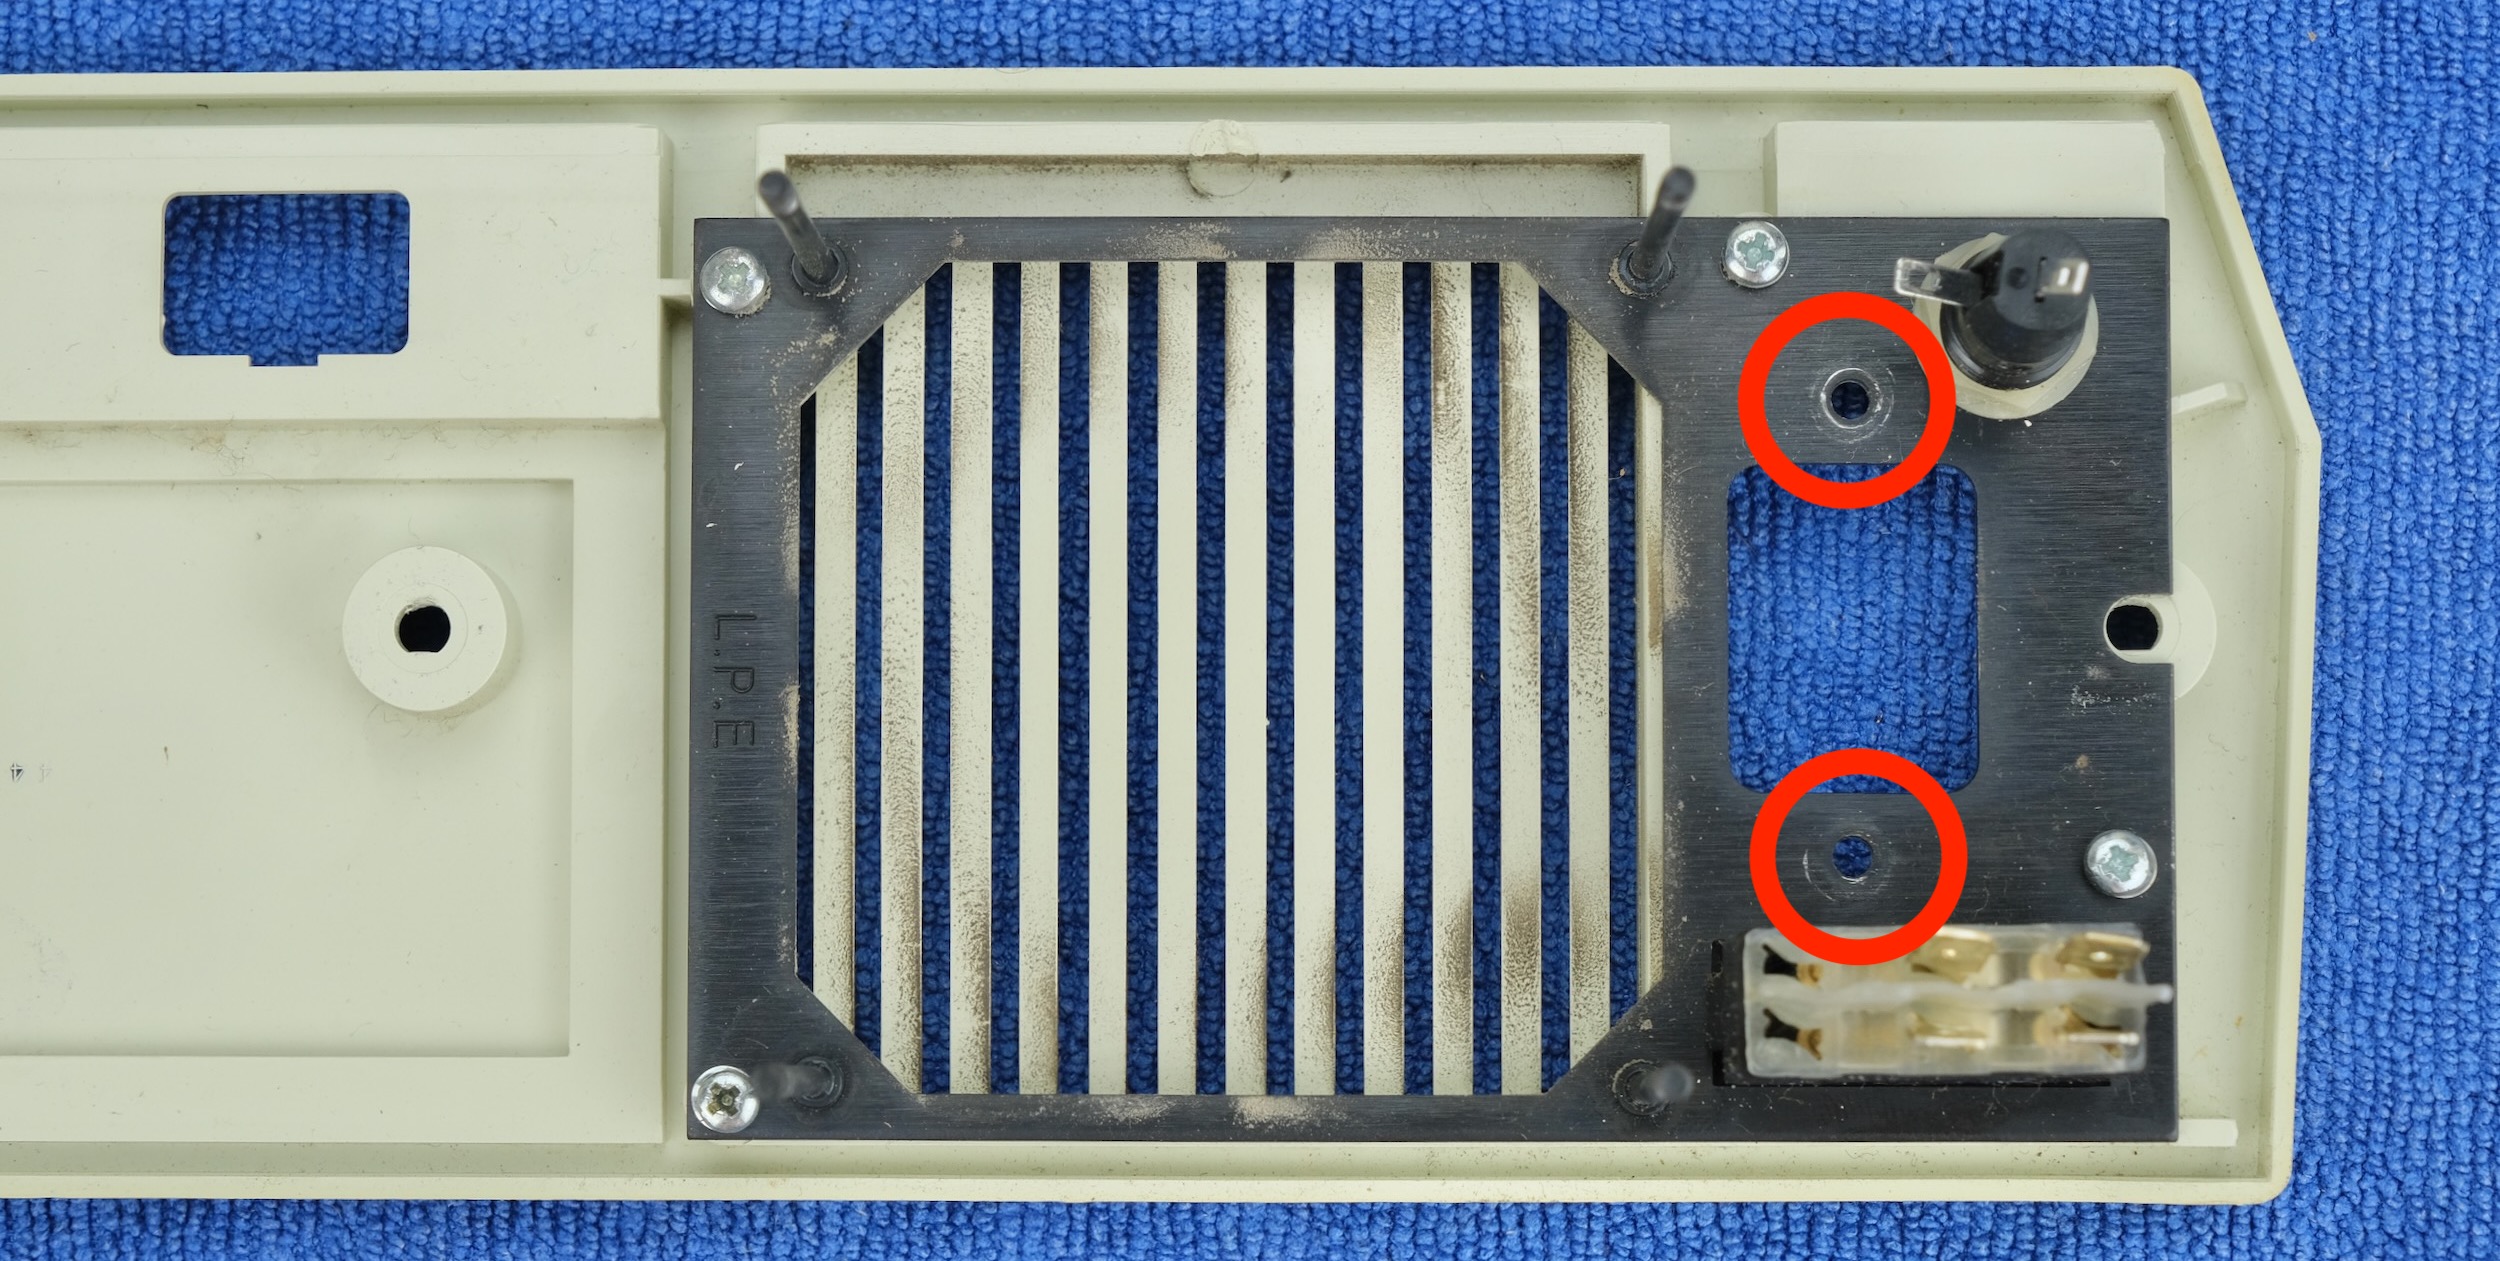
Install a new 80mm PC Fan, use the standoffs to help secure it.
-
Double check airflow direction! The fan should push air OUT OF the case.
-
Usually an arrow on the fan frame indicates the air direction.
- Also install the blanking plate with the original nuts and bolts.
-
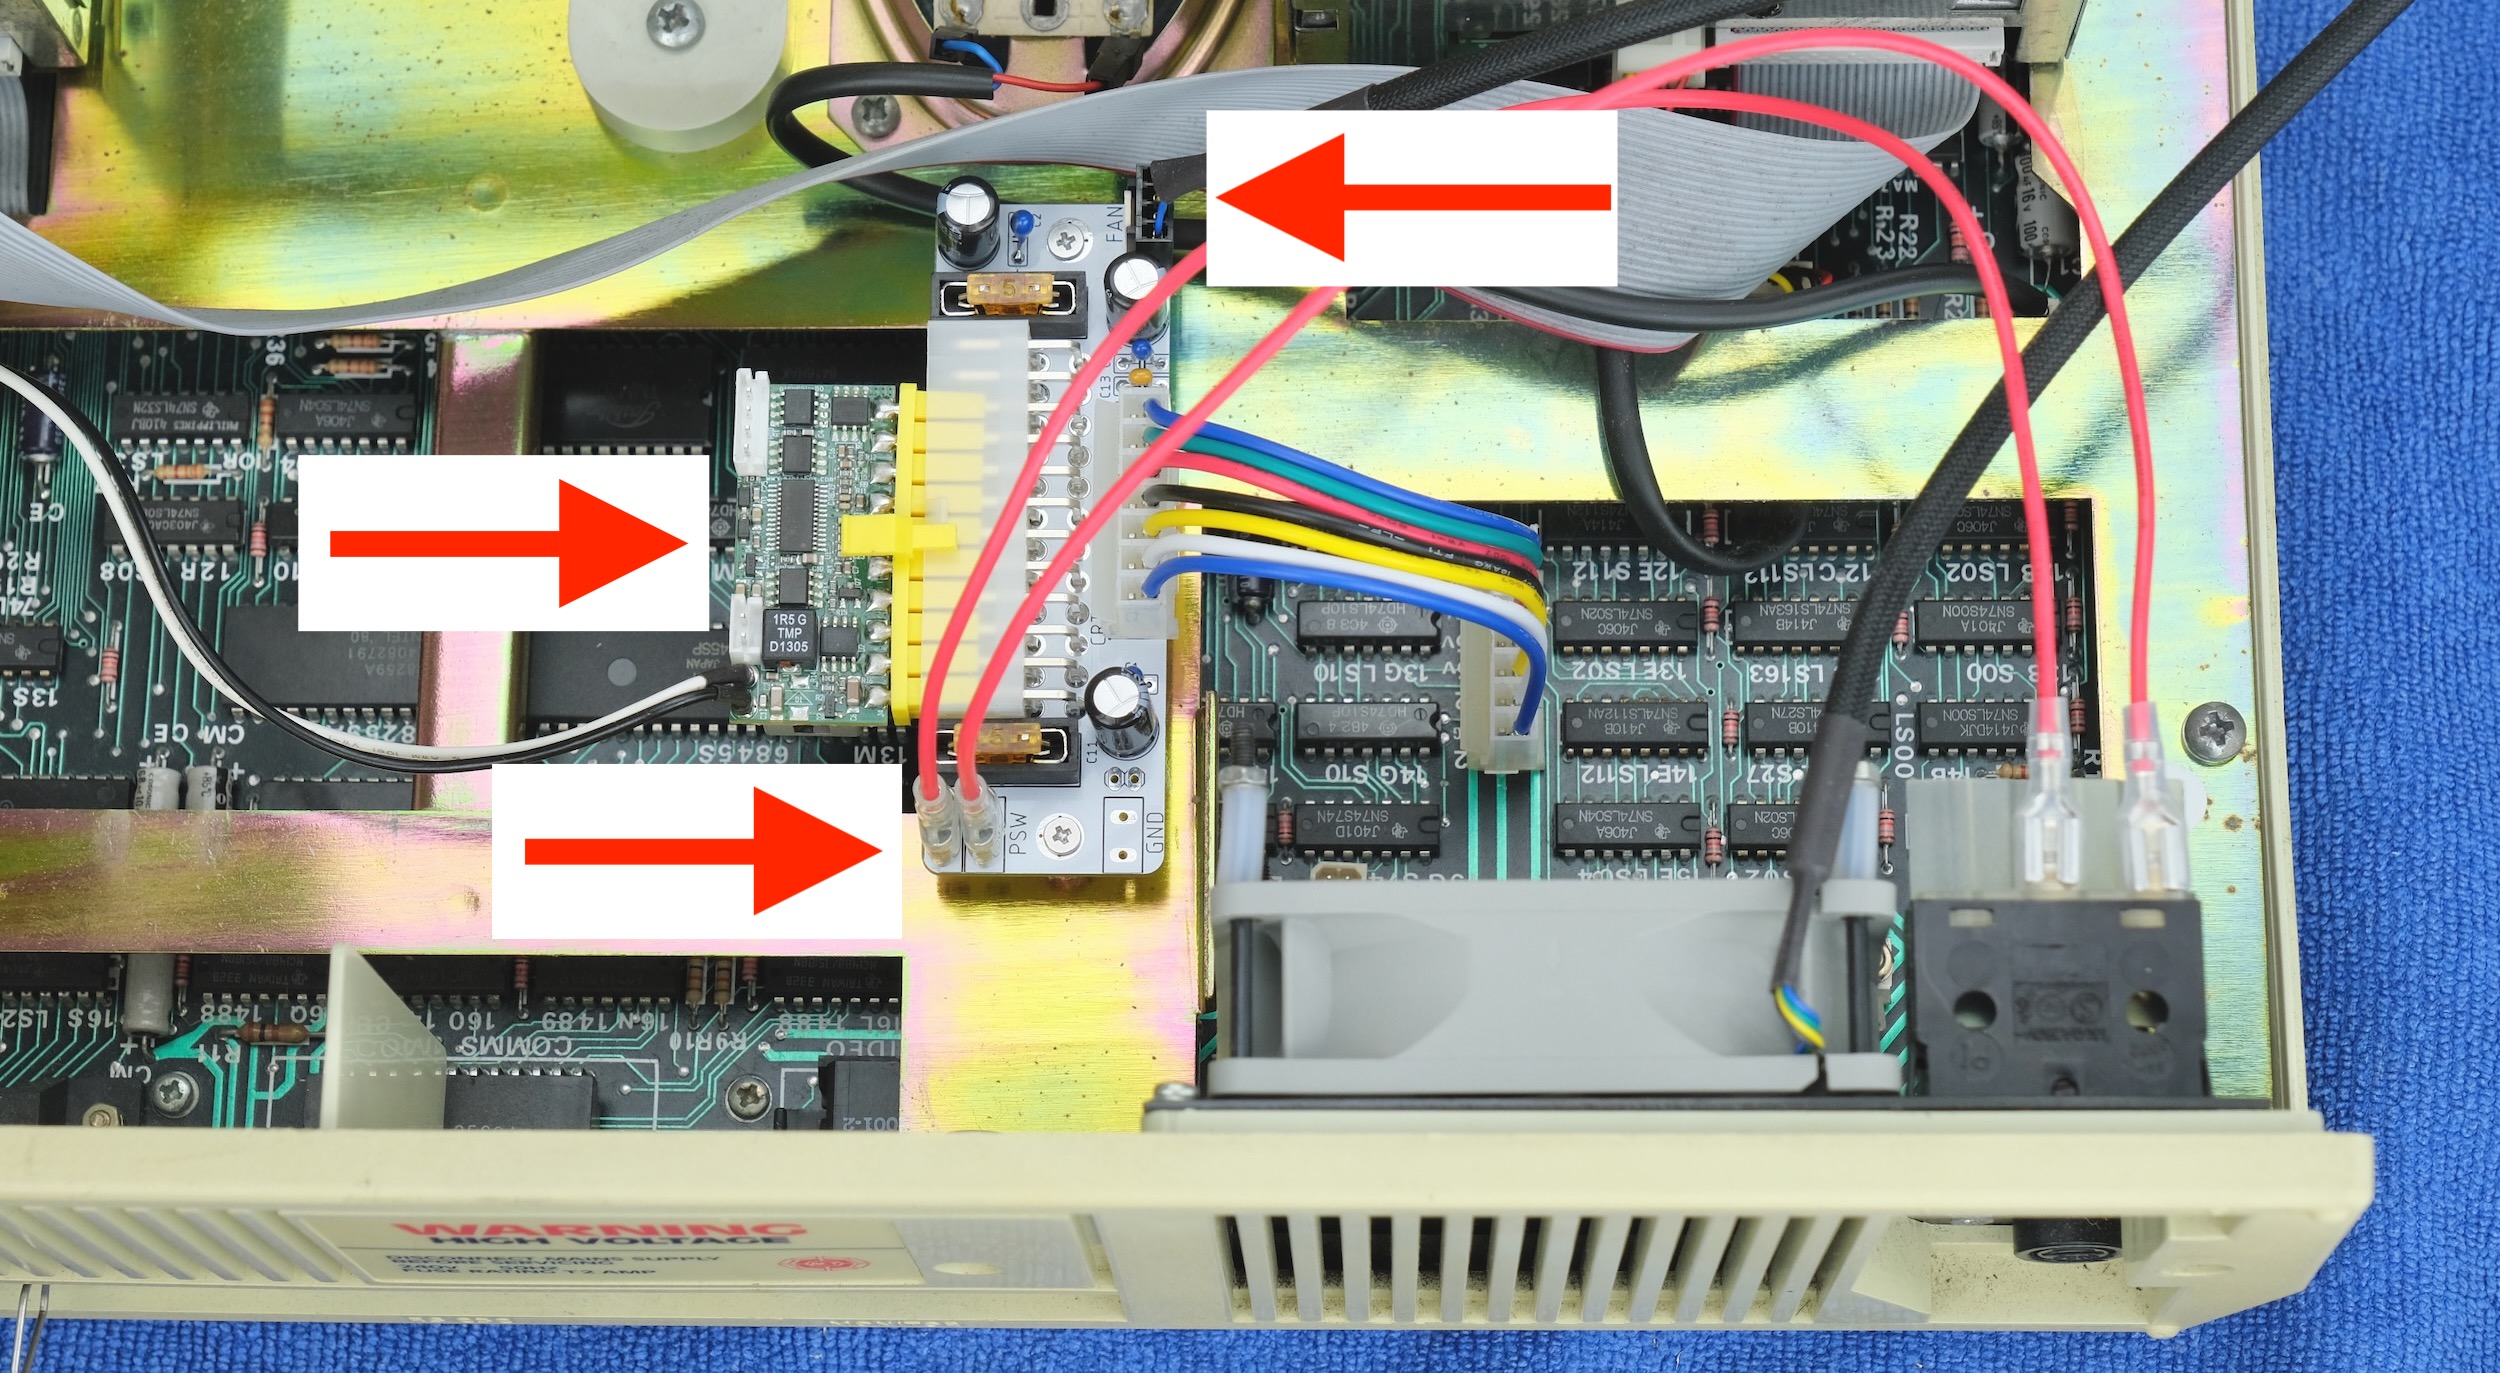
Plug in fan connector.
-
Plug in PicoPSU.
-
Plug in power switch wires.
-
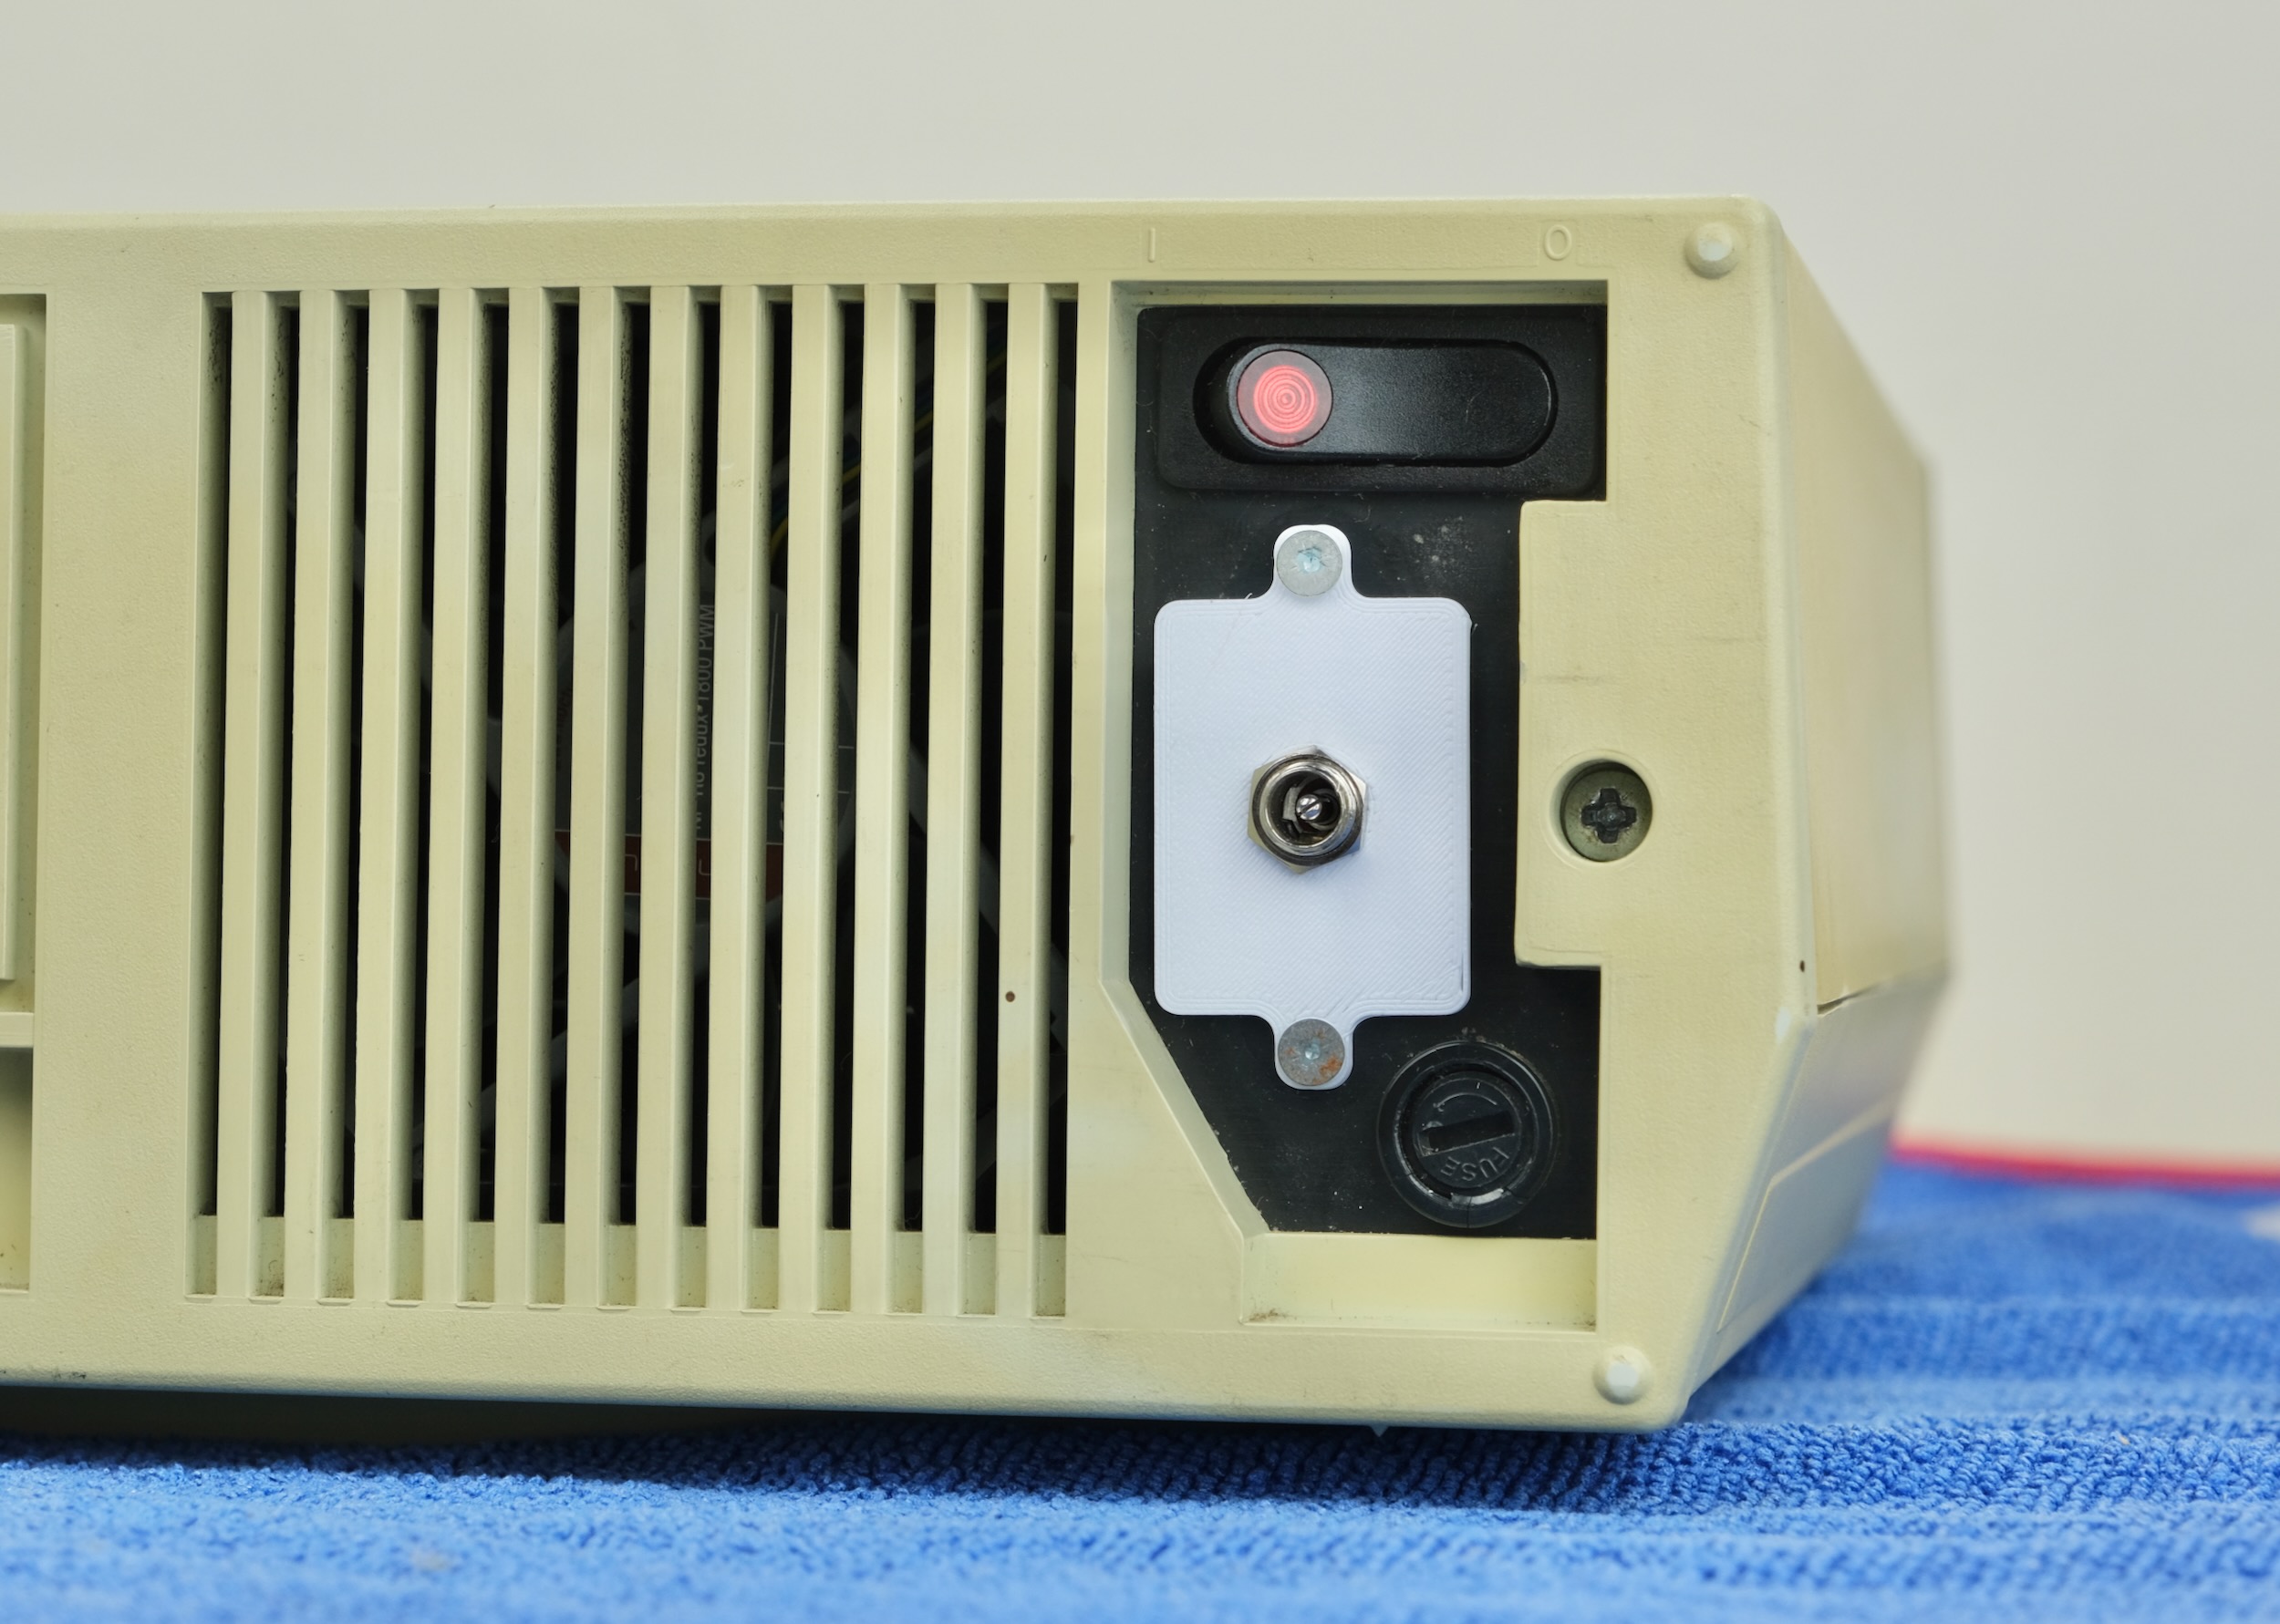
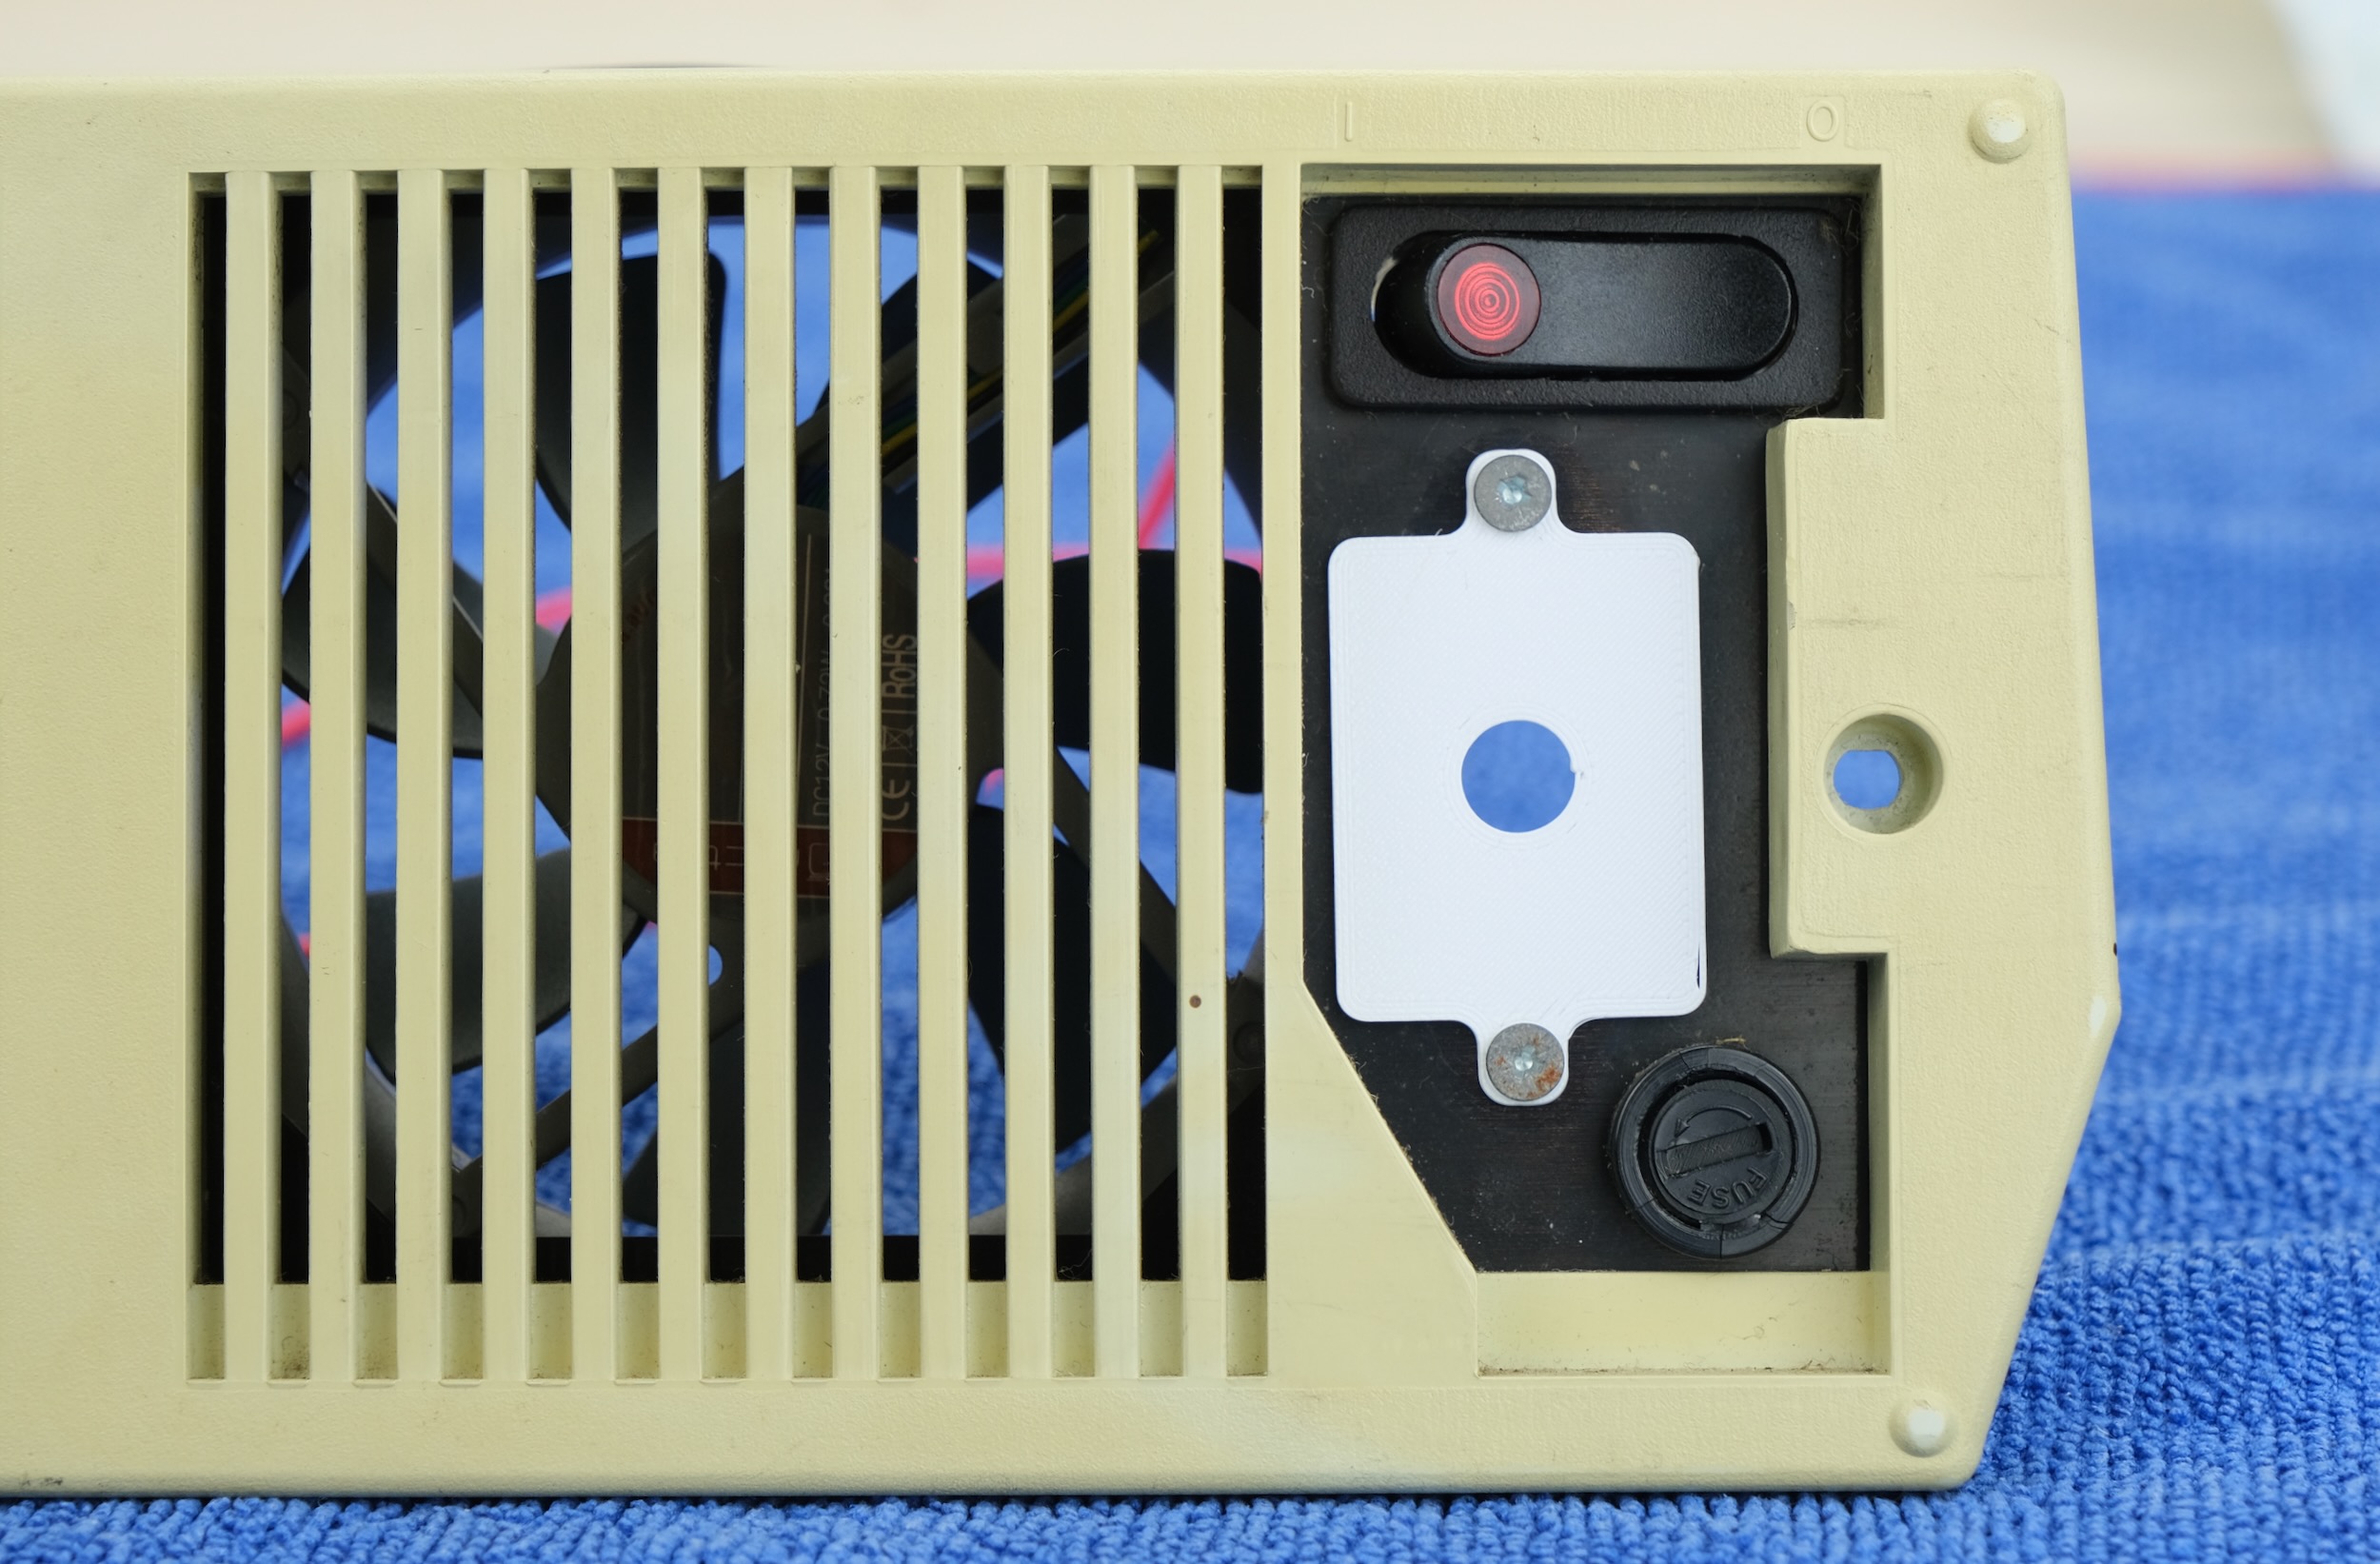
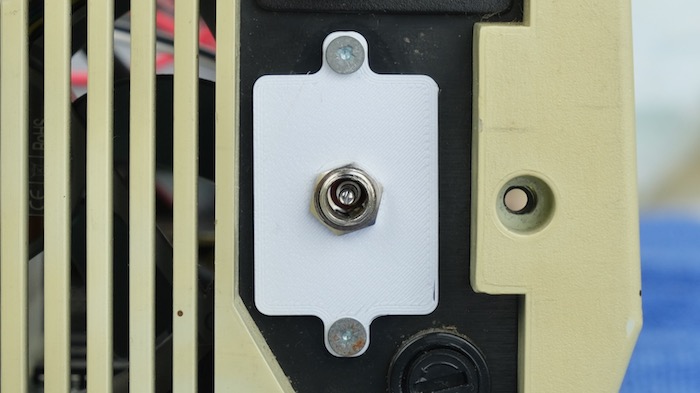
Undo the locking ring on the barrel jack
-
Insert through the blanking plate.
-
Secure the ring to fix it in place.
- Put all the unneeded parts in a bag for safekeeping. Don’t throw anything away!
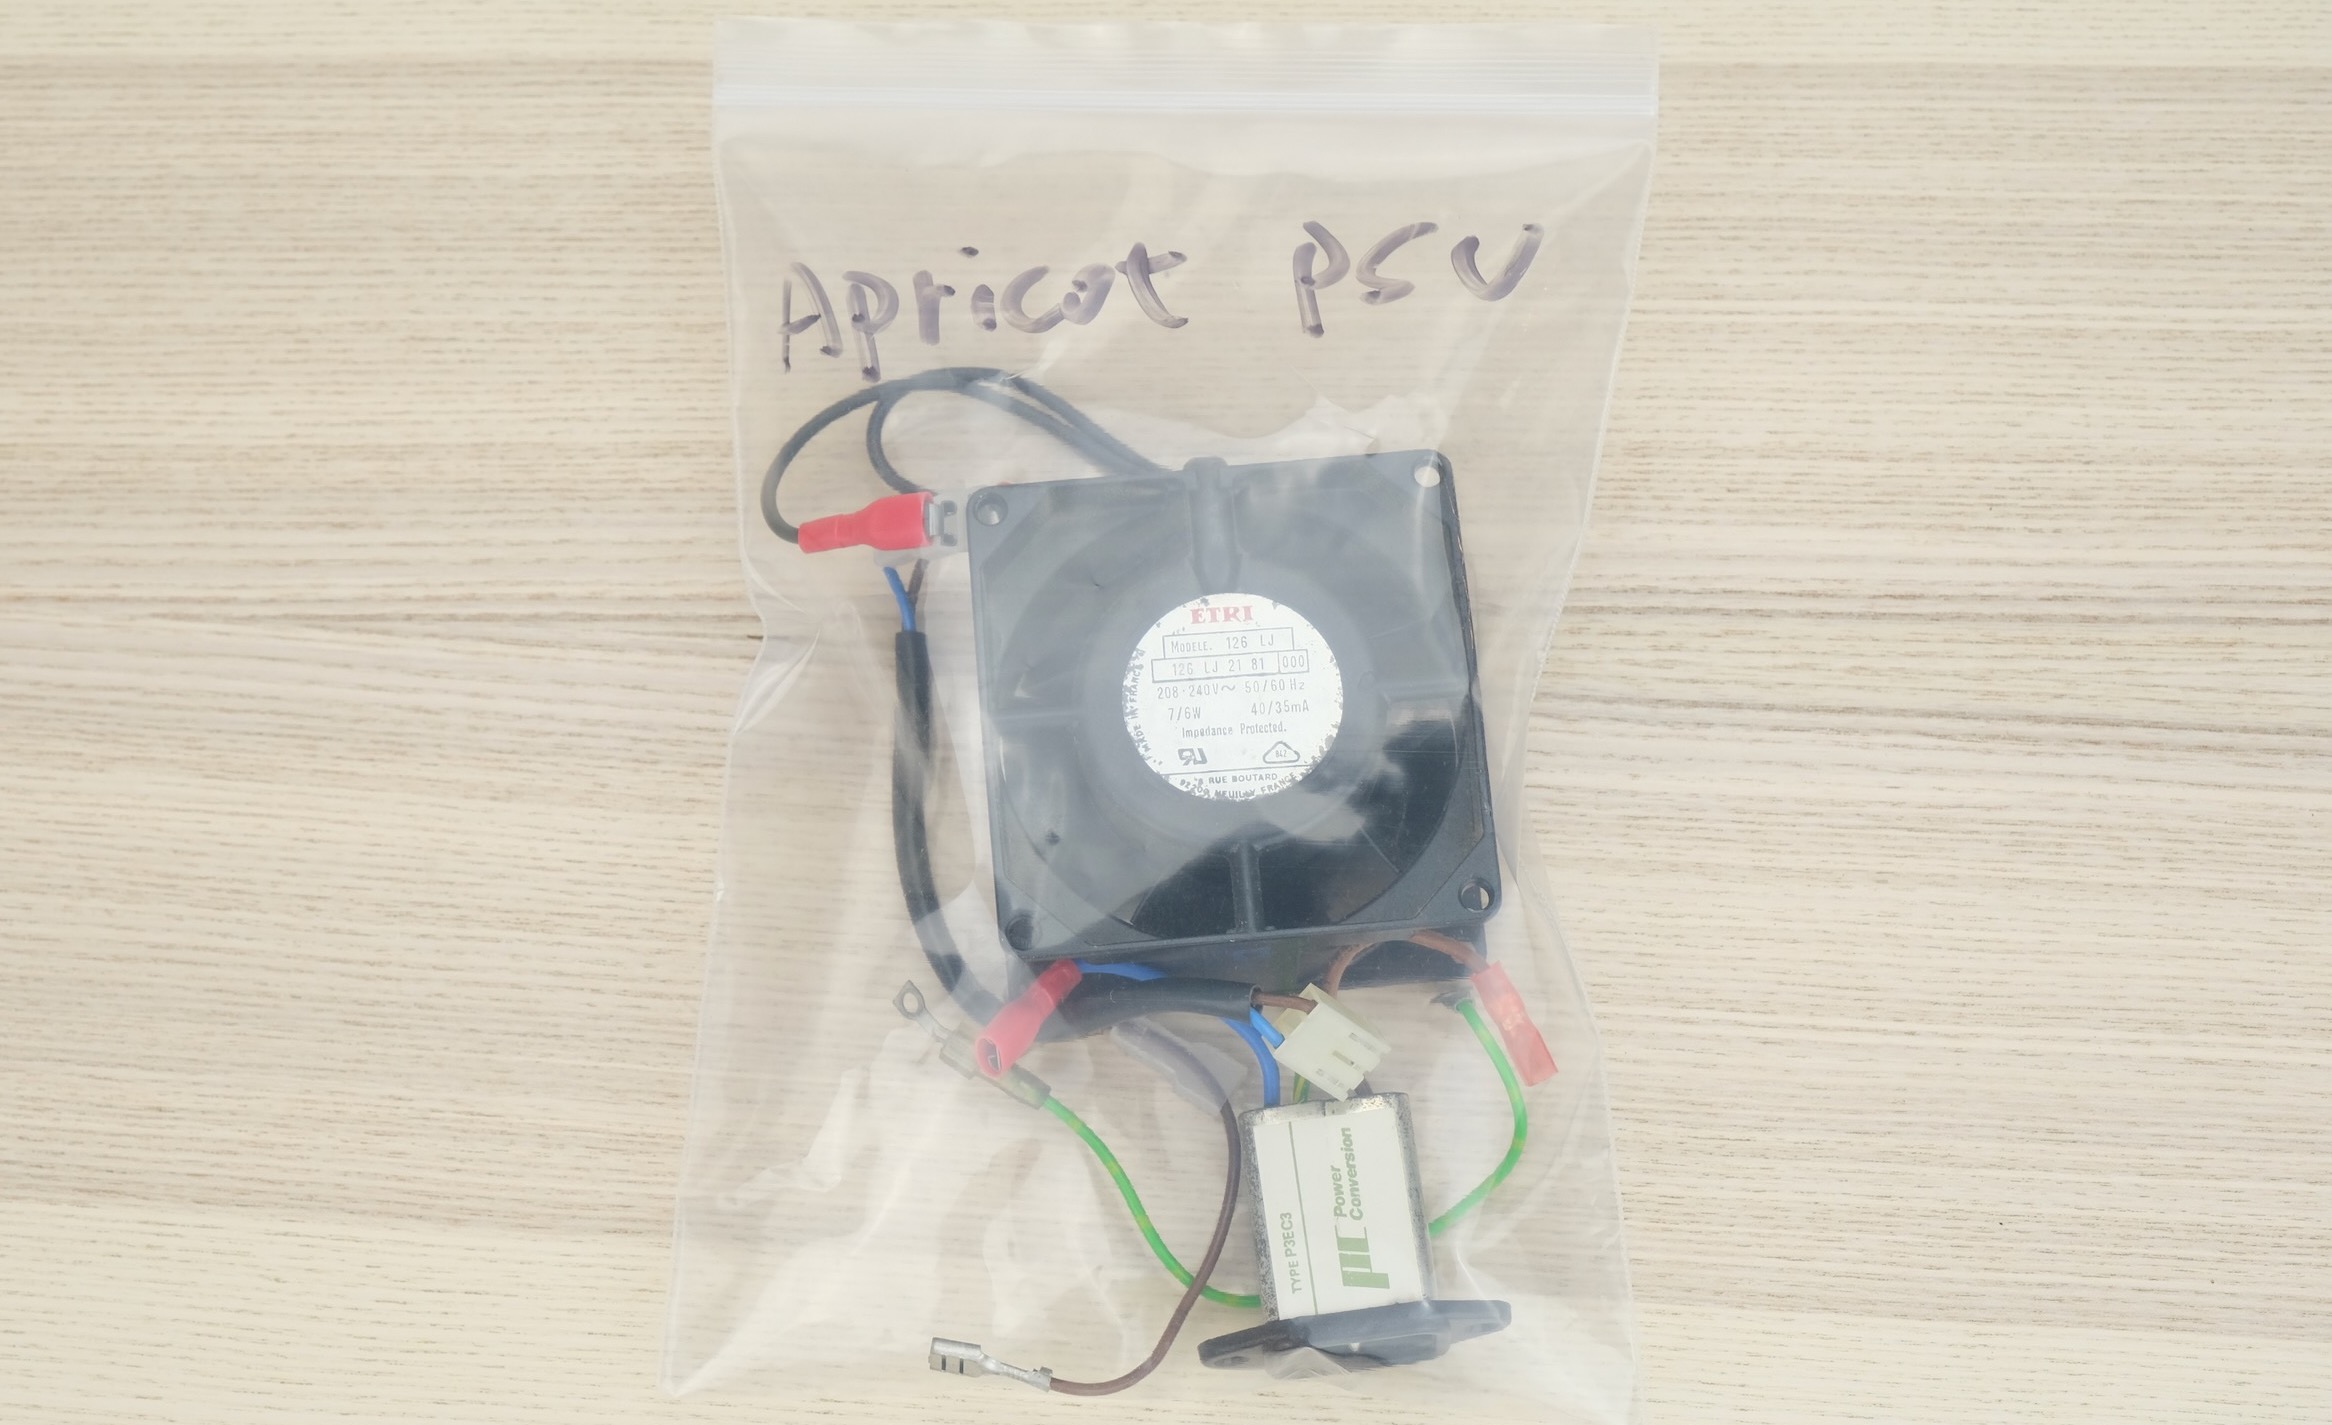
-
That’s pretty much it!
-
Plug in the 12V jack, switch on, and see if it works!
Questions or Comments?
Feel free to ask in official Discord Chatroom, raise a Github issue, or email dekunukem gmail.com!