traffic-cone-film-scanning
Traffic-Cone Film Scanning: Customization Guide
| Main Page | Discord |
This guide shows you how to customize the cone to your particular lens and film size.
Install Autodesk Fusion
Autodesk Fusion is a popular 3D CAD software.
We’re going to install the free version, customize the traffic cone, and print the result.
Go to this link:
https://www.autodesk.com/products/fusion-360/personal
Create a free personal-use account, download, and install.
- Launch Autodesk Fusion
- Click through until you see the main screen
- File icon -> Open…
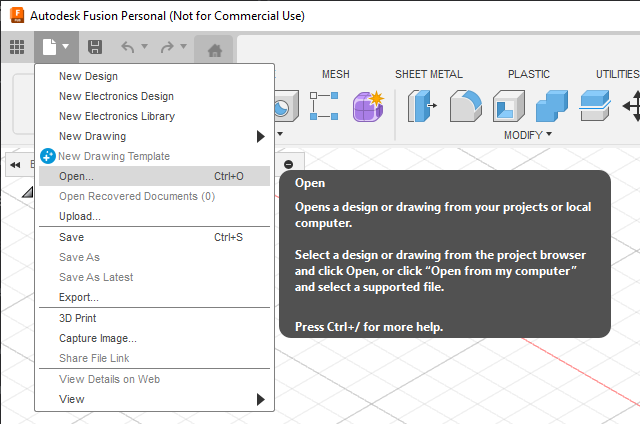
- Select
Open from my computer...
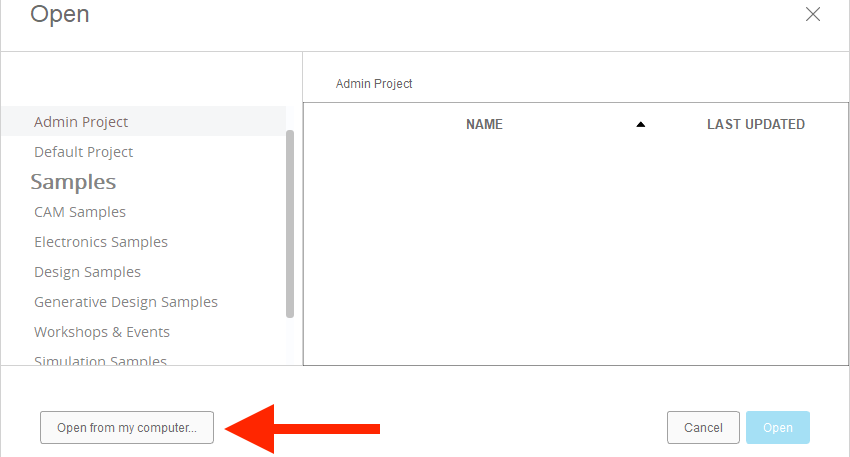
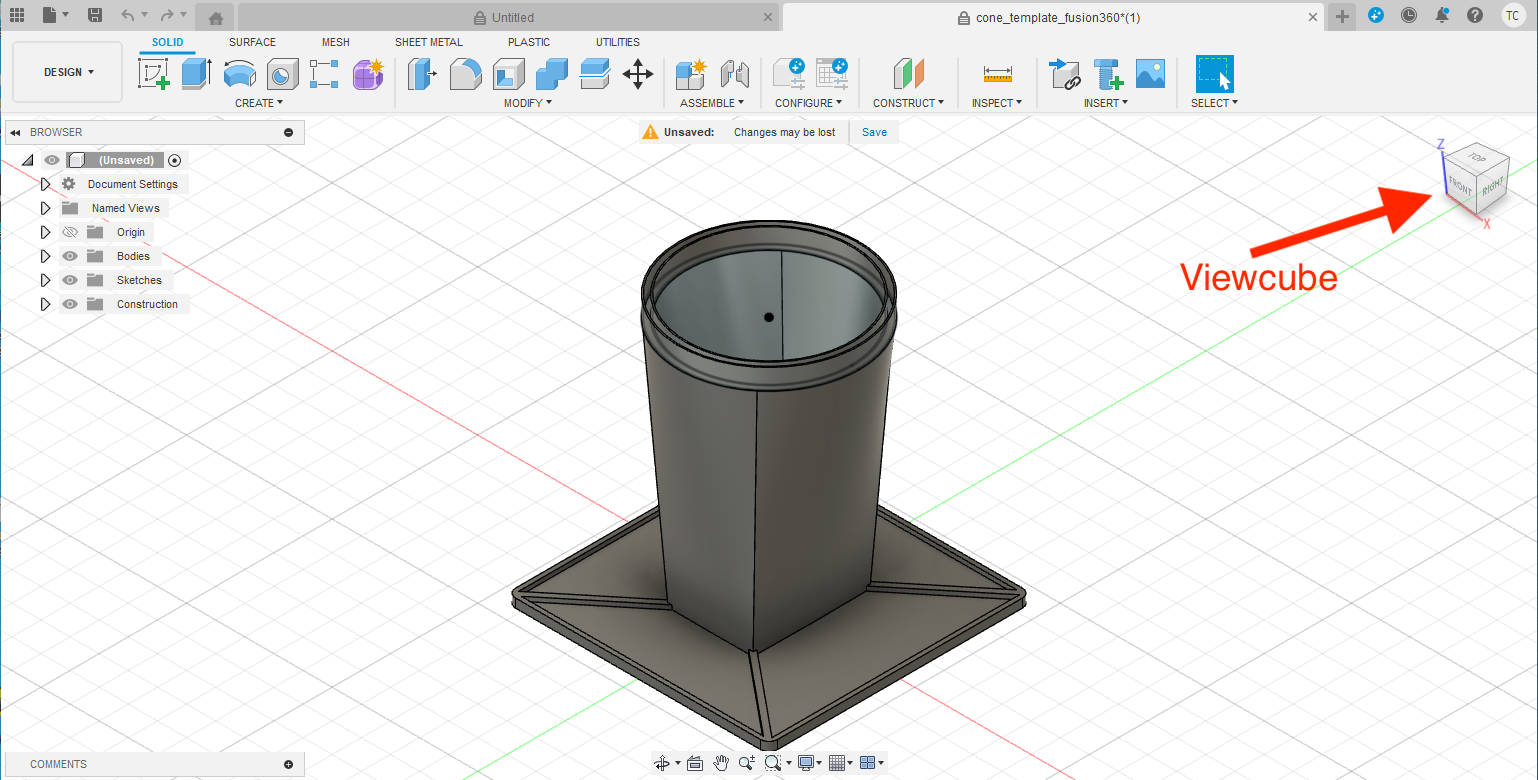
- Download the template cone and select it.
- Feel free to drag the viewcube to look around.
- Click its edge/corner/face to snap to view point.
- Click on
MODIFYmenu - Select
Change Parameters
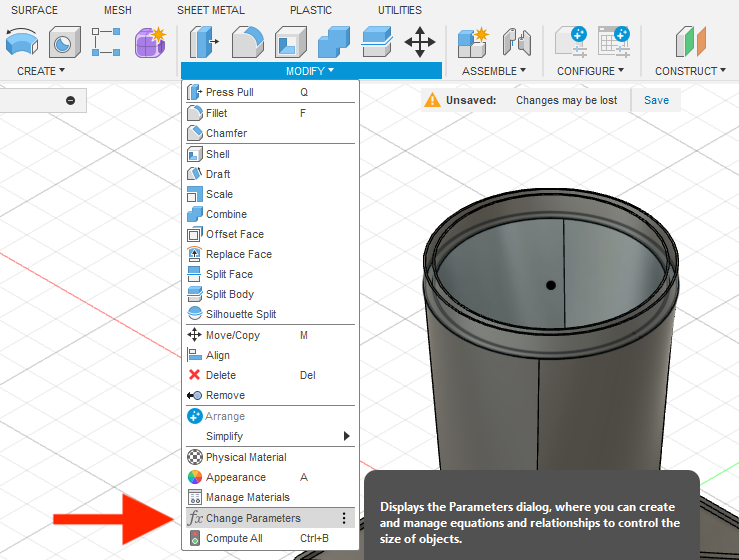
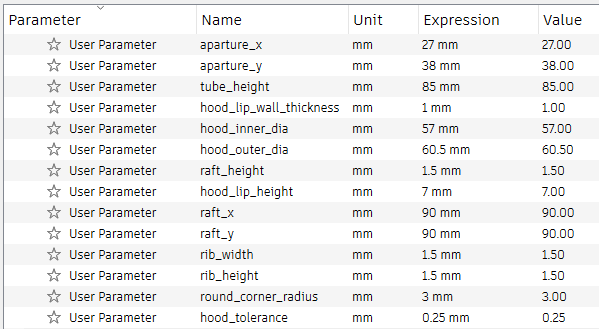
- Here you can see all the parameters for this cone.
- Don’t touch anything yet!
- Changing the values here will alter how the cone looks.
- But first, we need to do some measurements.
Measurements
In this example, I want to make a cone for 645 format with Laowa 65mm f/2.8 and Fuji X-T4.
- Light panel flat on table, turn on.
- Film under glass
- Don’t worry about dust yet, it’s only for measurement.
- Install lens hood
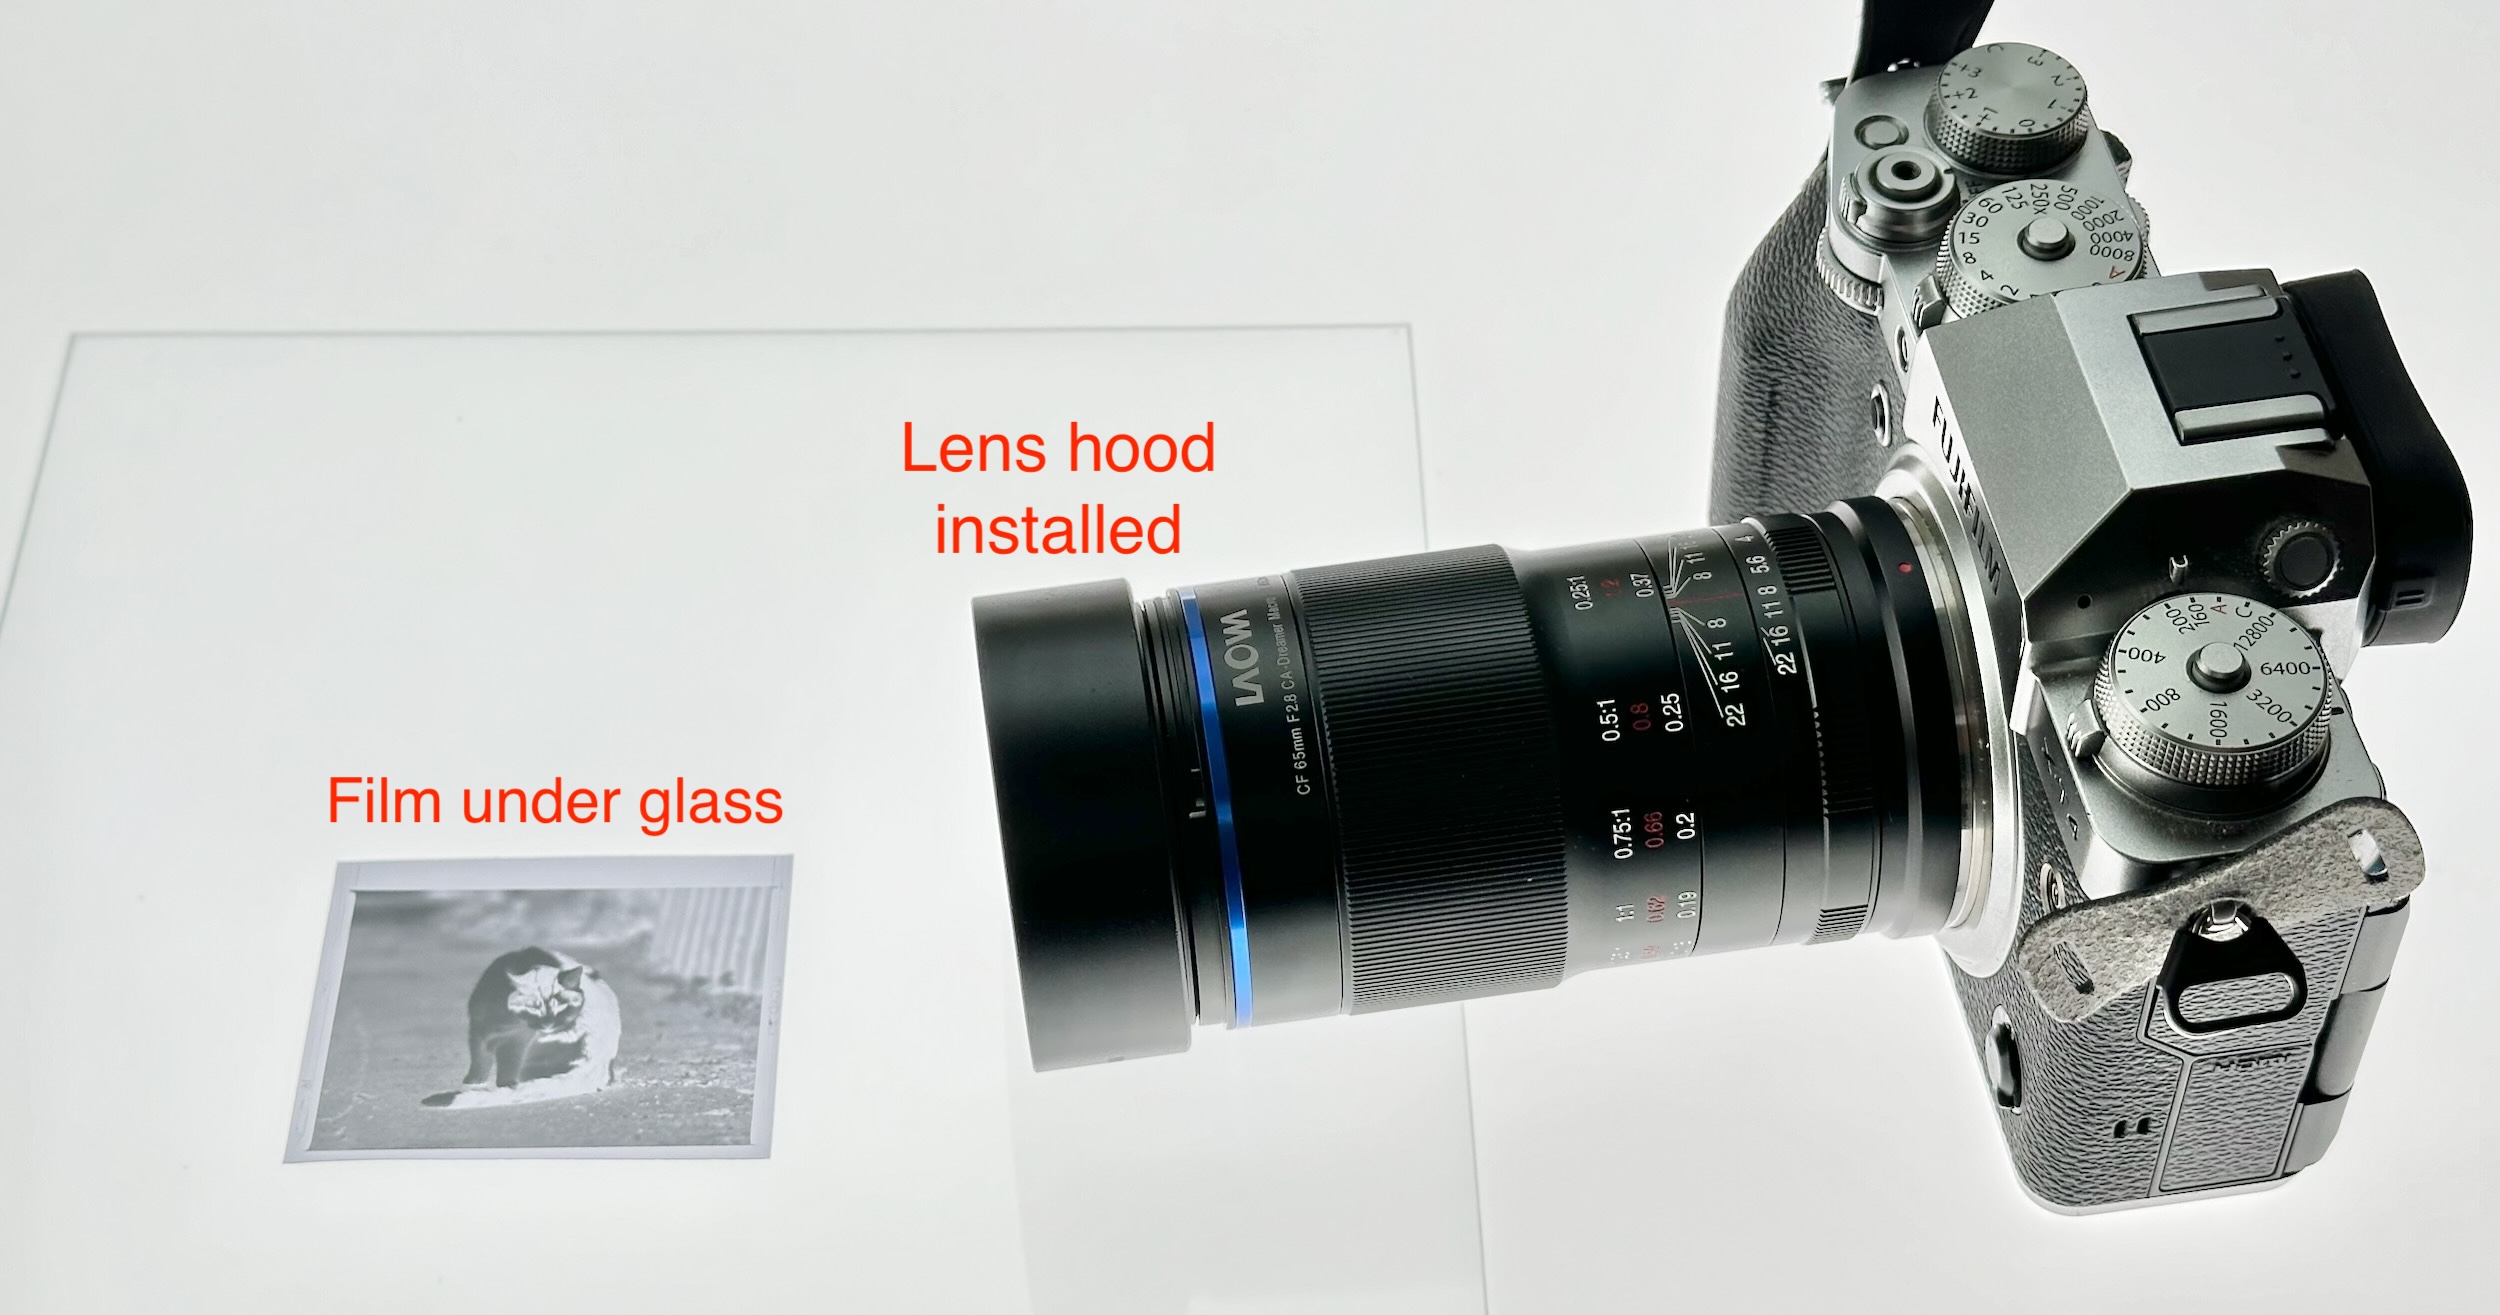
- Camera on
- Point straight down
- As best as you can, adjust height and focus, until the photo:
- Fills most of the frame, AND
- In focus
- Leave a little space near the edge to make alignment easier
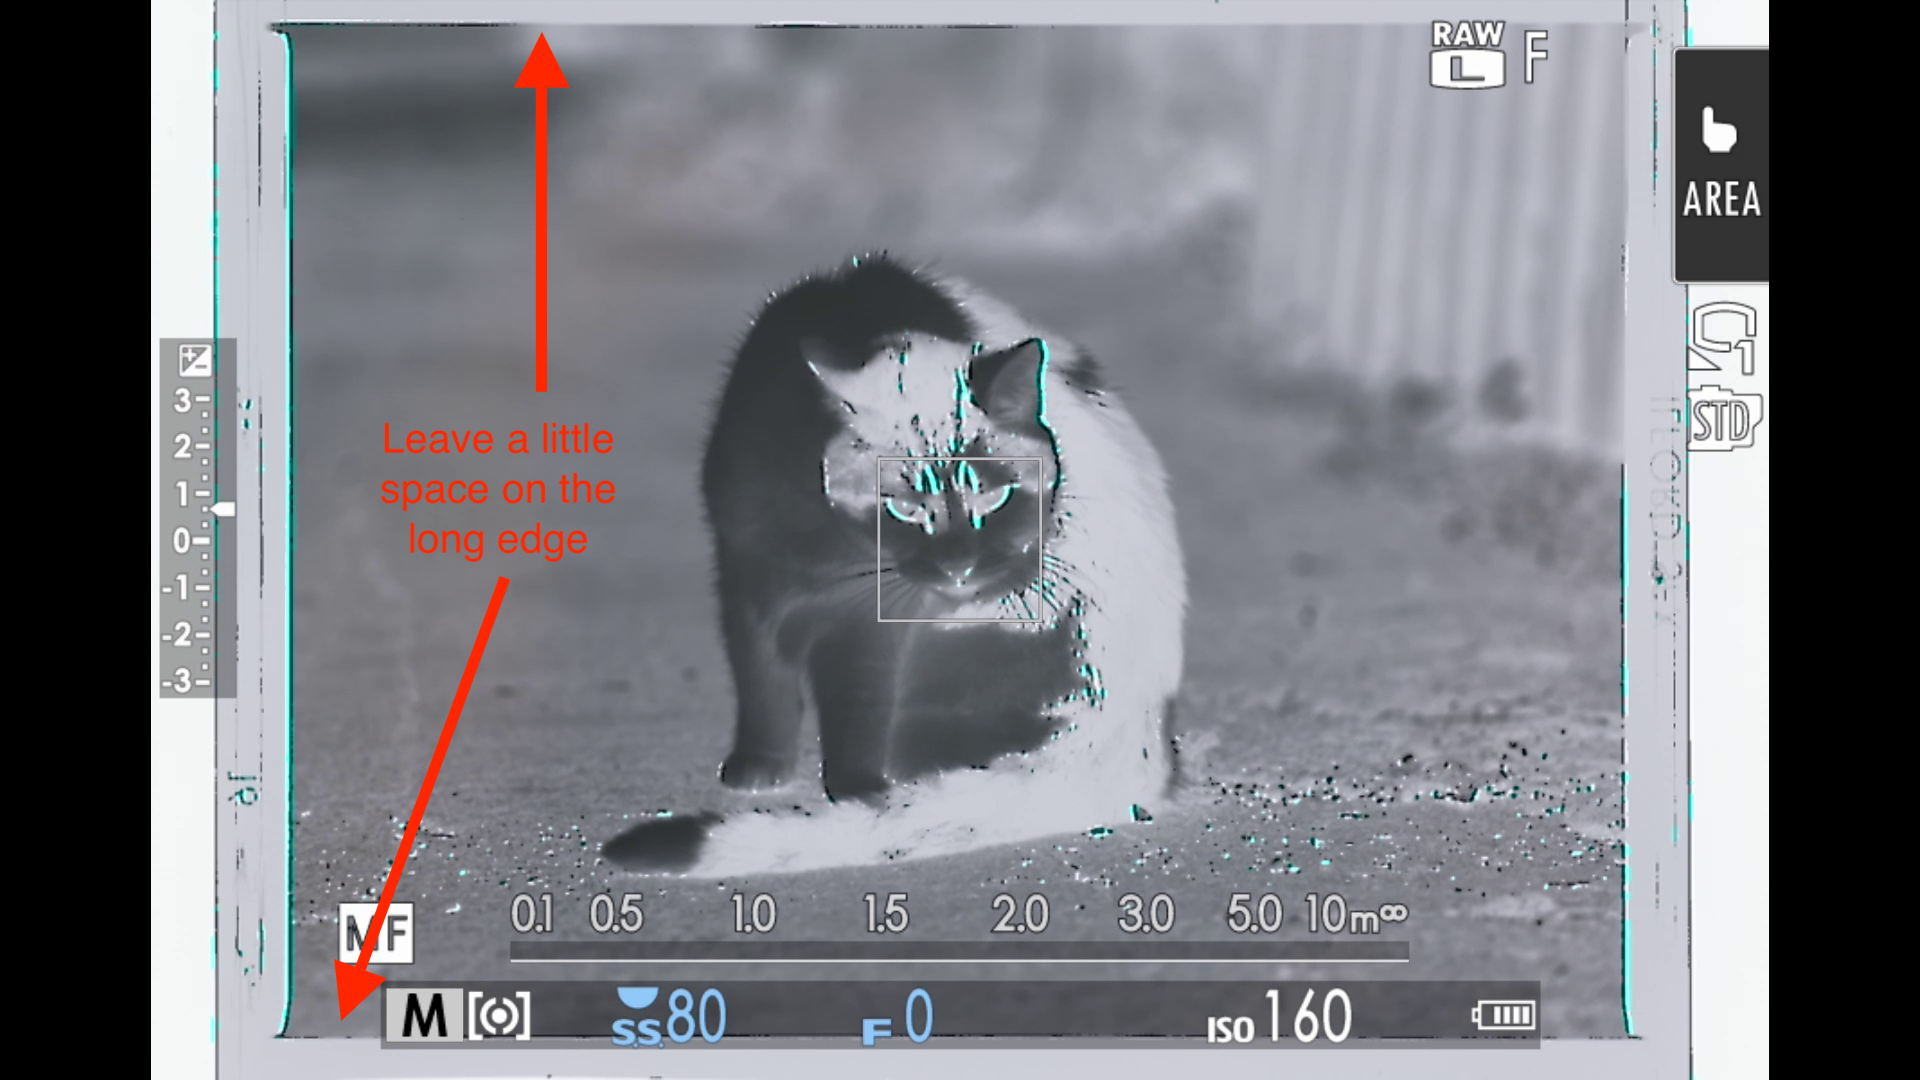
- Hold steady
- Measure the distance from
glass surfacetolip of lens hoodin mm
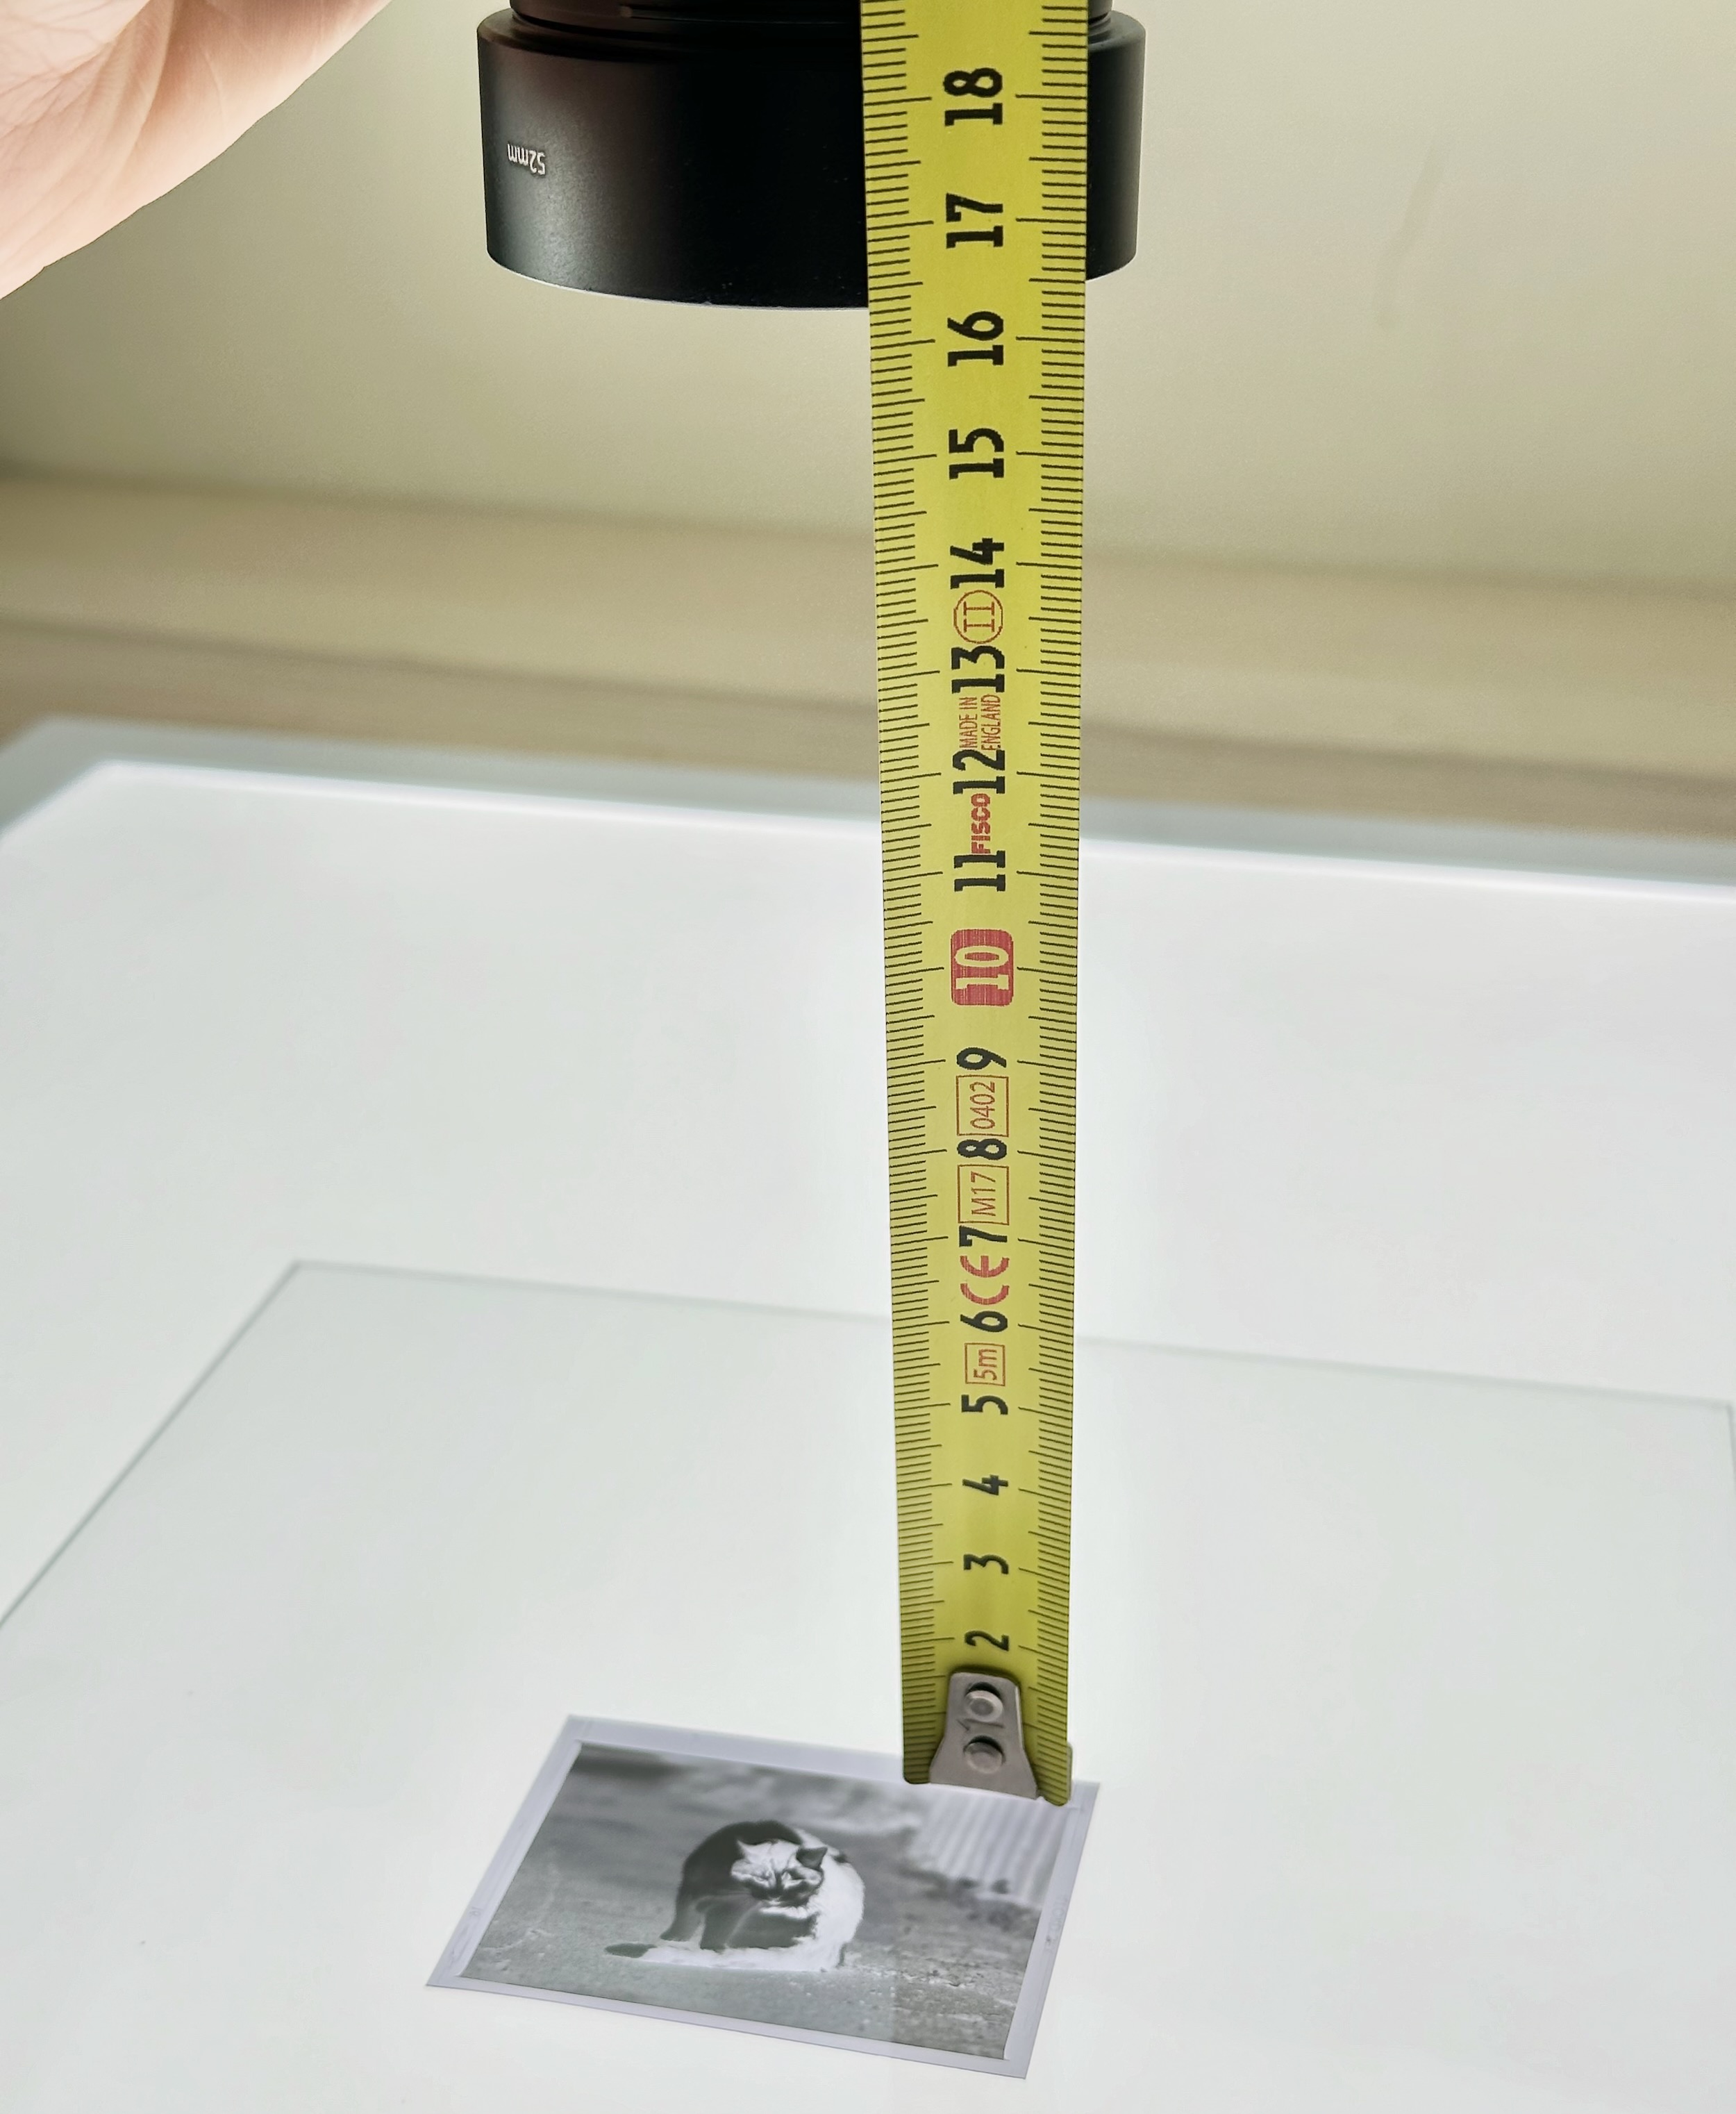
This will be the height of the cone.
Around 16cm, or 160mm, in this case.
Write it down.
Next, use a caliper, measure the inner and outer diameter of the outward facing rim of the lens hood in mm.
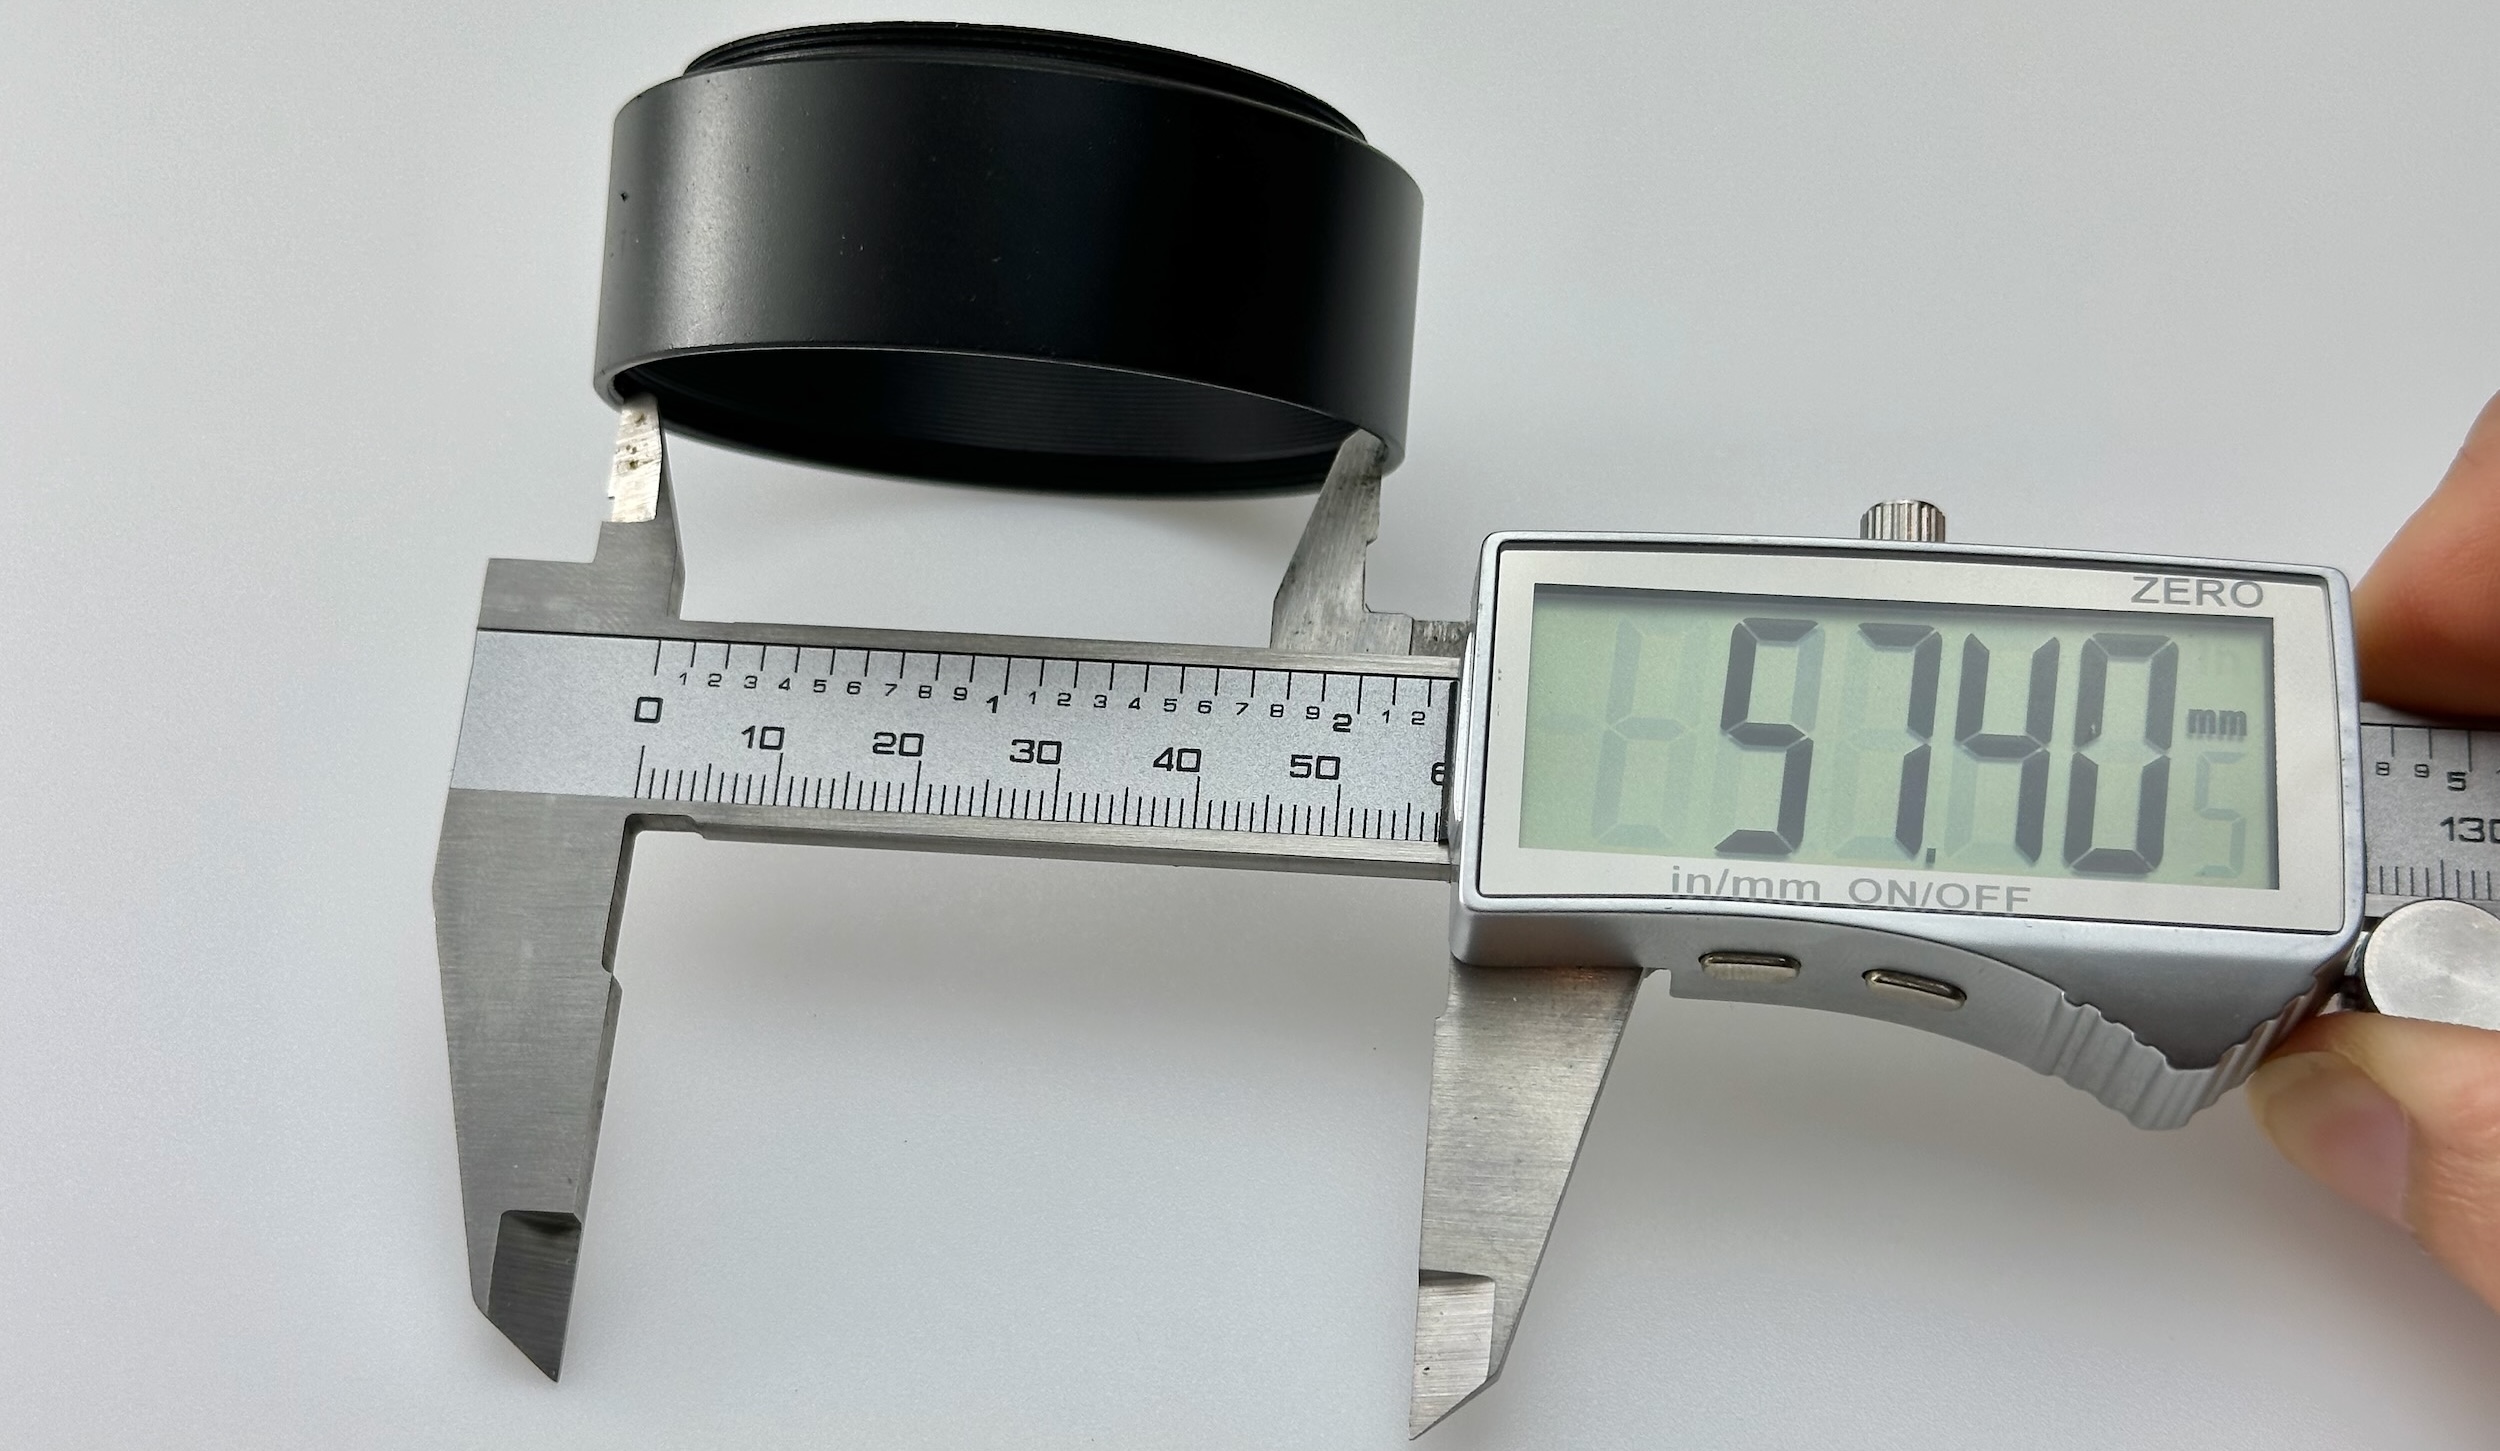
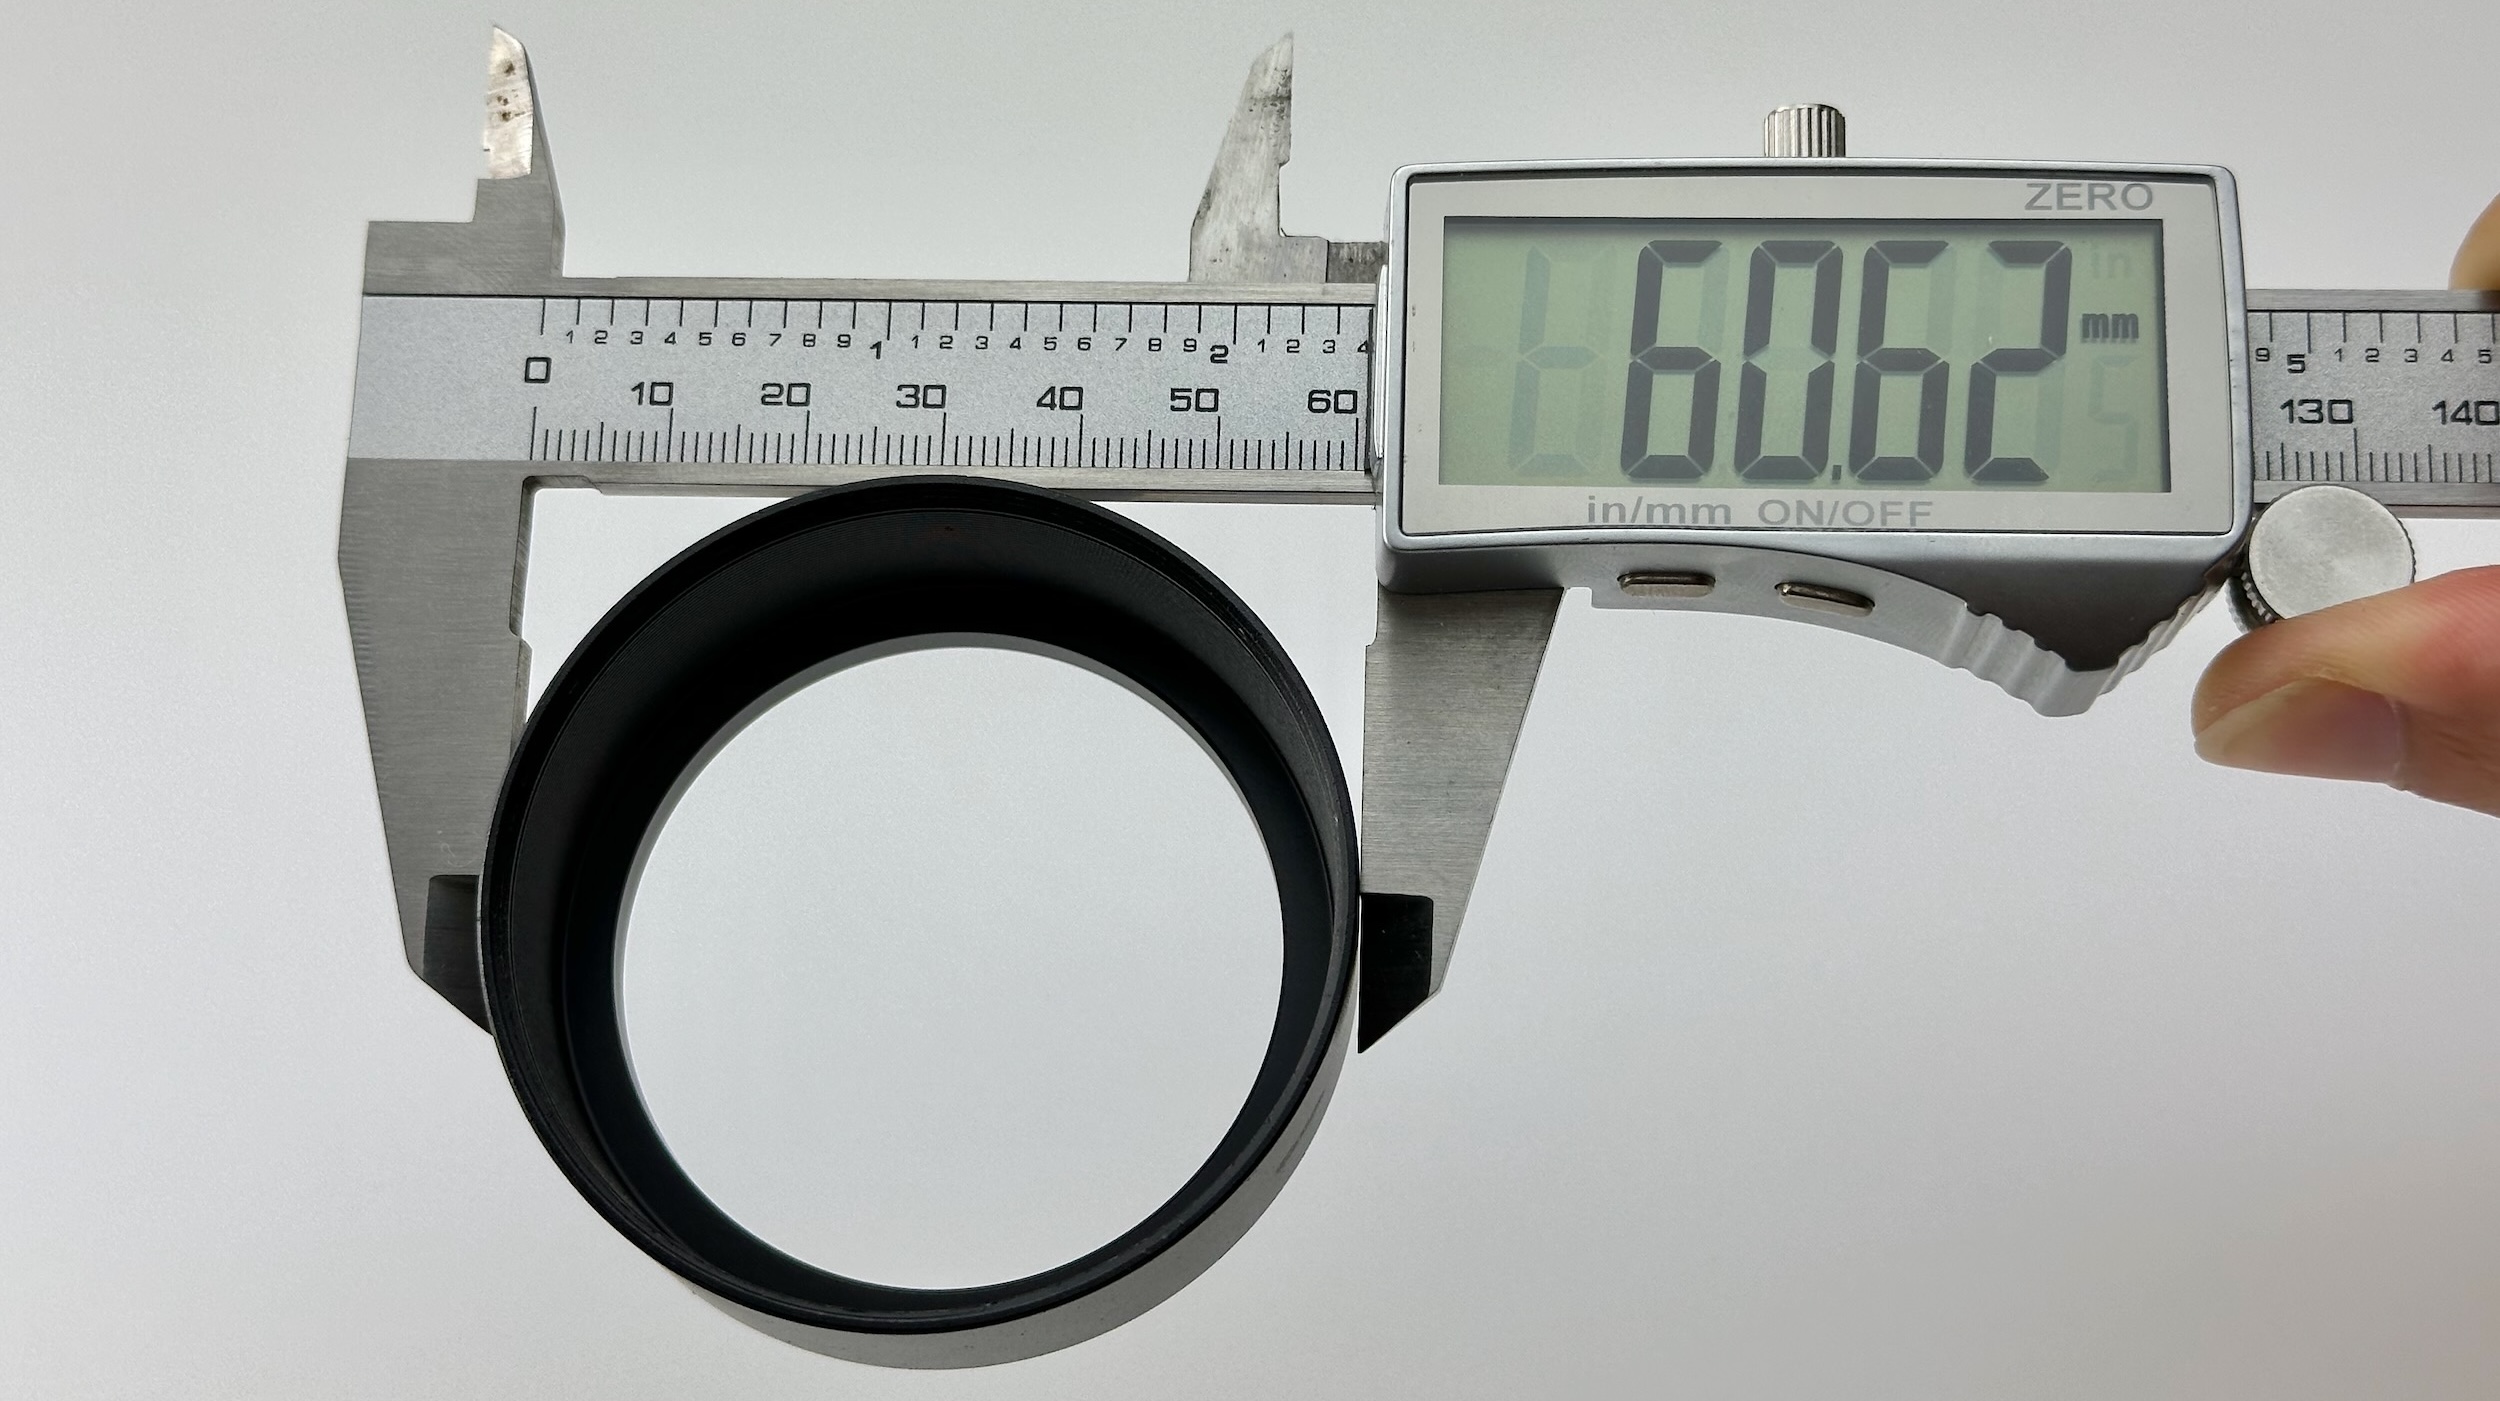
Write those down as well.
That’s it! We’re done.
Parameter Adjustment
Back in Autodesk Fusion. We can now put in the values we just measured.
Click the number in Expression column to change the value.
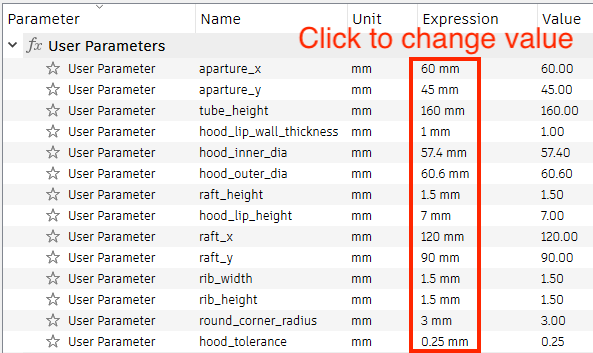
Usually, the following values need to be changed:
aperture_x and aperture_y
- Size of the scanning window.
- 24×36mm for 135, 60x45mm for 645, 60x90mm for 6x9, etc.
- Add extra 1mm for margin of error if you want.
tube_height
- Height of the cone you measured, in mm.
hood_inner_dia and hood_outer_dia
- Lens hood diameters you just measured
- Type in exactly as-is
raft_x and raft_y
- Size of the “base” of the cone
- Default is 90x90mm, works pretty well.
- Increase slightly for larger formats.
No need to change anything else.
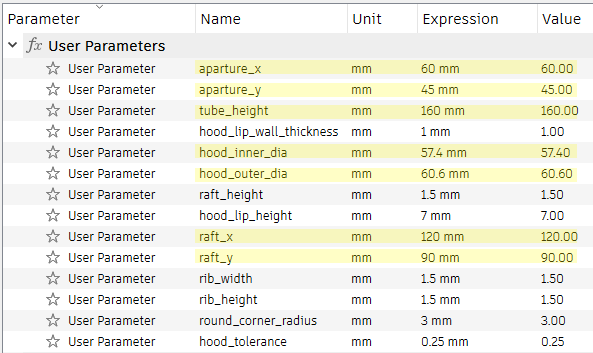
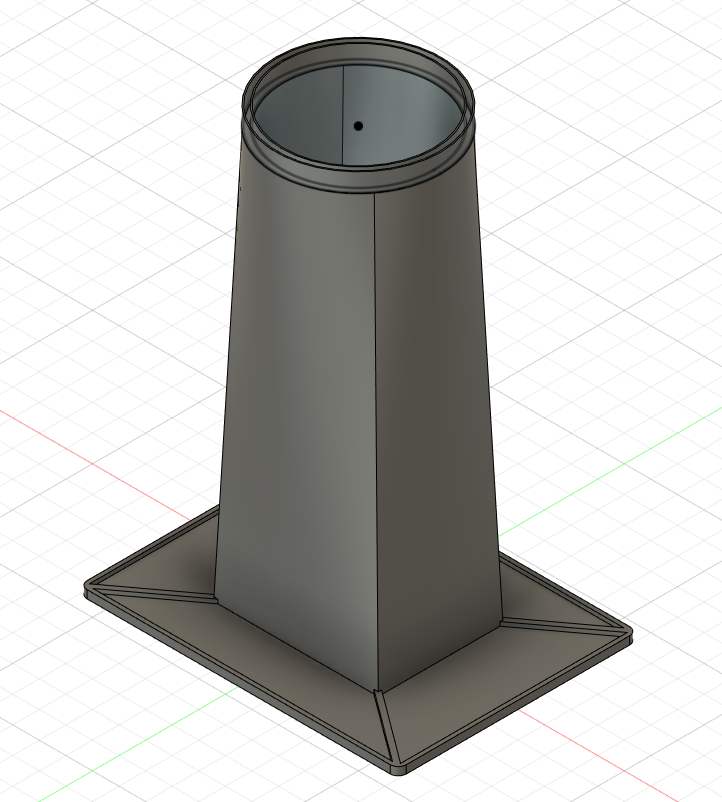
As you type in new values, the cone changes shape accordingly.
It is now much taller:
We can now 3D print the new cone!
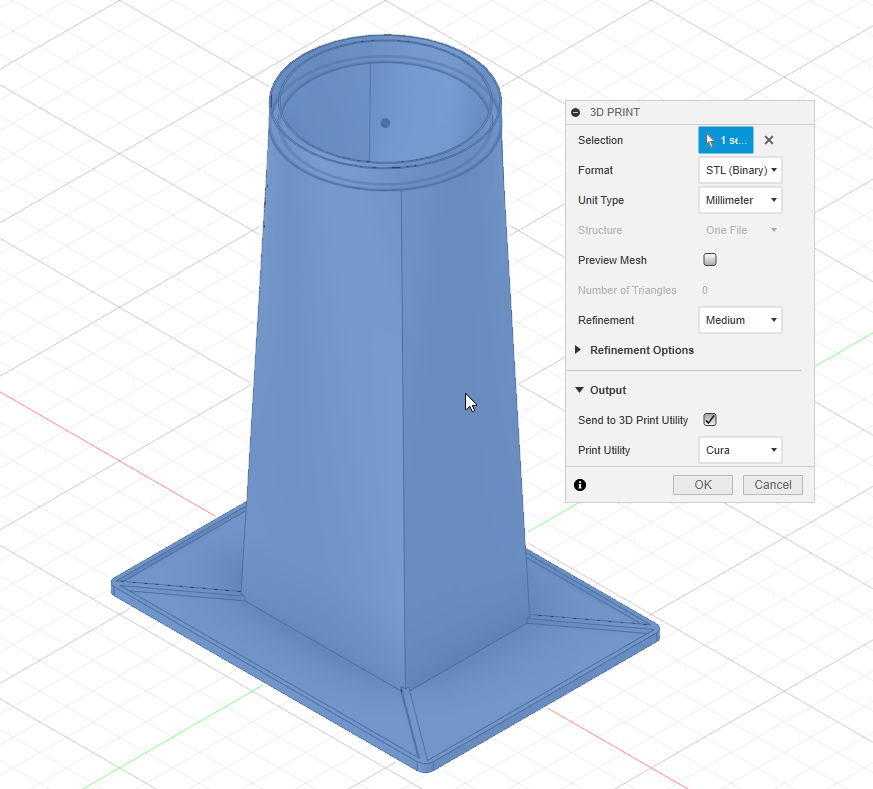
- File icon -> 3D Print
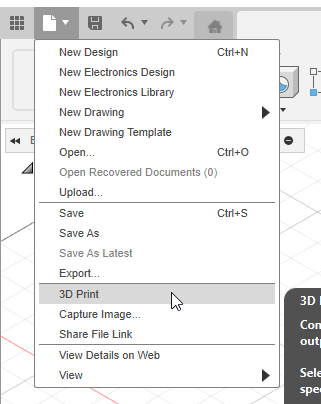
- Click on the 3D model
- Export STL file, or send directly to a slicer.
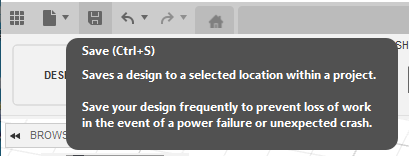
- Press
Saveicon to save the project as your own.
Now with the bespoke traffic cone model, head back to the main guide! (Printing the cone section)
License Note
The scanning cone design is under CC BY 4.0 License
You can:
- Share, modify, remix, and redistribute the material, even commercially.
- AS LONG AS you give appropriate credit to me (dekuNukem) and the project page.
The sample photos are NOT under CC BY 4.0 and are all rights reserved.