ATX4VC
ATX4VC: ATX Power on Retro Computers!
| Buy ATX4VC | Discord | User Manual | Table of Contents |
ATX4VC lets you use ATX power supply on vintage computers.
- Plug in ATX PSU on one end
- Get 12V, 5V, 3.3V, -12V, -5V out the other!
Features:
- All common voltage rails: +12V, +5V, +3.3V, -5V, -12V.
- Also
5V StandbyandPower-Good
- Also
- Tool-less Lever-Actuated Terminal Block
- USB-C and Auxiliary Power Output
- PC Fan Header
You can use ATX4VC to:
- Replace retro computer PSUs
- Test and diagnose vintage hardware
- As general-purpose multi-voltage bench PSU
Get ATX4VC
PicoRC
Also Check out PicoRC for device-specific and lower-cost PicoPSU adaptors.
Showcase
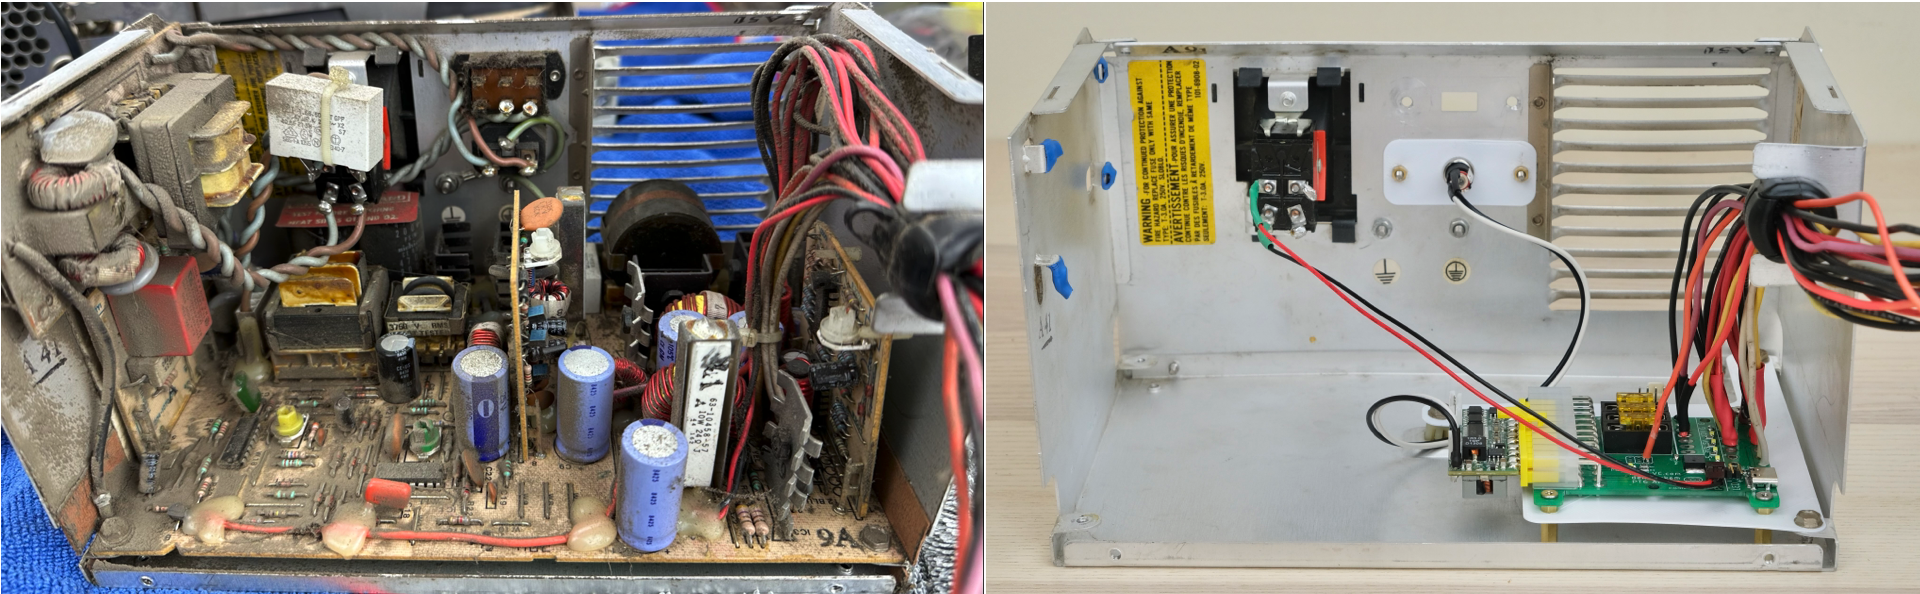
Here ATX4VC replaces the dead PSU in my IBM 5155 Portable PC, providing +12, +5, -12, and -5V.
Note the significant simplification and space/weight saving.
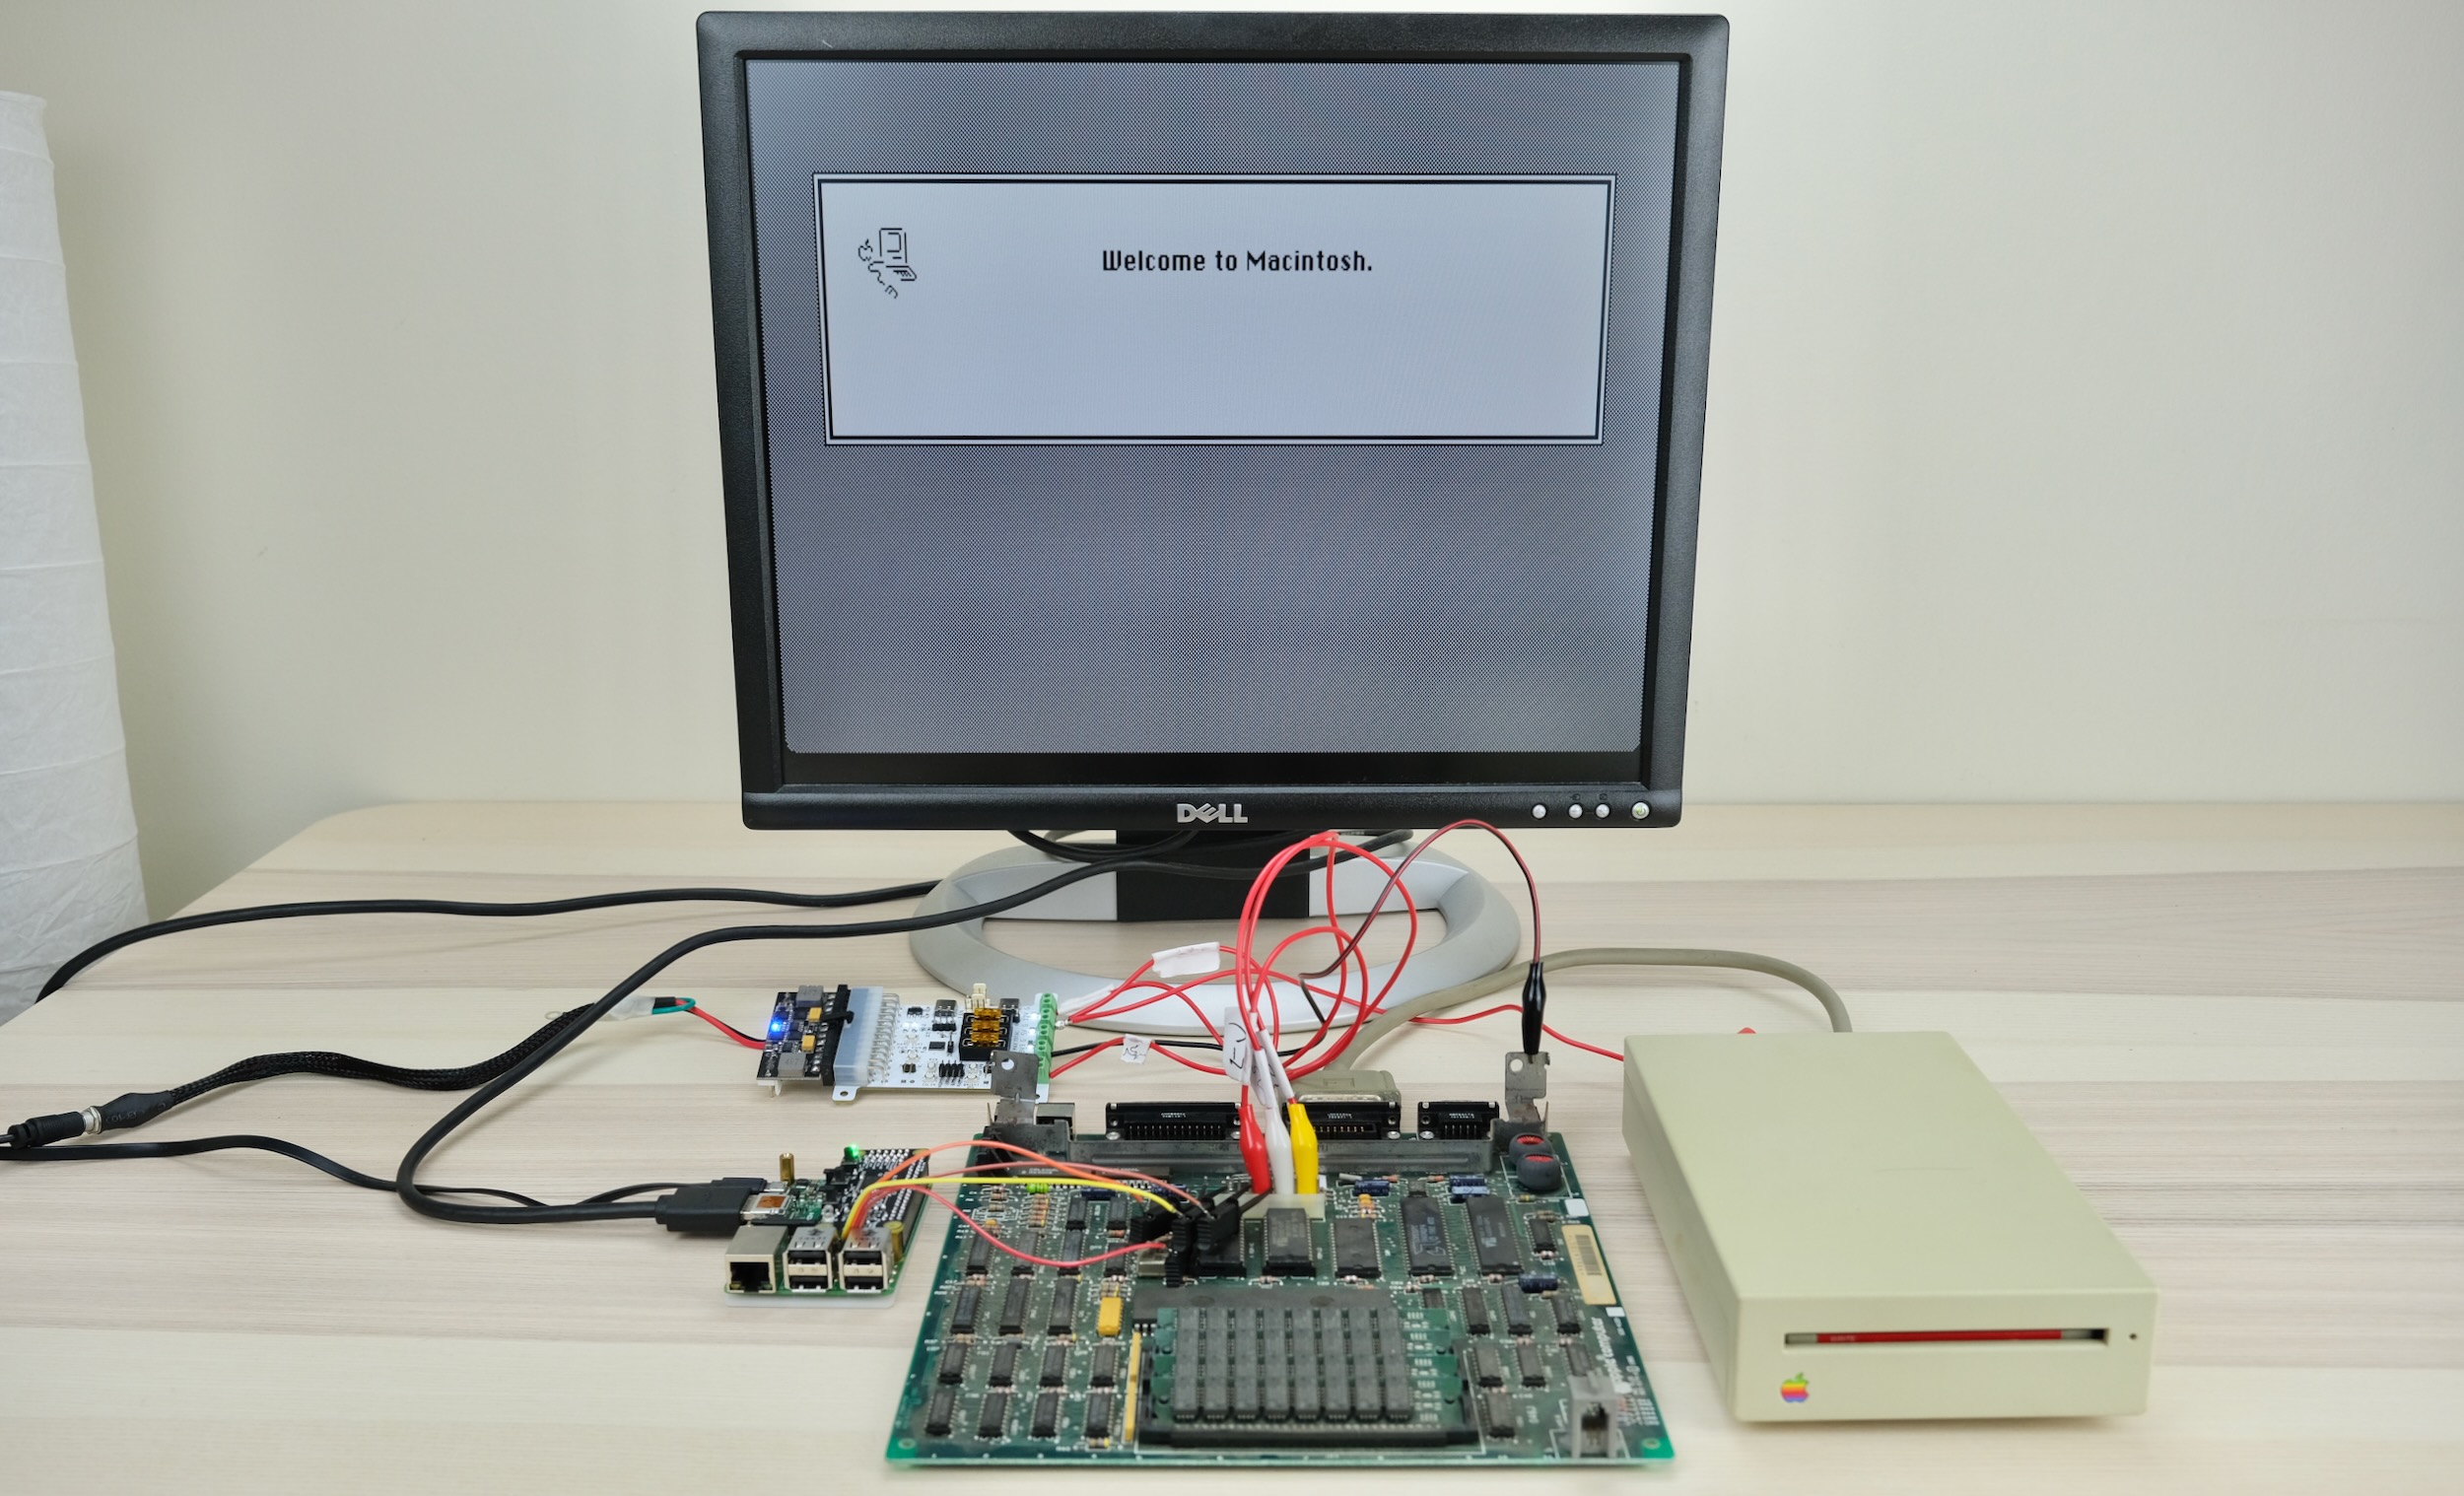
It also works as a multi-voltage bench PSU for testing and diagnostics.
Here it powers a Macintosh Plus motherboard with +12, +5, and -12V.
Why / Project Goals
Power supplies are a major failure point of old computers today.
Those early PSUs are heavy, inefficient, hot, and (slightly) explosive! After 40 odd years, many are not working, or worse might cause damage with out-of-spec voltages.
ATX4VC is designed to replace them with much more reliable modern ATX PSUs, and help test and diagnose vintage computers.
Table of Contents
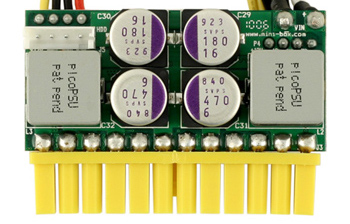
- Pico PSU
- Quick Start
- Power Button
- Power Connection
- Pre-flight Checks
- Current Limit
- Fuses
- Fan Headers
- USB-C Power Output
User Manual
ATX vs Pico PSU
ATX4VC works with any ATX PSU.
Although for permanent retrofitting, a PicoPSU is recommended due to its compact size.
- Official website and distributors
- The cheapest 80W one should be plenty for most
- The 160W variant is recommended if using many expansion cards and/or spinning hard drive
- Avoid generic clones
- They over-rate and are of low quality
- A power brick with 12V DC and center positive 5.5x2.5mm barrel jack is also needed.
- They are very popular and you might already have one
- Make sure it has enough wattage
Quick Start
- Plug in ATX connector
- Plug in Power Button (left two pins)
Press the button. PSU should turn on, voltage rail LEDs should light up.
That’s the gist of it! Please do keep reading for more info.
Power Button and LED
The power button should be latching type (aka NOT momentary).
You can also hook up a Power LED (right two pins, note polarity, resistor NOT needed).
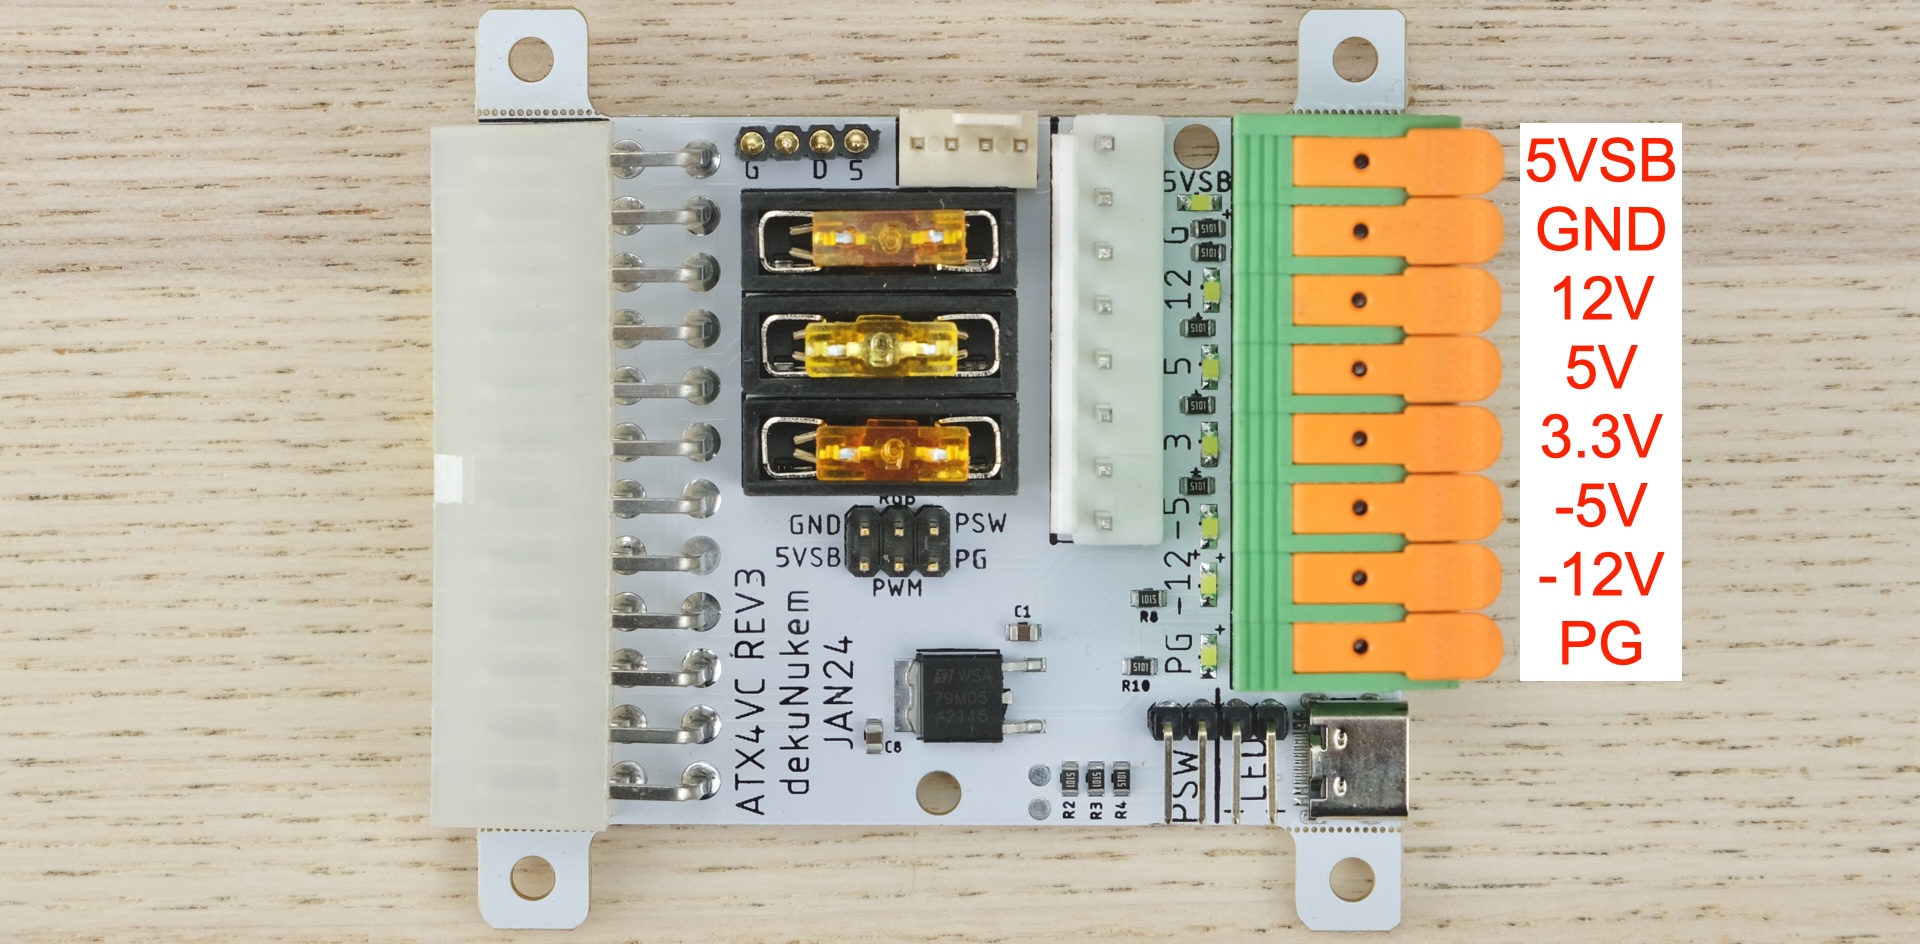
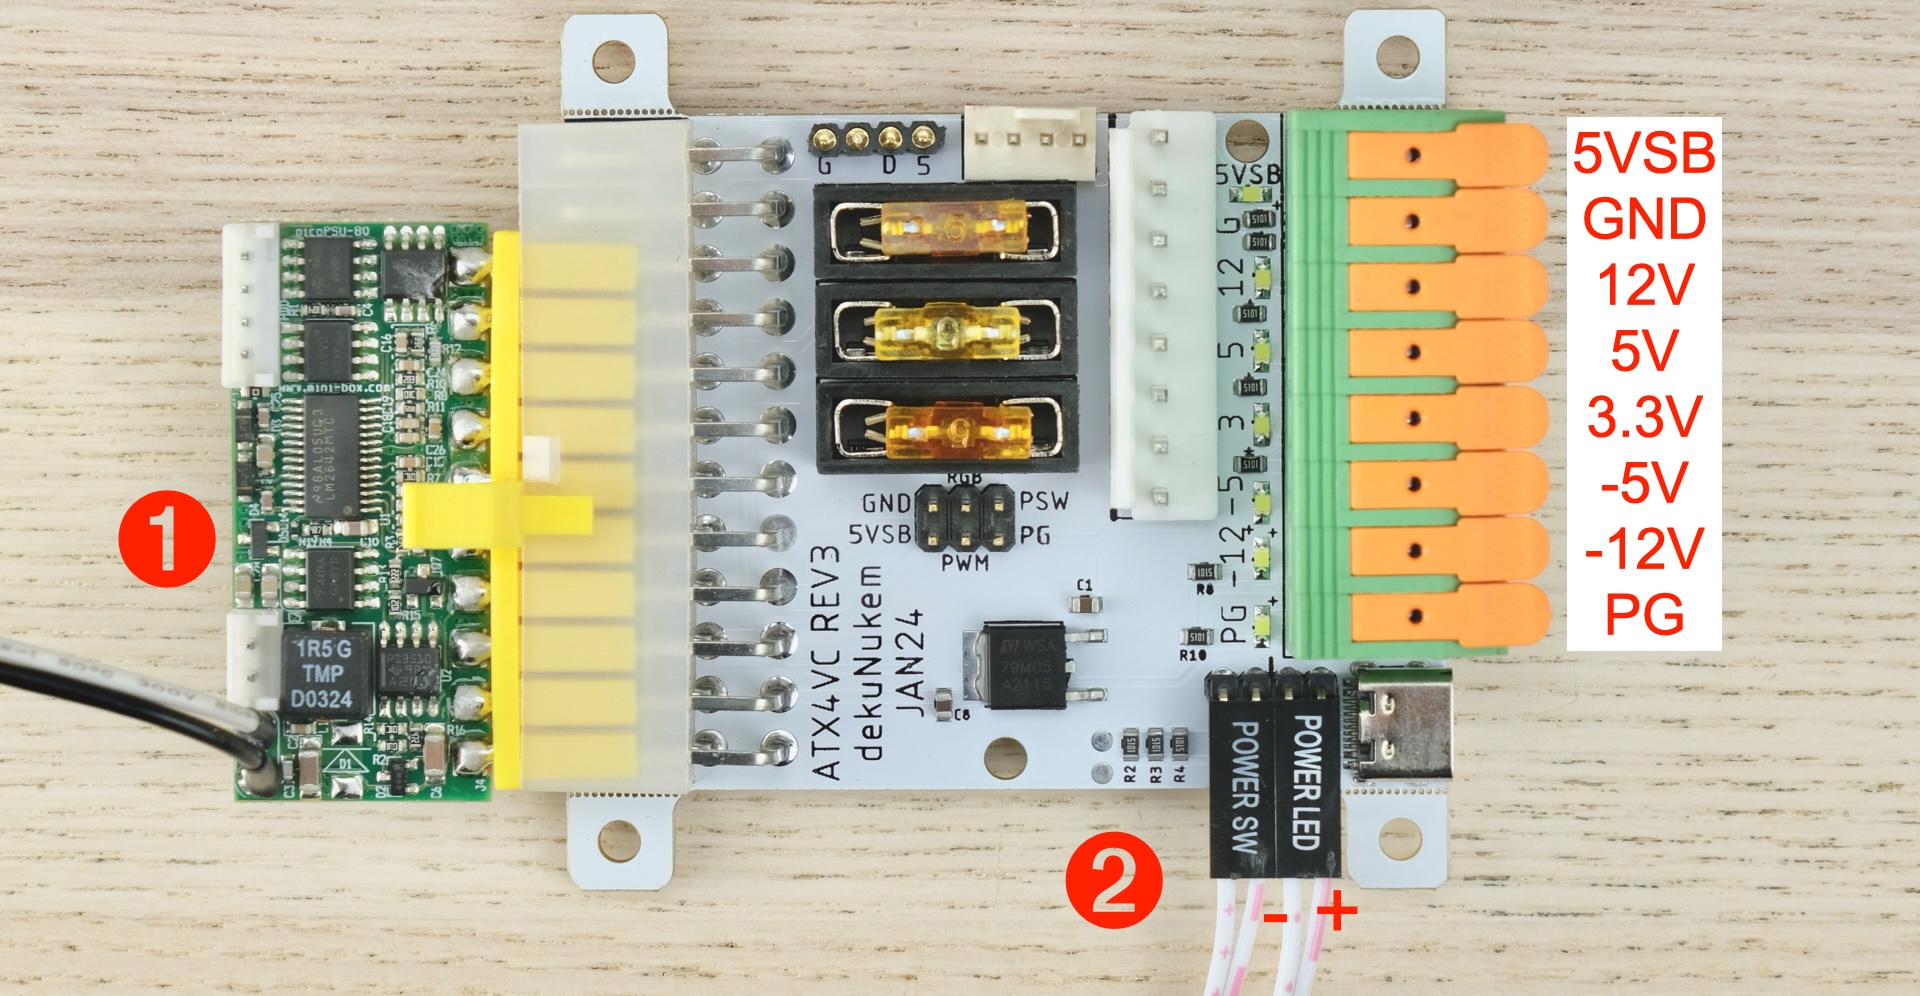
Power Connection
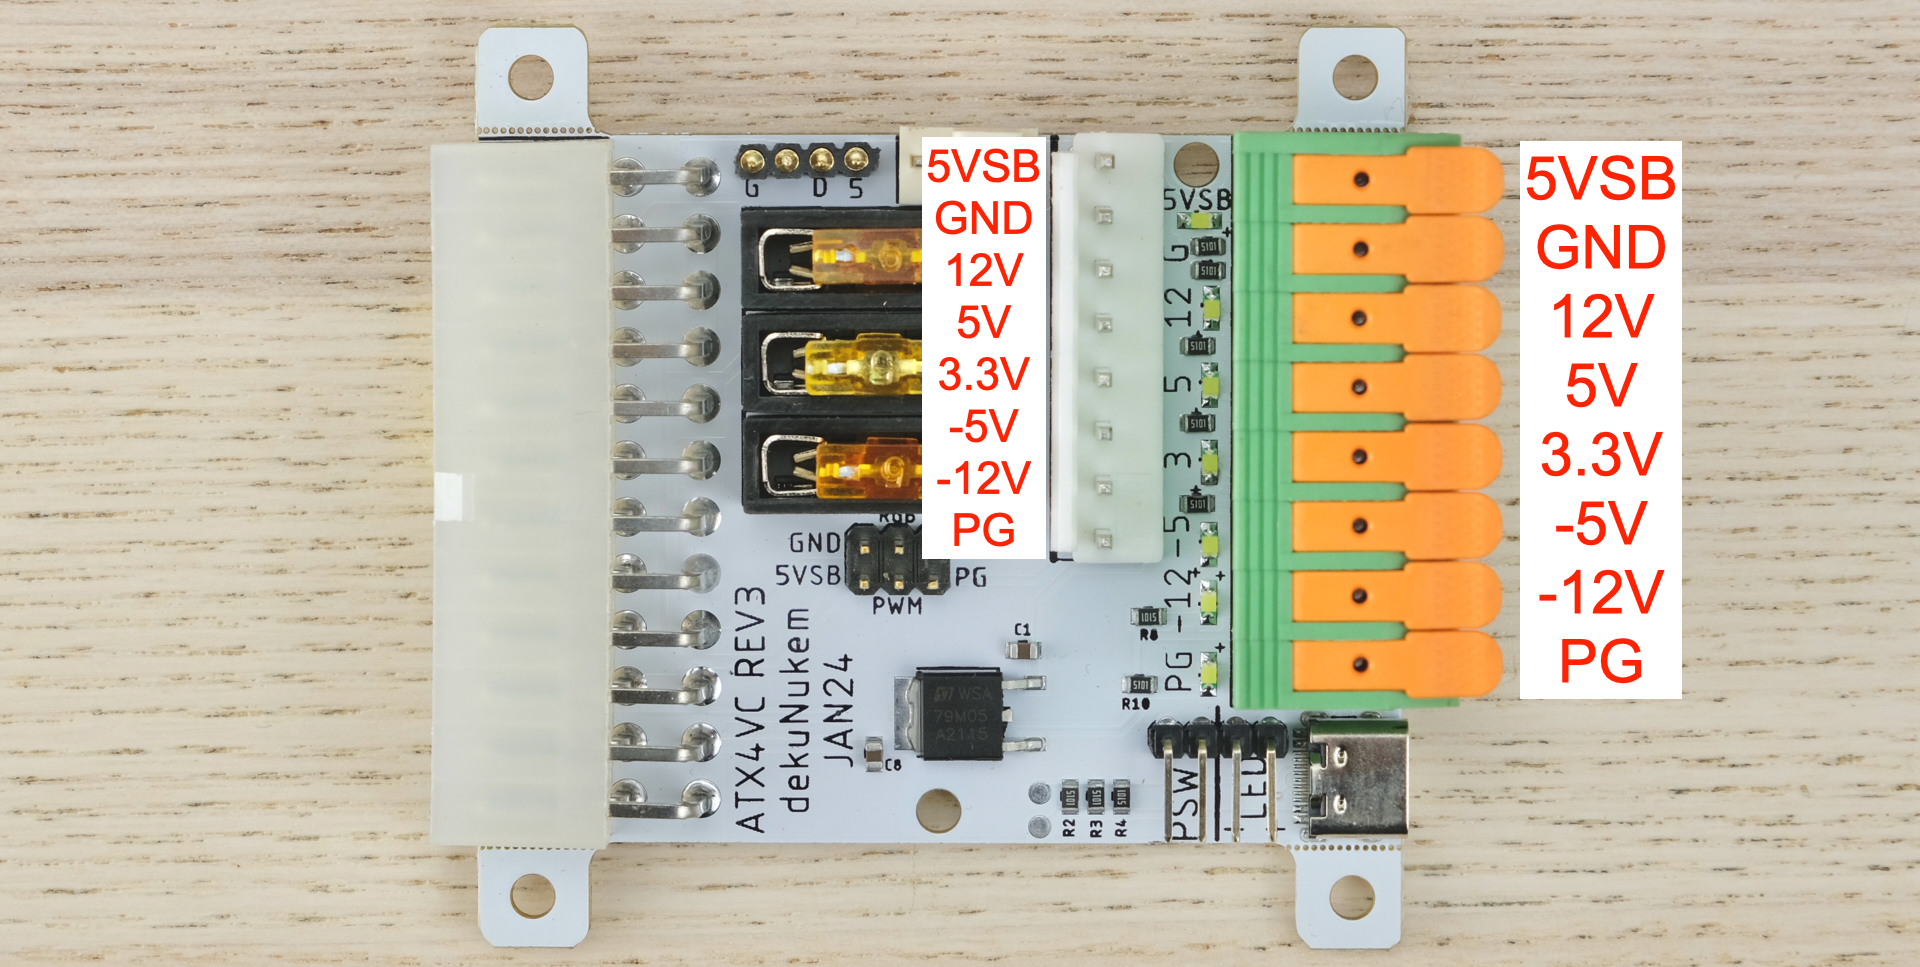
- Pinout is the same on terminal block and auxiliary connector.
- For aux output harness, use 8P VH 3.96 female connector.
- 5VSB = 5V Standby
- Available even when PSU is off
- Power Good Signal
- 5V when all rails are stable
- 0V otherwise
To connect a wire:
- Strip the insulation about 12mm / 0.5in.
- Lift handle, insert, push back down.
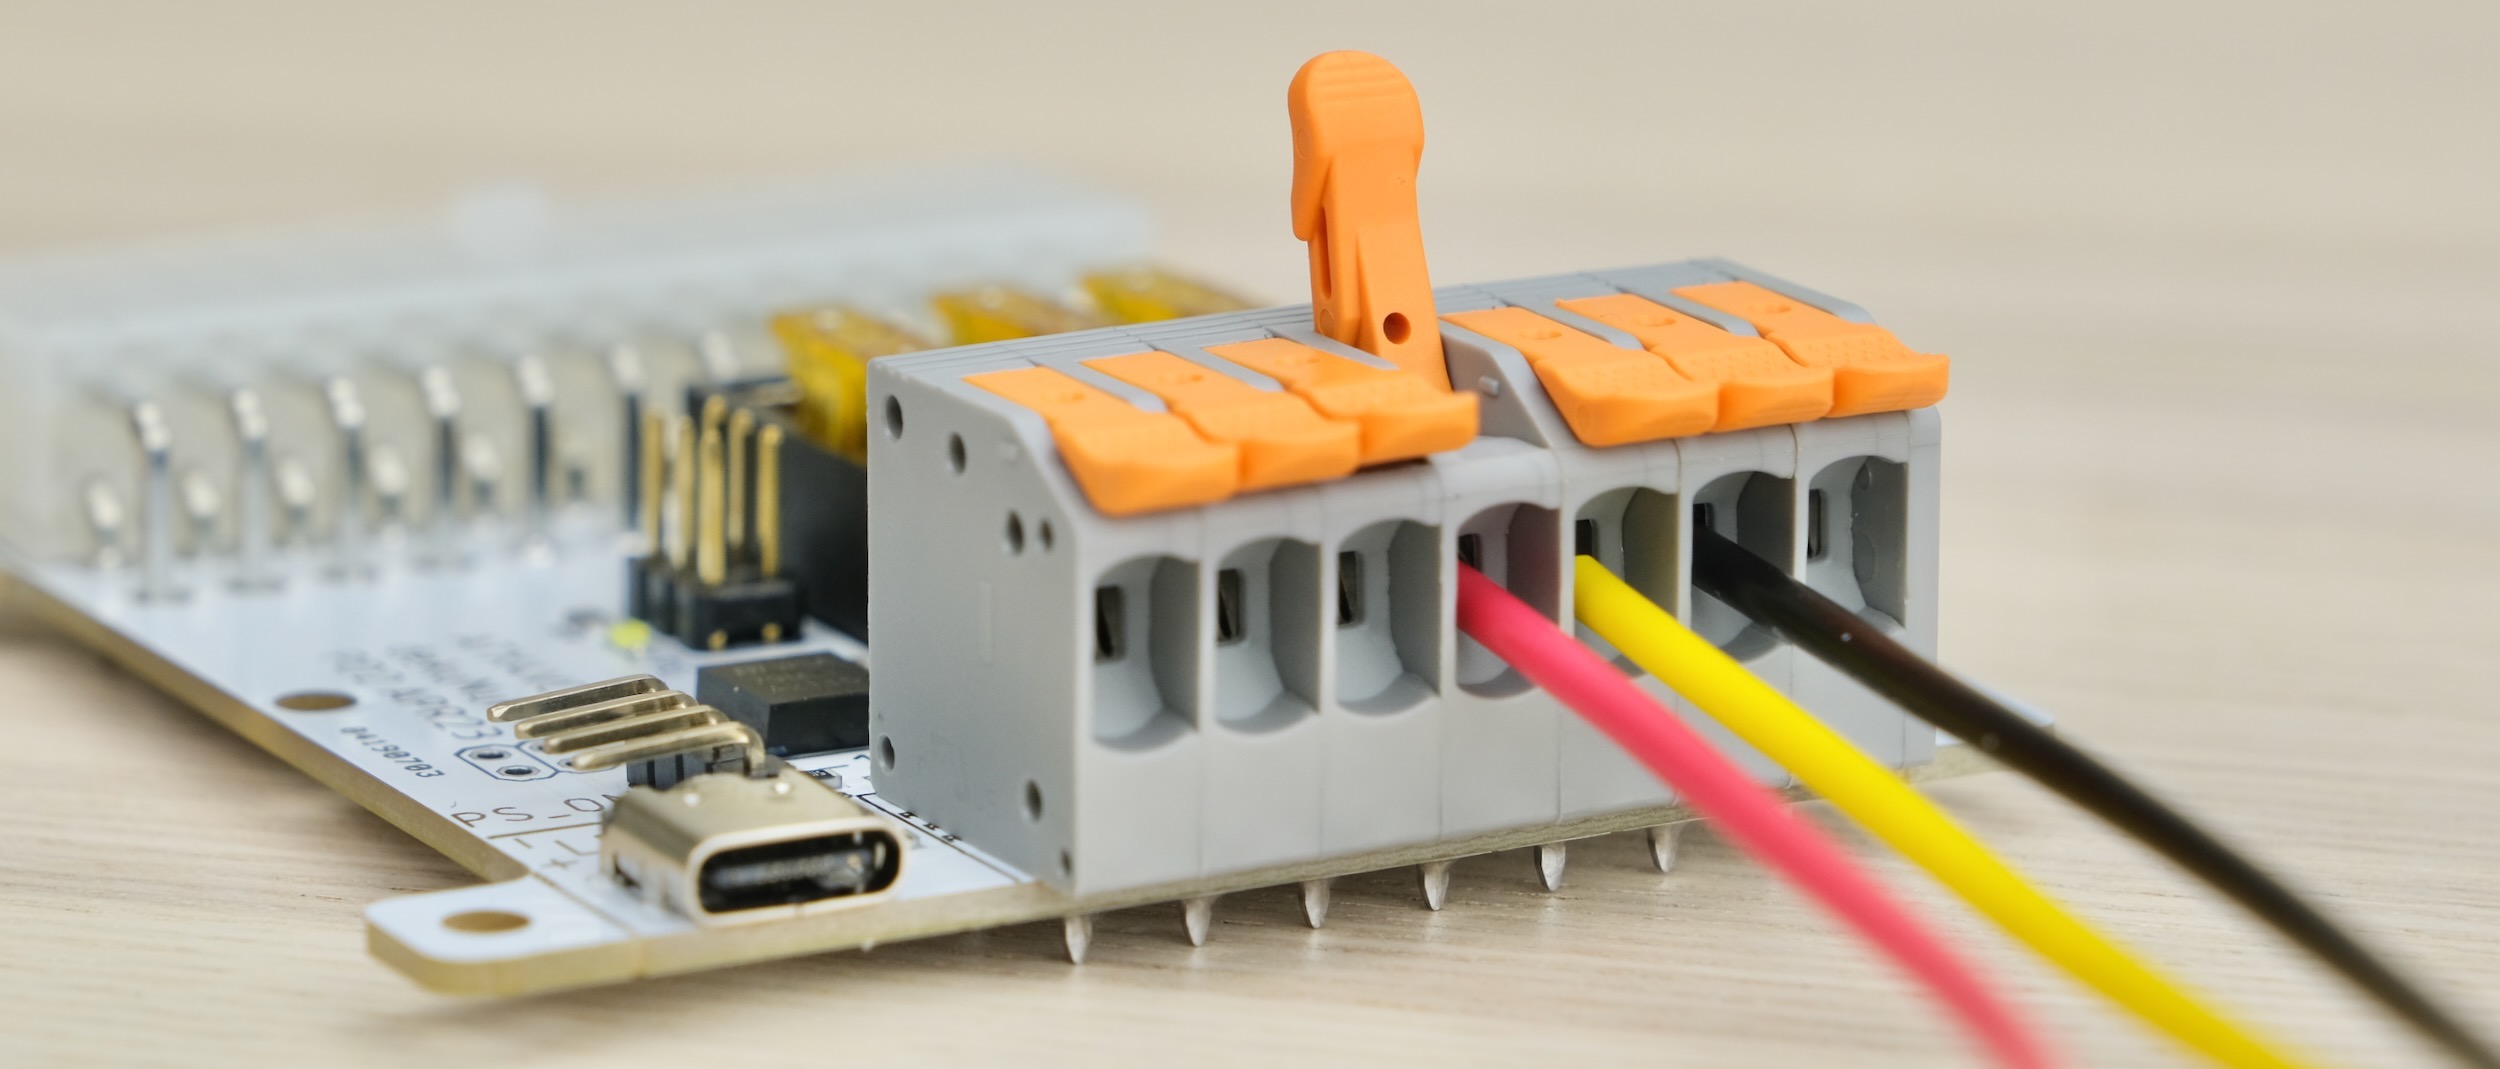
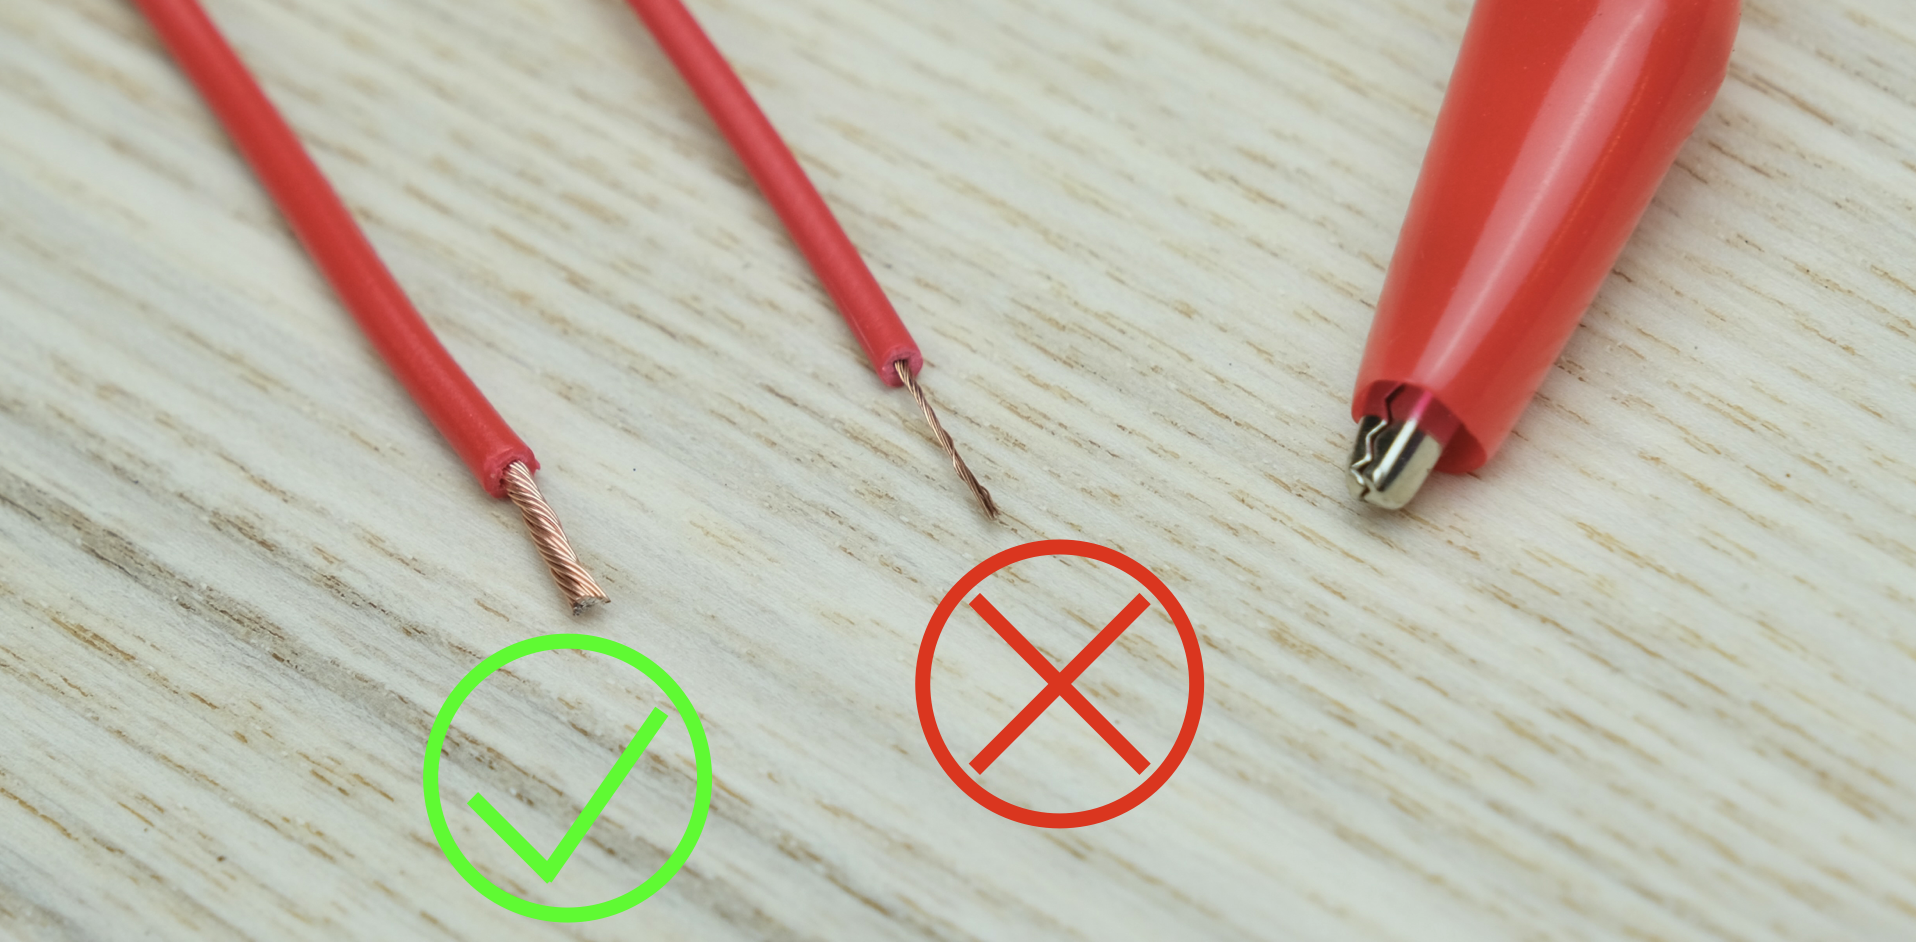
Also, make sure the conductor is thick enough!
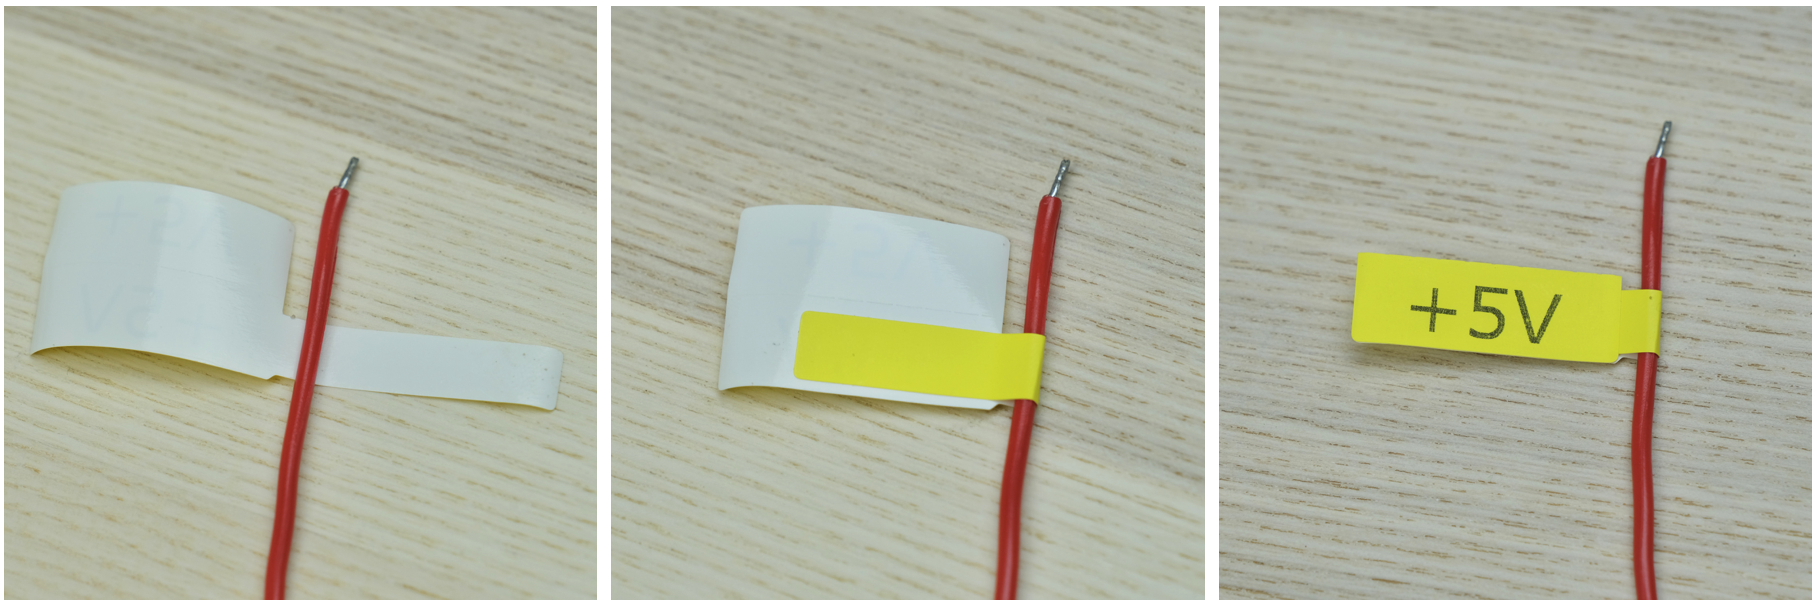
Label the rails, vinyl stickers are available on the product page:
Pre-flight Checks
Before powering up:
- Double check the correct voltage terminal is used
- Check for dead shorts between each voltage rail and GND, and between themselves!
Once powered up:
- Check voltage readings on each rail
Remember that ATX4VC DOES NOT monitor or condition PSU voltage outputs, ensure the PSU itself is of good quality and trustworthy!
Current Limit
5 AMPS MAXOVER ANY SINGLE RAIL7 AMPS MAXTOTAL CURRENT OVER ALL RAILS
If more is needed, tap the power directly from a Molex connector.
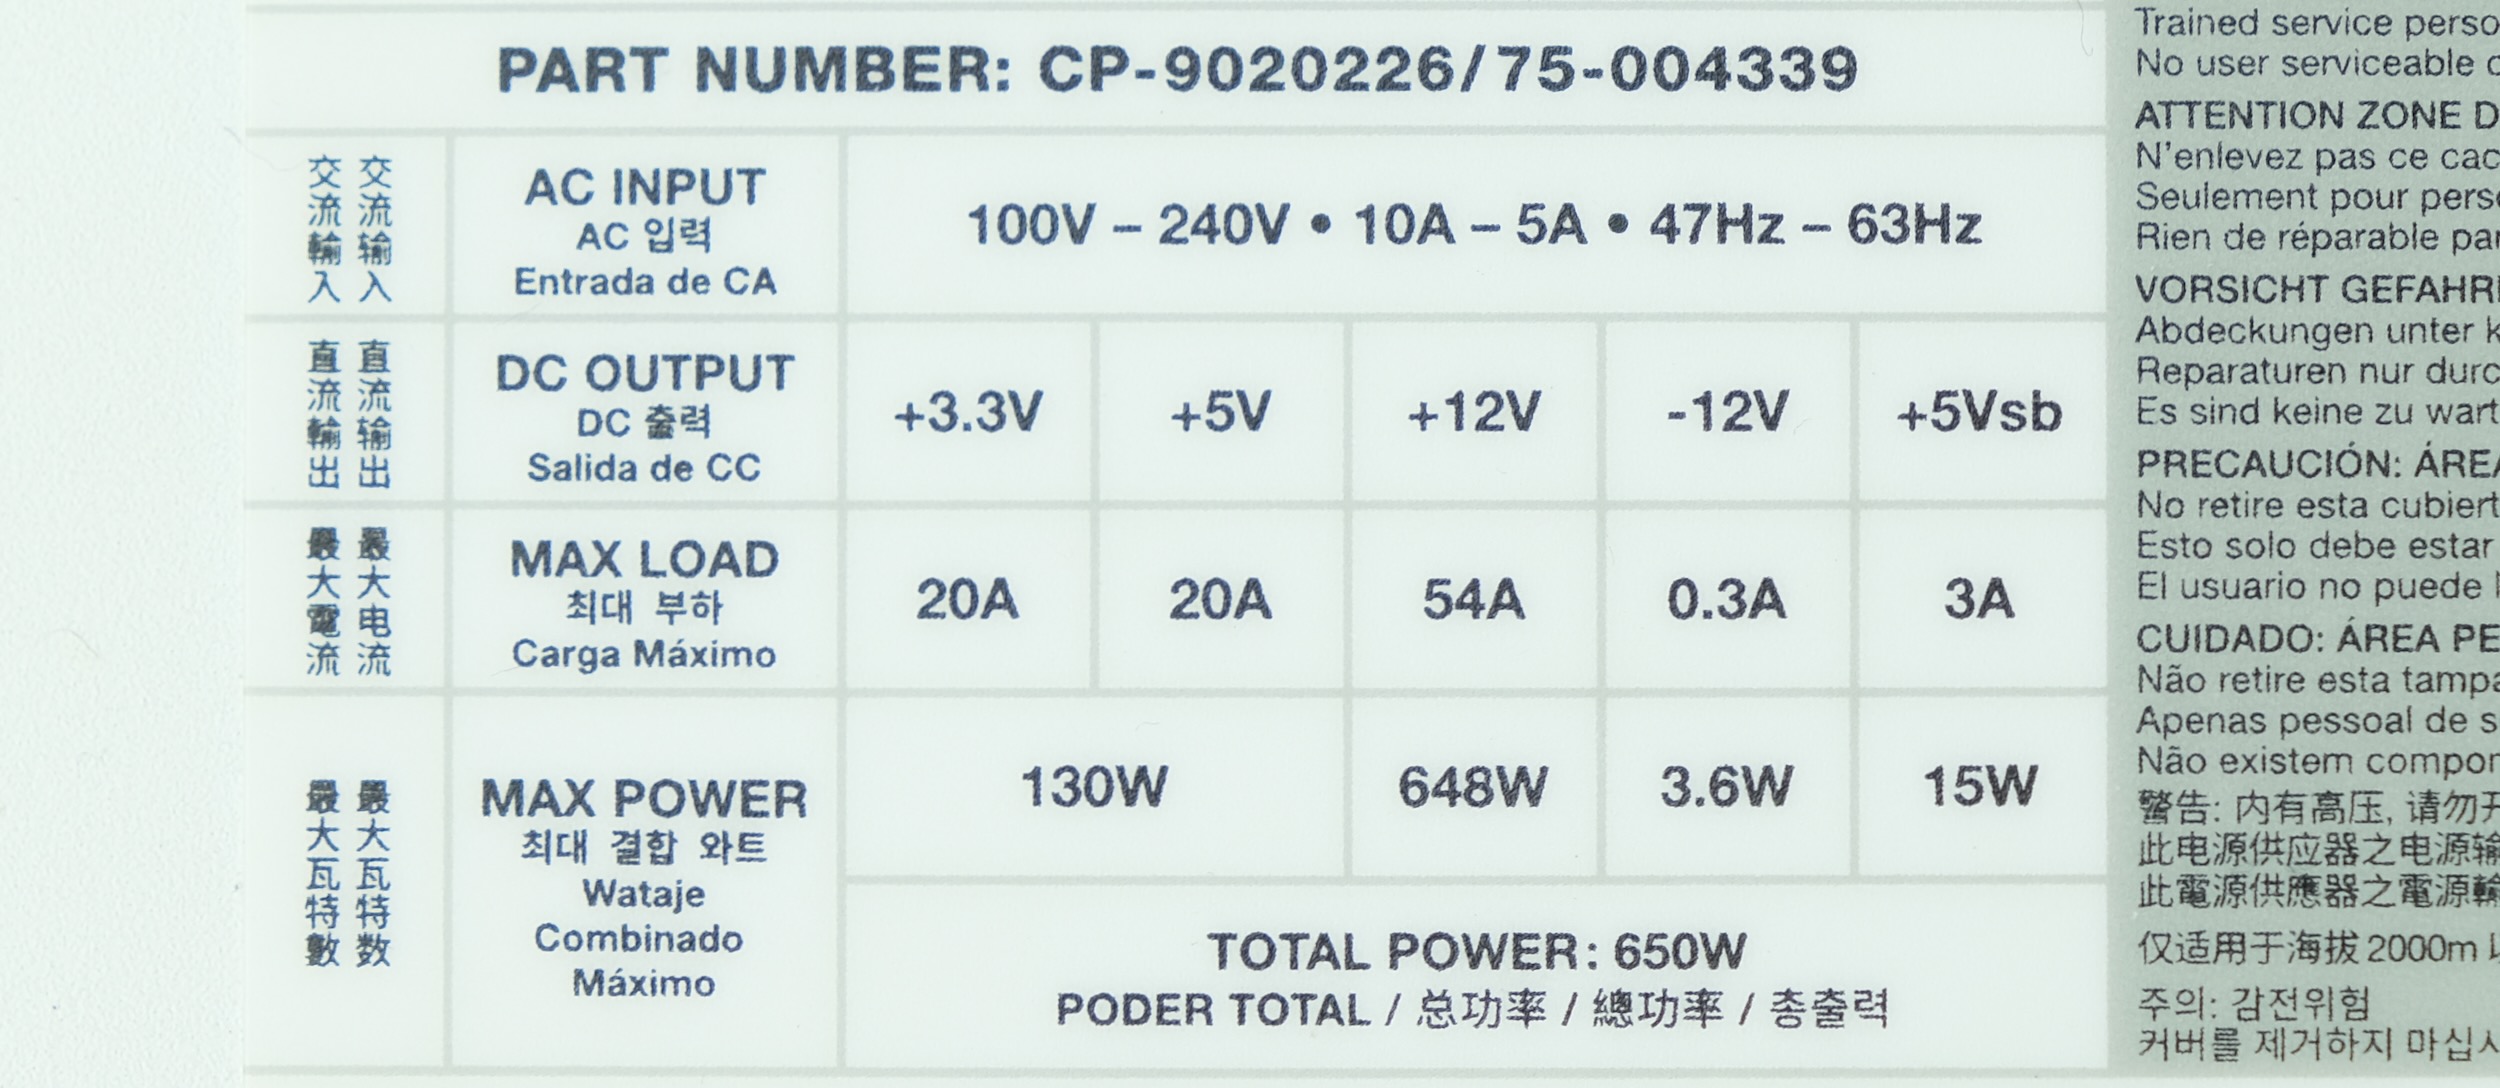
See your PSU label or datasheet to see how much current it can provide:
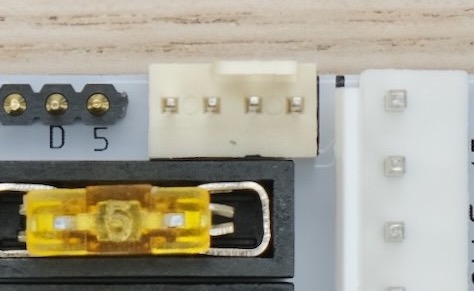
Fuses
- USE FUSES RATED 5A OR LESS
- DO NOT BYPASS FUSES
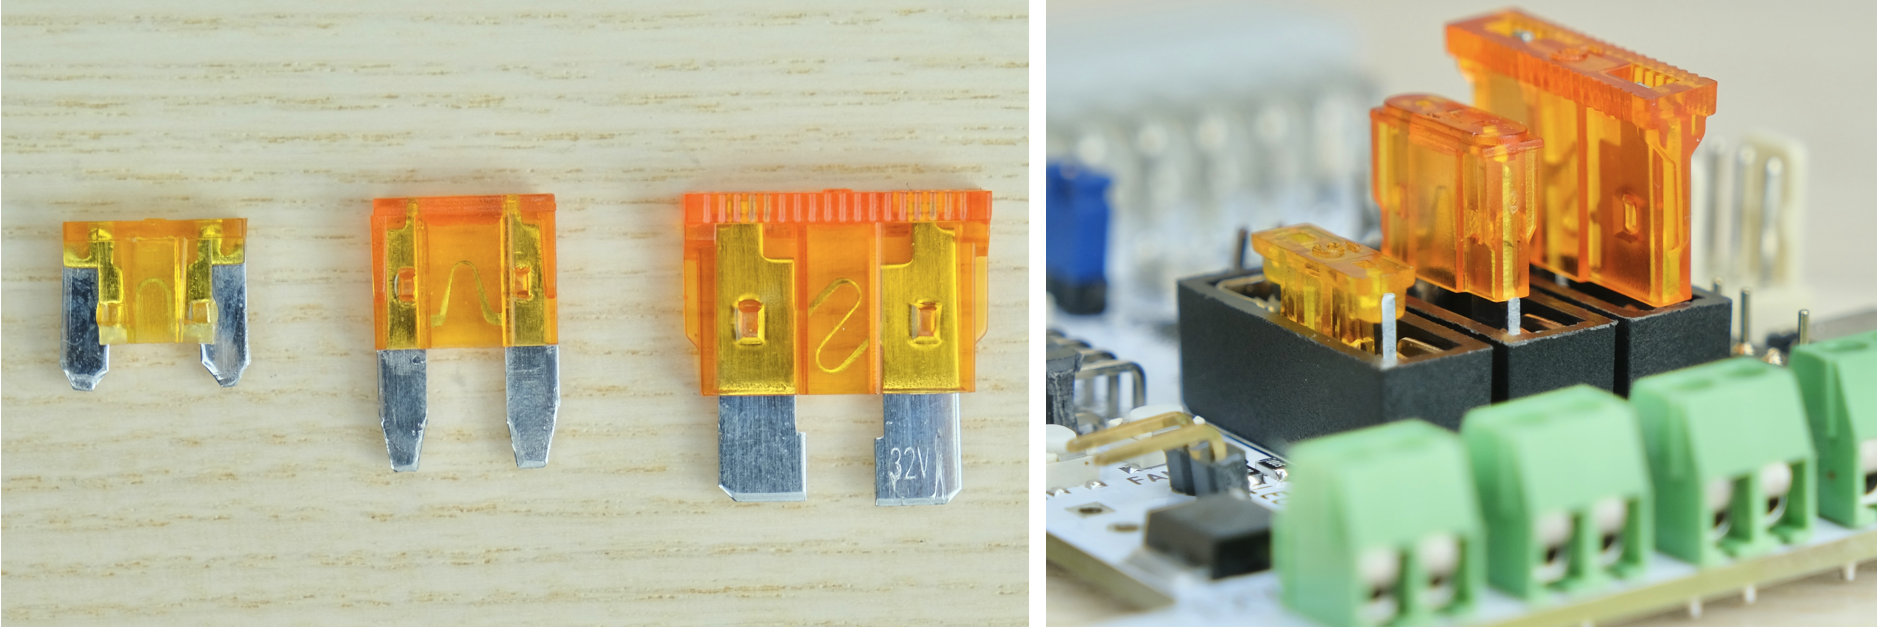
ATX4VC uses common automotive fuses.
Regular, Mini, and Low-profile Mini all work.
Simply push into the holder.
Fan Headers
A PC Fan header is available. You can plug in any standard 12V PC fan, both 3-Pin and 4-Pin.
By default it will run at full speed.
PWM speed control and temperature probe is supported on optional MCU daughterboard.
USB-C Power Output
USB-C connectors are available for powering external devices.
The port on ATX4VC itself is on regular 5V rail.
The port on MCU daughterboard is on 5V standby. Lower current but always available.
Those ports are output only, don’t try to backfeed with another powered device.

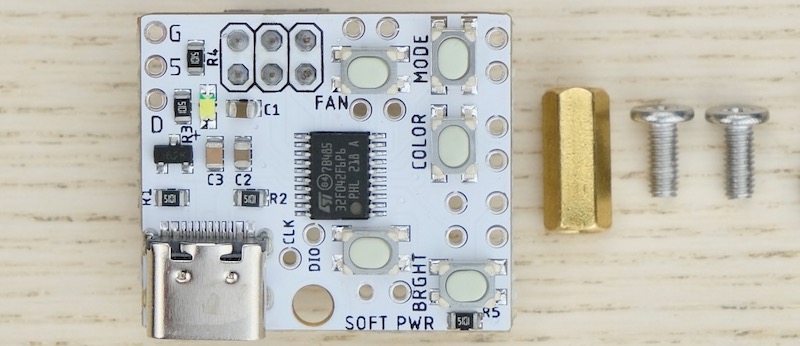
MCU Daughterboard
The optional MCU daughterboard adds many new features:
- Soft power with momentary buttons
- Addressable RGB (ARGB) lighting. Adjustable brightness, animation, and color.
- DS18B20 Temperature Probe support
- PWM fan speed control
- 5V Standby USB-C power output
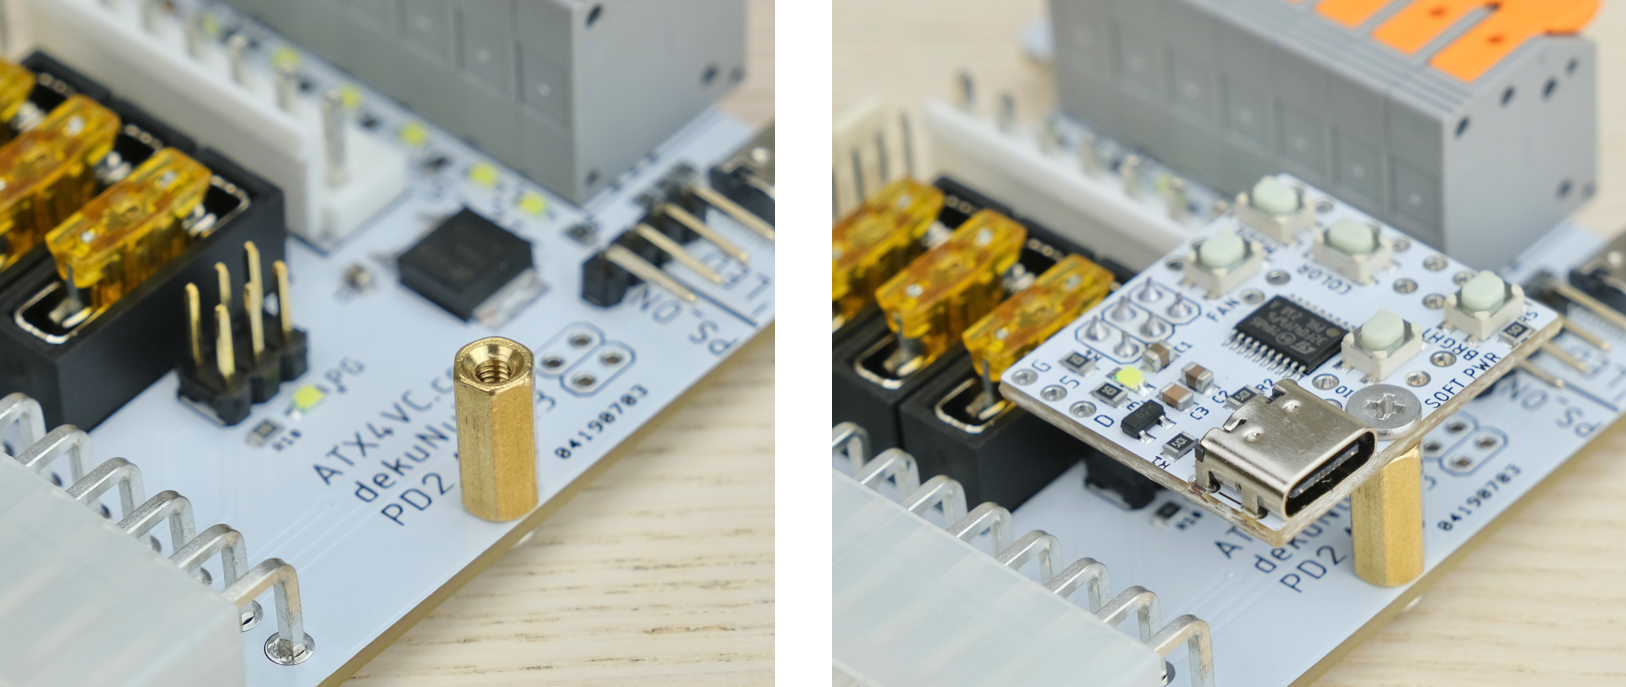
Installation
The MCU board should come with two screws and a standoff:
- Put one screw from bottom side
- Install and tighten the standoff
- Plug in the MCU board
- Secure it in place with the other screw
Soft Power
Press the soft power button to turn on, press again to turn off.
You can also solder a header for an external button.

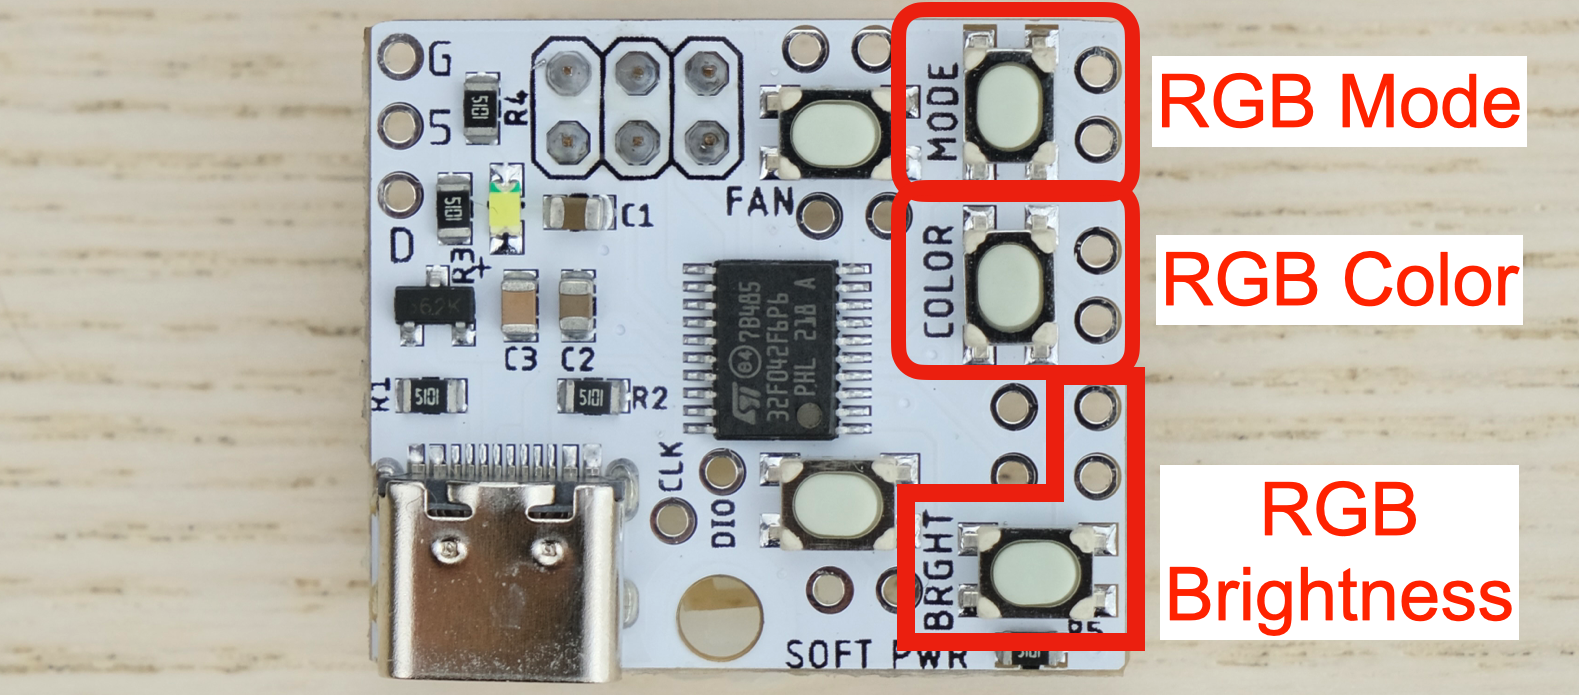
ARGB animation
Plug device into the ARGB header.
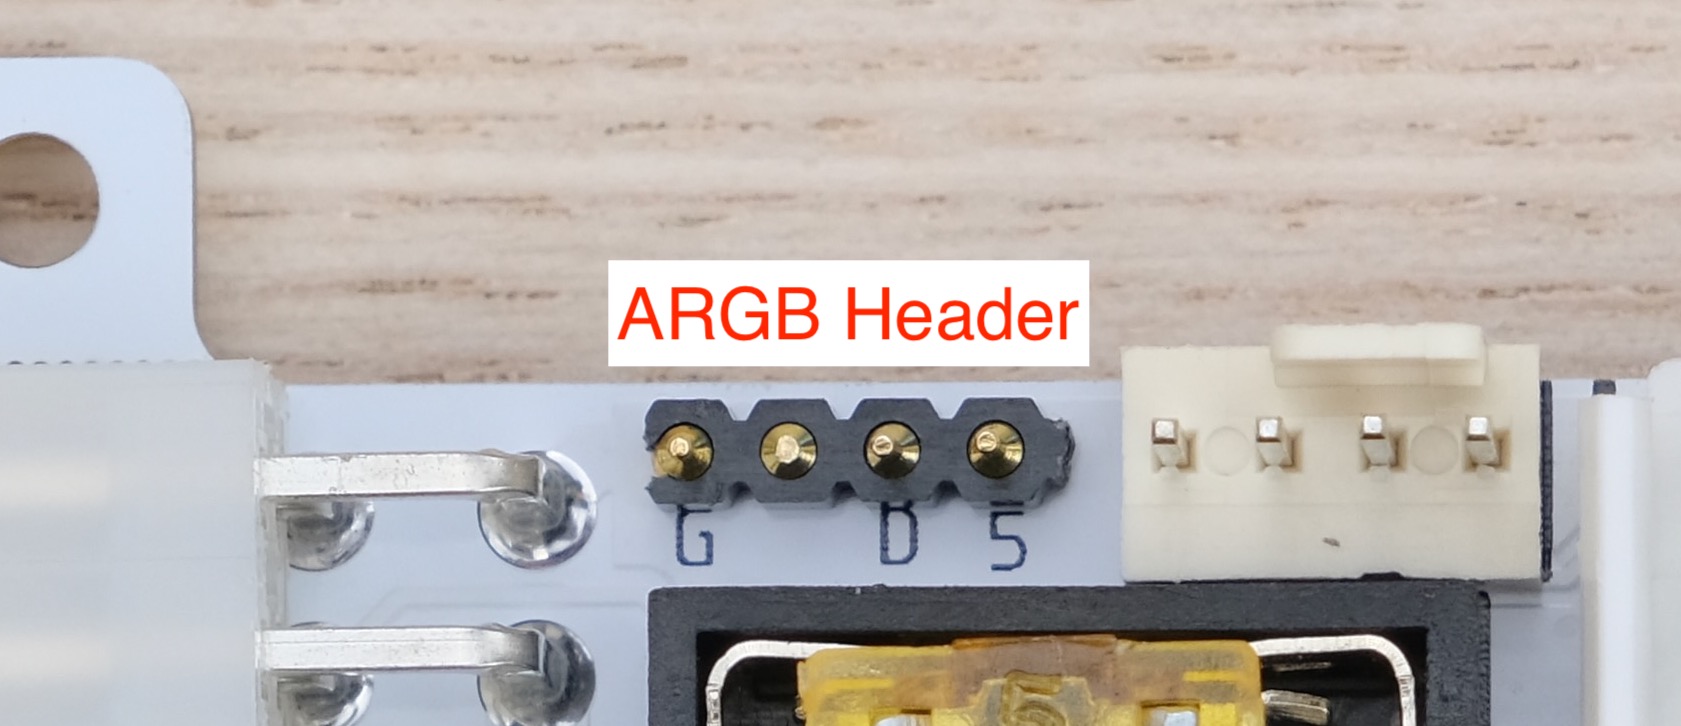
Use RGB Mode, Color, and Brightness button to adjust settings. Headers are available for external buttons.
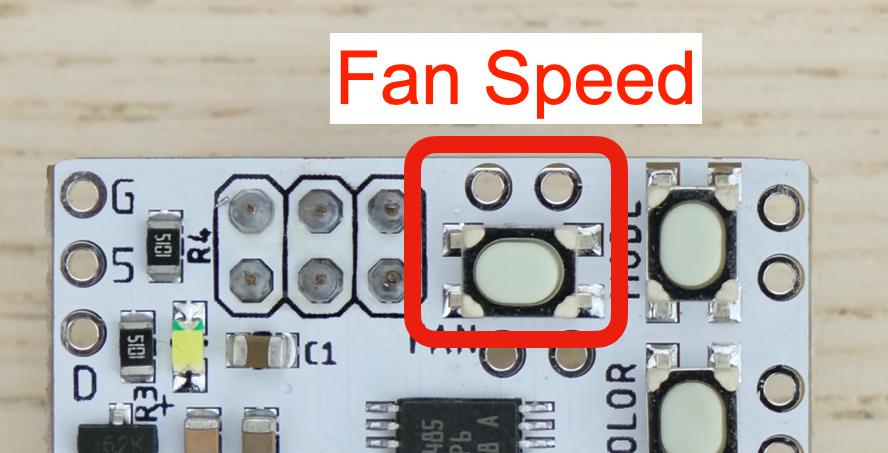
Fan Speed
Press FAN SPD button to cycle through different speeds:
Temperature Probe
ATX4VC supports the DS18B20 temperature sensor. They are inexpensive and very popular in Arduino projects.
The cheap ones are almost certainly counterfeits! They’ll still work, but readings are noisier and less accurate.
Try a reputable distributor like Sparkfun, Adafruit, Mouser, or Digikey.
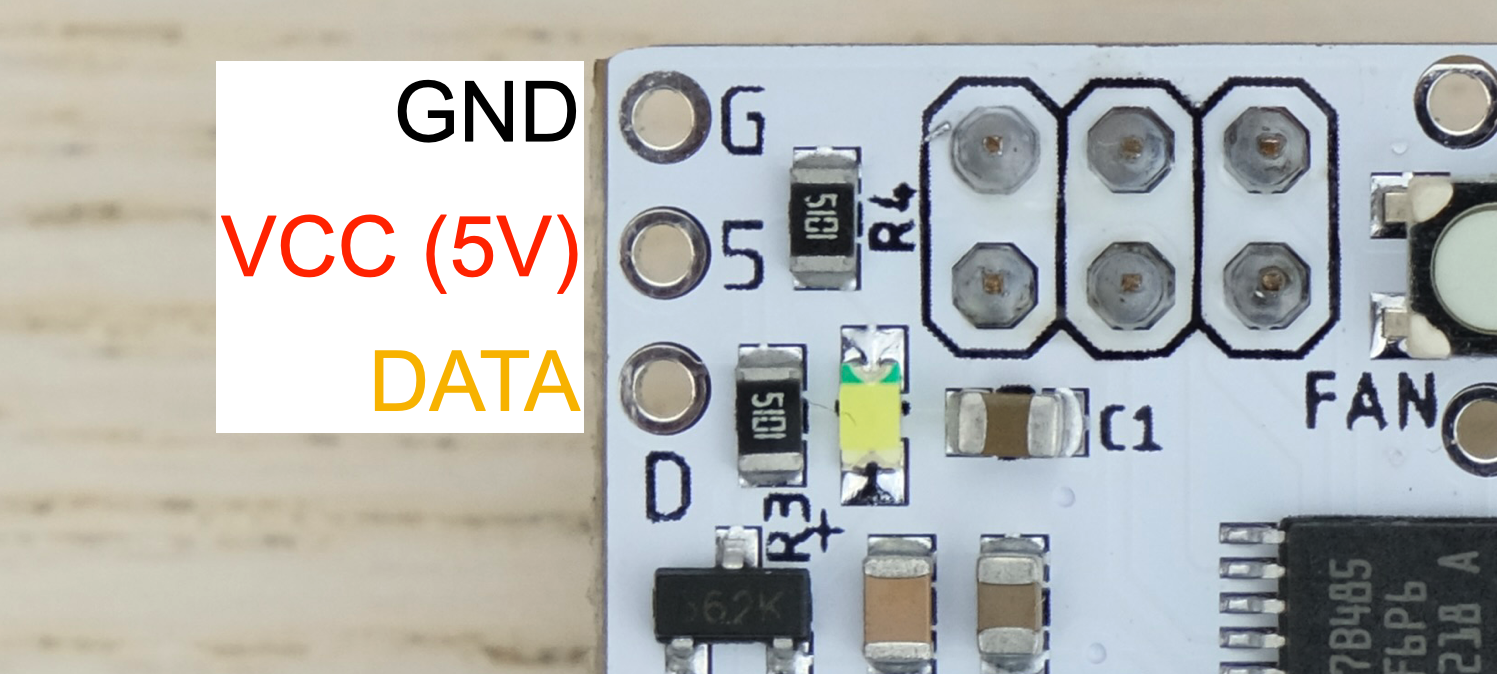
Connect the headers. Usually VCC is red, GND is black, DATA is yellow.
Press FAN SPD button until the user LED slowly blinks 5 times. Now fan speed will depend on the temperature reading.
The fan starts to speed up at 25°C, and reaches full speed at 50°C. If probe is not detected, it will run at full speed.
You can use a heat gun and air duster to test it.
Questions or Comments?
Feel free to ask in official Discord Chatroom, raise a Github issue, or email dekunukem gmail.com!