USB4VC
Getting Started with USB4VC
| Get USB4VC | Official Discord | Table of Contents |
Thank you very much for getting USB4VC! Here is a short guide on getting started.
Pick a Raspberry Pi
-
USB4VC is designed for Raspberry Pi 1/2/3/4/5.
-
Any RPi with a 40-pin header should work, although Model B/B+ is preferred.
-
No need to get the latest model, even the earliest RPi B+ is plenty fast enough.

Prepare SD card
You need a Micro SD card at least 4GB in size. A fast card will reduce boot time.
Download the latest boot image here, use 7zip to unzip.
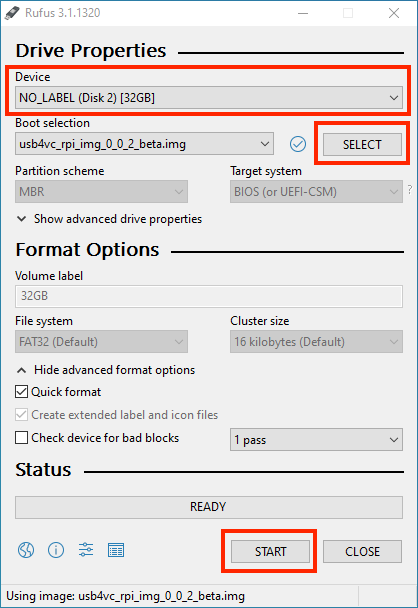
Burn the image to your SD card. I use Rufus, which is free and open-source. Etcher is another cross-platform option.
Select your SD card, then the image file, then press START to begin writing.
(Optional) Set up WiFi
After burning the SD card, go to the drive named boot, and open up wpa_supplicant.conf with a proper text editor:
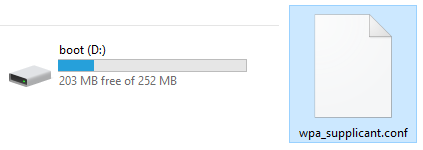
If the file doesn’t exist, download a new one, unzip, put it under boot, and continue.
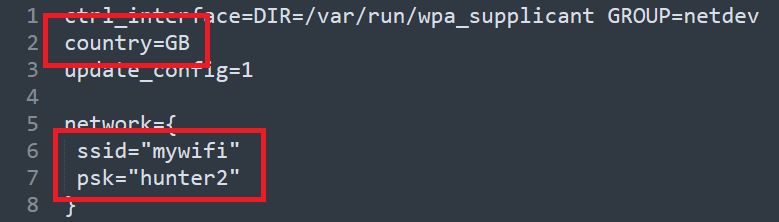
Edit the file with your WiFi information. You can find your WiFi country code here.
Kit Assembly
Insert the SD card in your Raspberry Pi. Then See this guide to put everything together.
Power Considerations
A high-quality power supply is very important! It should provide 5 Volts and at least 2 amps of current.
An inadequate supply can result in failure to boot, unstable operation, glitches, and SD card corruption.
Check the cable too! Cheap ones tends to have unreliable connections and large voltage drops.
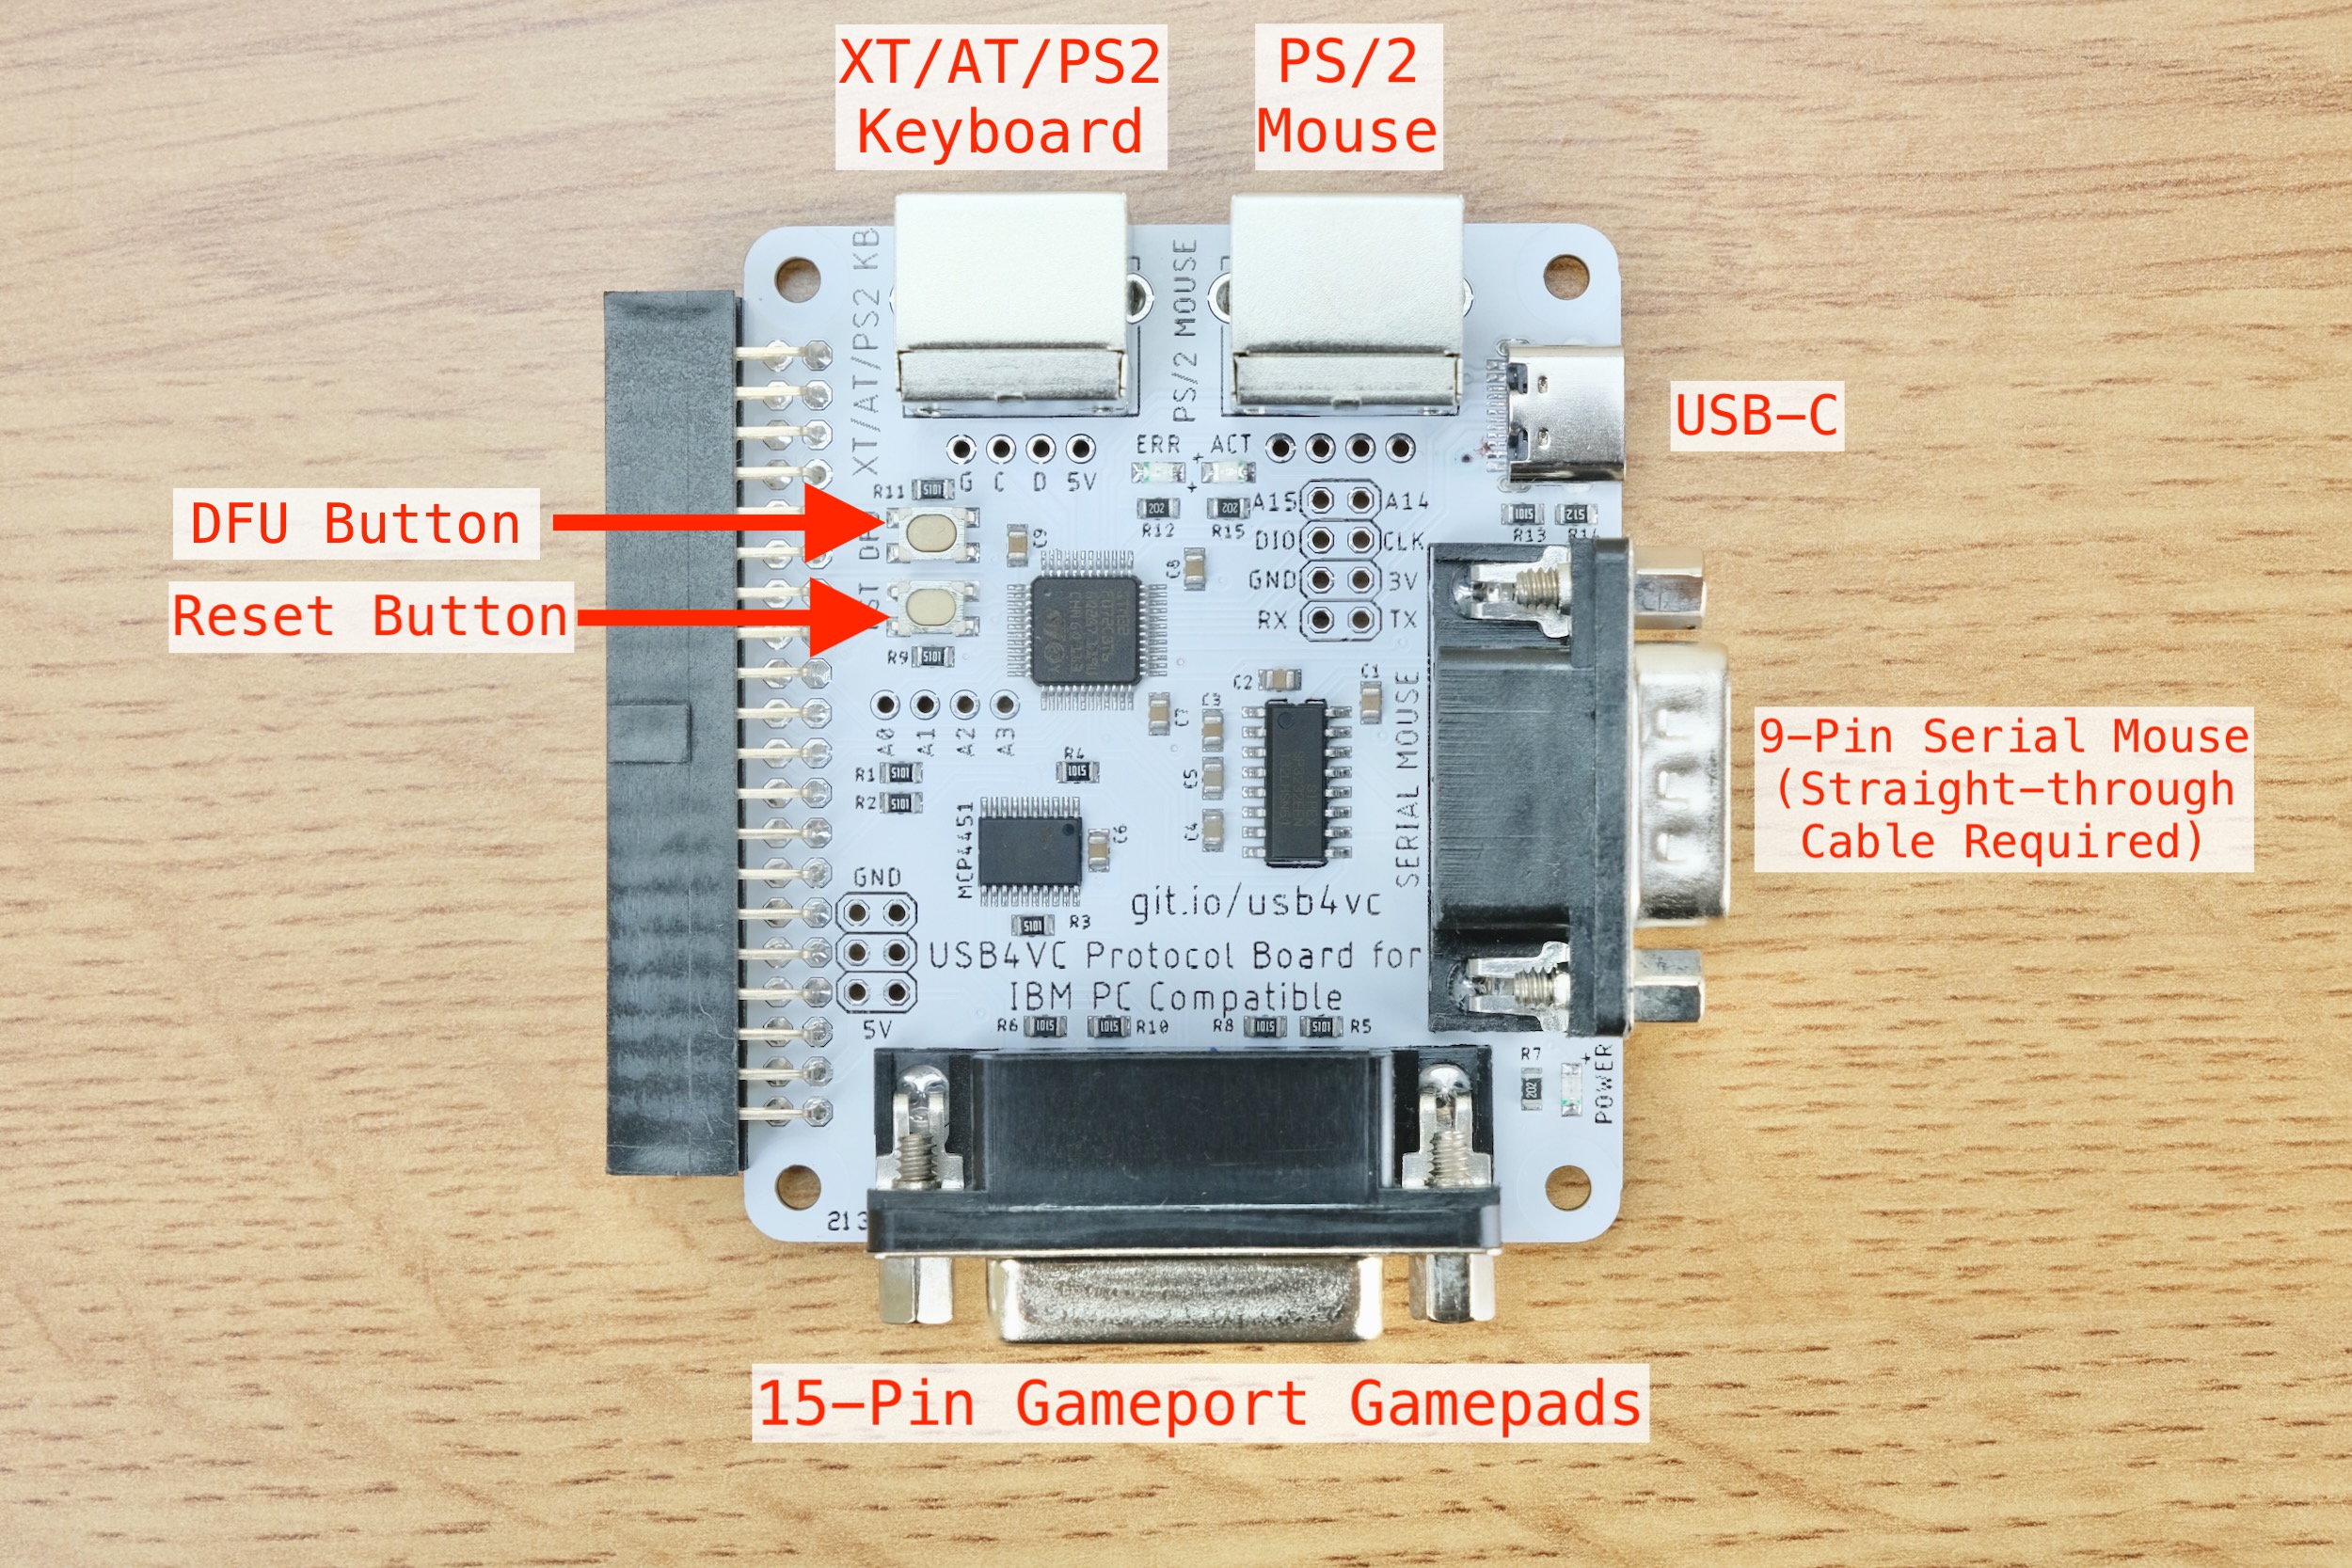
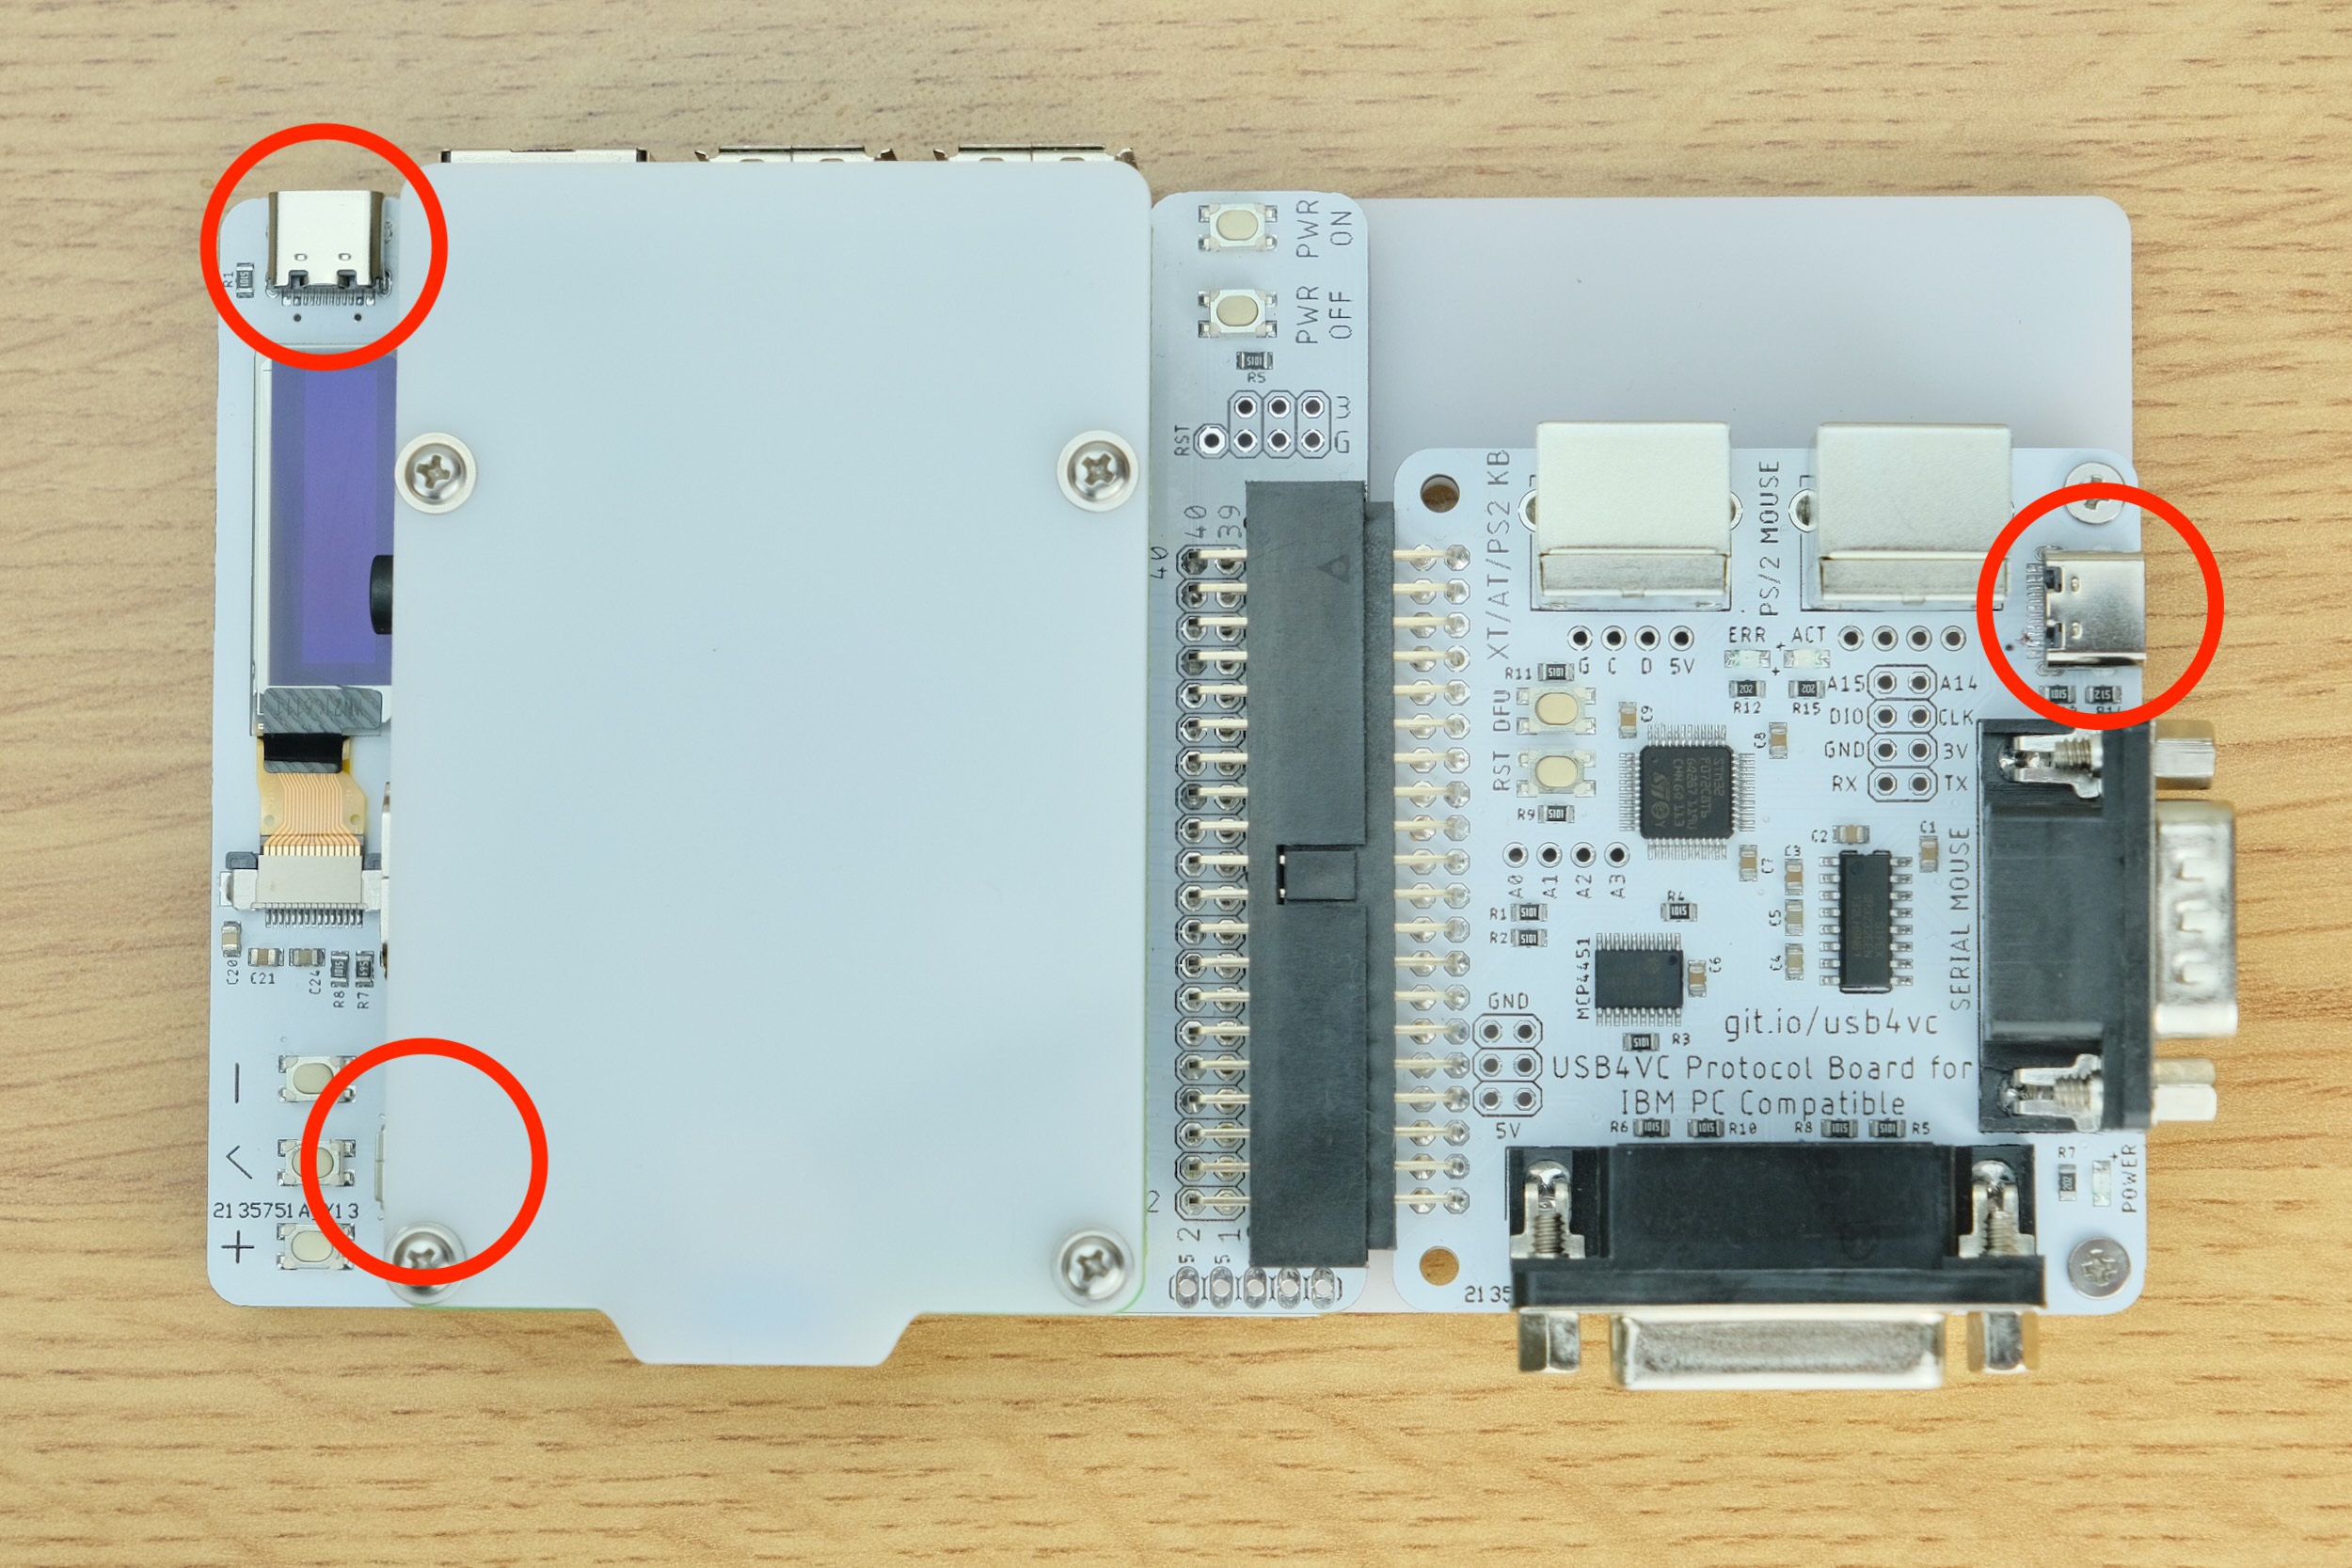
Protocol Card Overview: IBM PC
Let’s take a quick look:
-
Cables can be purchased in my Tindie store (and of course other places).
-
PS/2 keyboard and mouse need a male to male PS/2 cable.
-
XT and AT keyboards need a PS/2 female to AT male adapter.
-
The 9-Pin serial mouse requires a female-to-female straight-through cable.
-
The 15-Pin gameport requires a male-to-male cable.
-
DFU button is used for firmware updates.
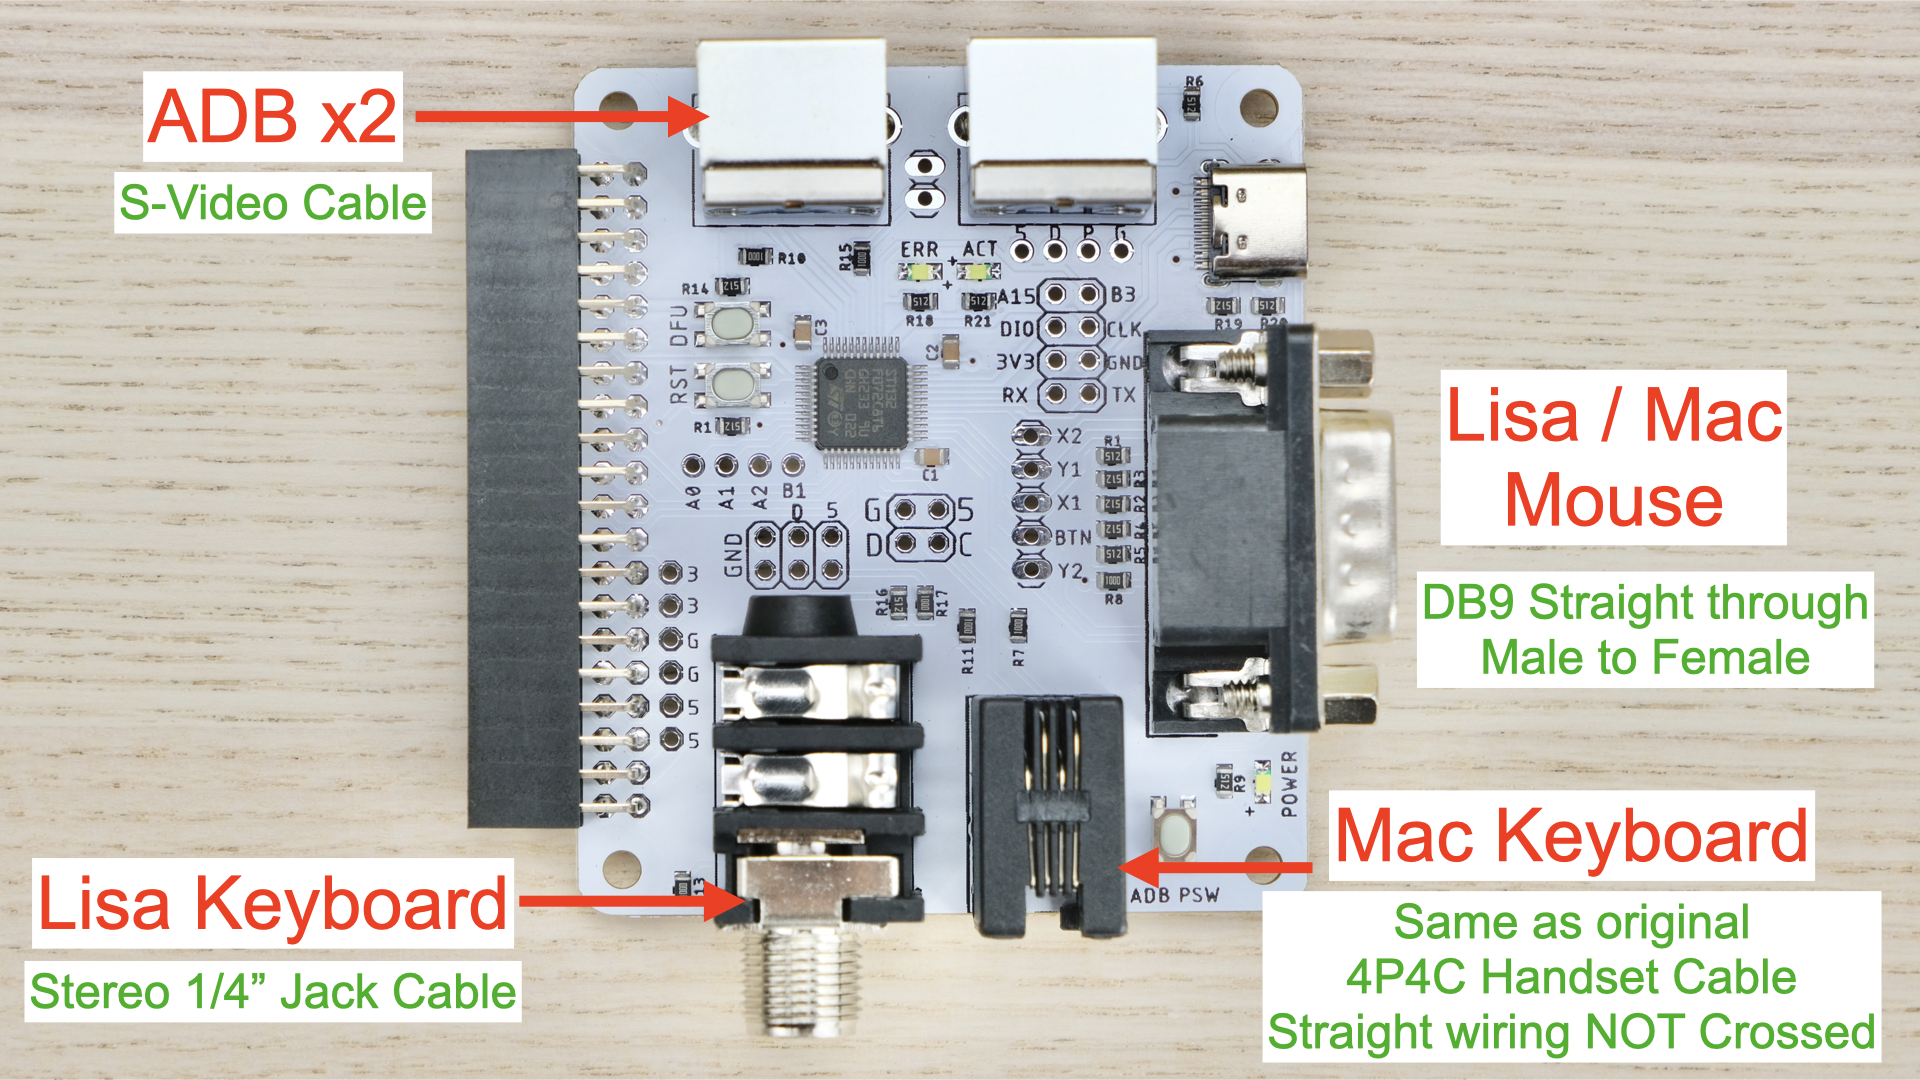
Protocol Card Overview: Lisa, Mac, and ADB
Cable Connection
Keep everything OFF for now!
Using the appropriate cable, connect the desired port from Protocol Card to your computer.
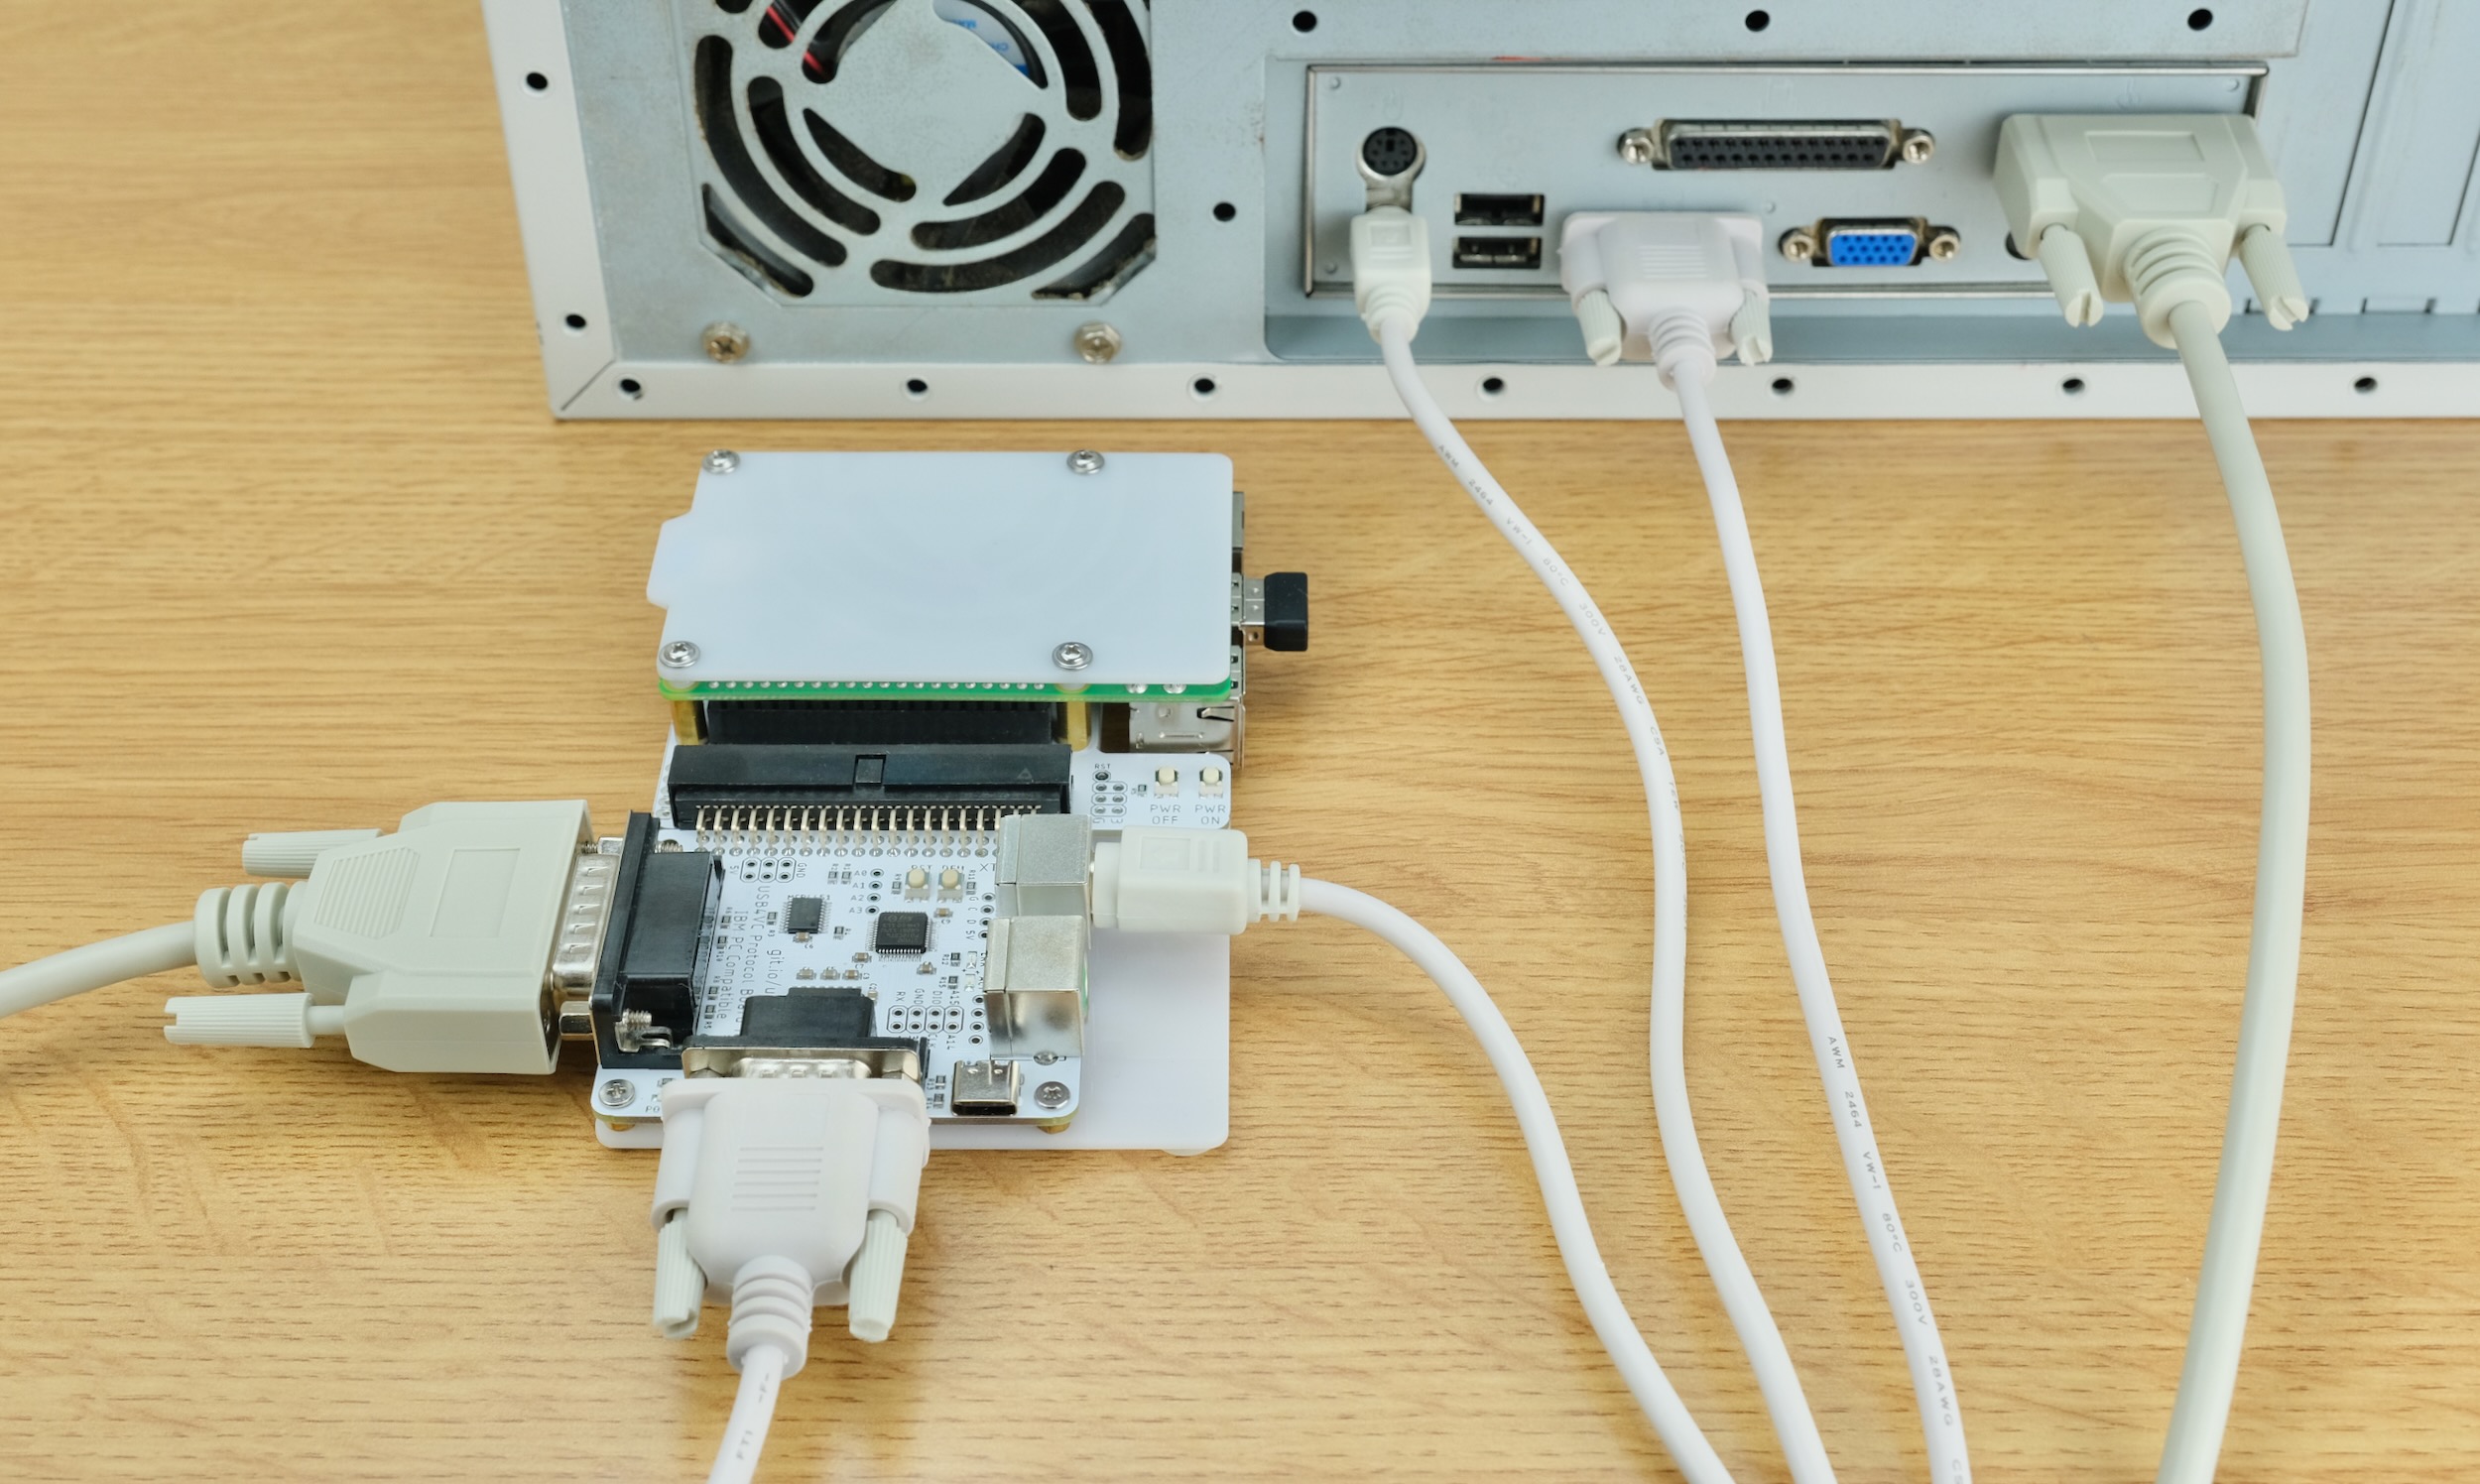
Most retro peripherals are NOT hot pluggable, so make sure all cables are connected before using!
Also plug in any USB Keyboard, Mouse, and Gamepad into the Raspberry Pi.
If using Bluetooth, we can pair it later.
Powering On
With cables connected, power up USB4VC with a USB-C cable.
You can do it from Baseboard, Protocol Card, or even RPi itself. All will work!
Always turn on USB4VC BEFORE the computer!
Protocol card will power up instantly and start talking with the retro computer, while Raspberry Pi takes a few seconds to boot up.
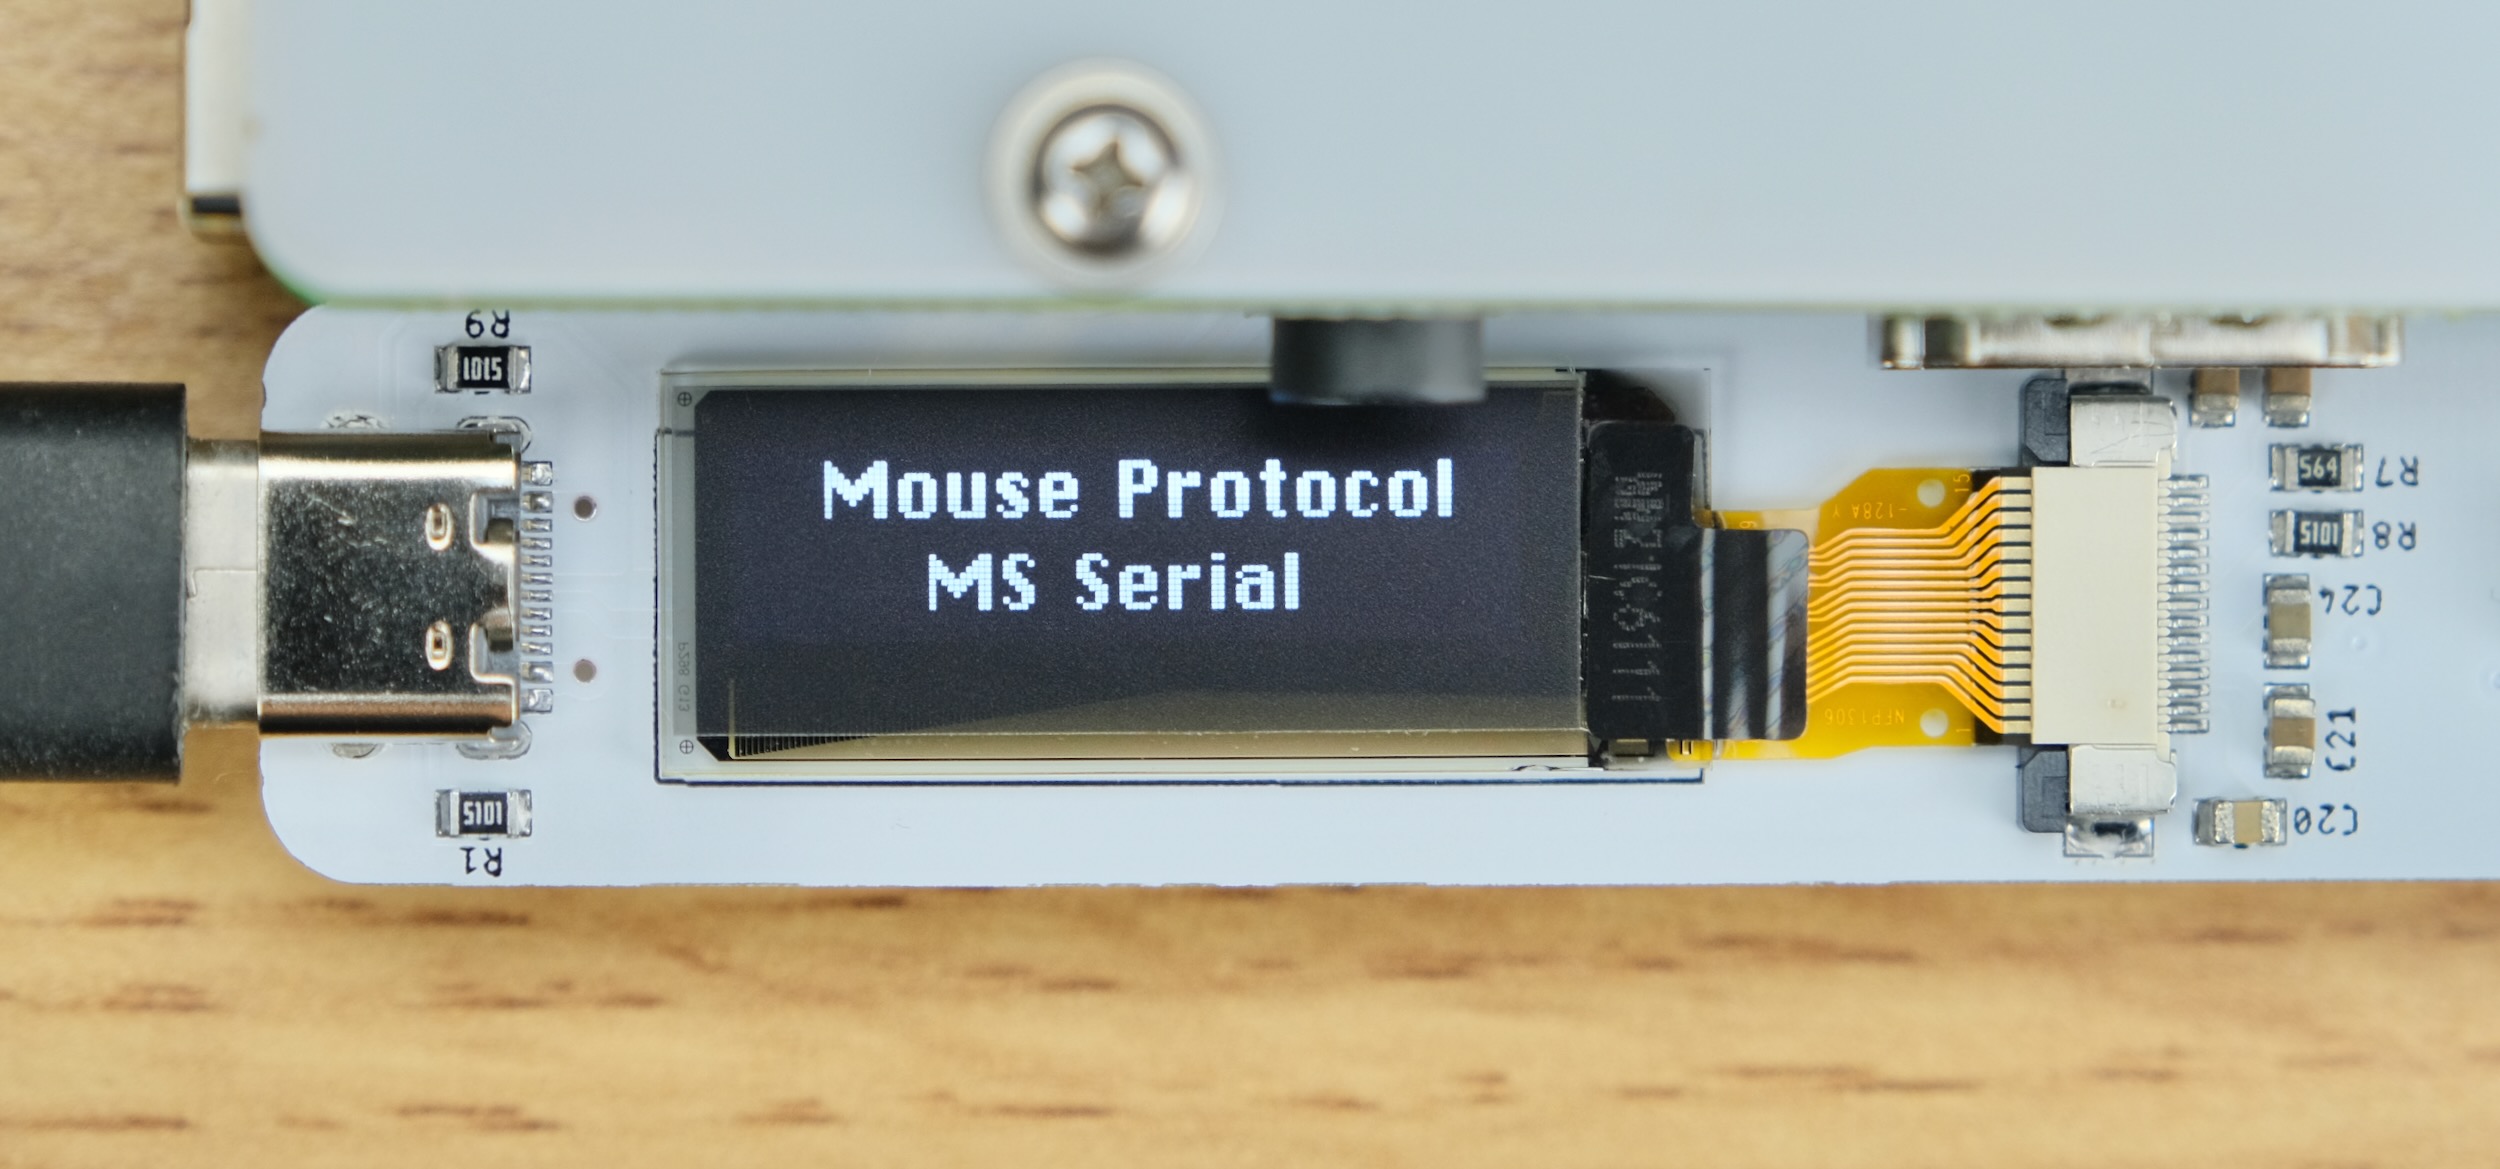
After a little while, the OLED screen should light up, showing home screen:

Press + or - to switch pages, and enter button to enter the submenu.
Protocol Setup
Looking at home screen, if displayed protocol is what you want, you’re good to go!
Otherwise, press Enter button to go to the submenu, and use Enter button to adjust protocols, mouse sensitivity, and gamepad linearity.
It is recommended to leave the sensitivity adjustments at default, and change them inside the OS or game first. Only do it on USB4VC if that’s not possible.
(Optional) Software Updates
Select Internet Update in main menu. It will update source code and P-Card firmware to latest version.
Pair Bluetooth
Select “Pair Bluetooth”:
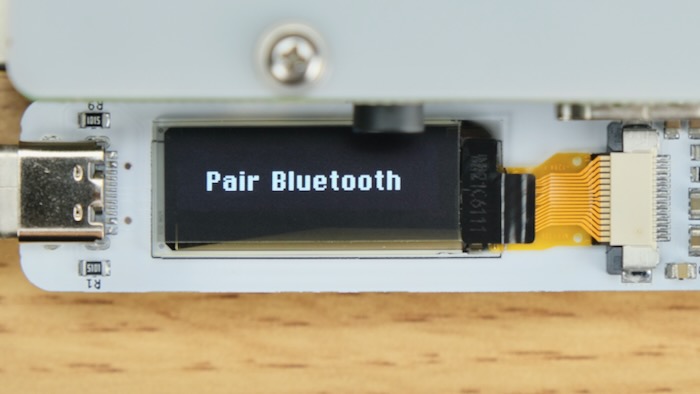
Put your device in Pairing mode, and press enter to start scanning.
After a while, a list of found devices is shown. If your device does not appear, try scanning again.
Use + / - to select one, and enter button to pair.
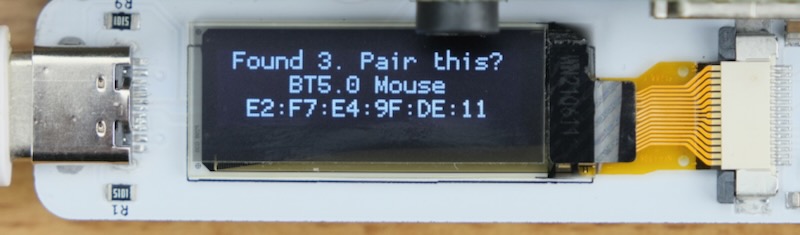
Pairing result will be shown. From my experience Bluetooth Mouse/Keyboards are usually fine, but Bluetooth gamepads can be a bit temperamental sometimes. If error occurs, try rebooting the BT device and/or USB4VC.
Try it out!
With protocol selected, and everything connected, time to power on the computer!
If everything goes well, you should be able to use it as normal, now with USB inputs!
Please do keep reading for more information though 😅!
Using Gamepads
Currently, USB4VC officially supports the following controllers:
-
Xbox 360 / Xbox One / Xbox Series X
-
PlayStation 4 / PlayStation 5
In my testing, gamepad compatibility seems to depends on the RPi models:
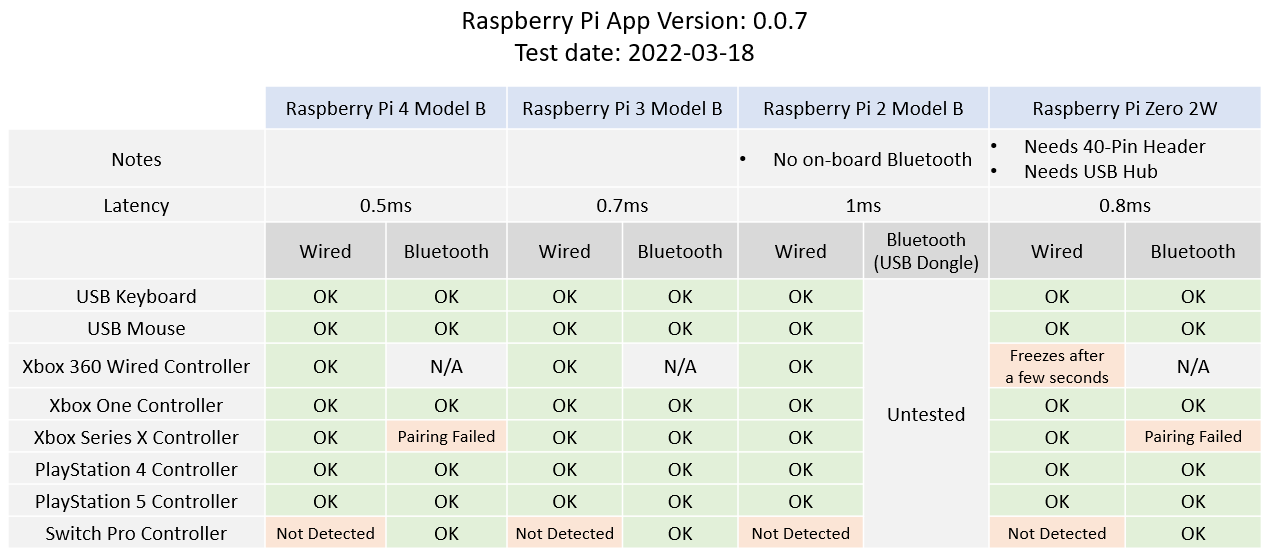
-
Raspberry Pi 3 Model B seems to be the most compatible.
-
If pairing fails, remove the BT device in the menu, reboot USB4VC, and try again.
-
Multiple controllers should work, although analog stick might compete with each other.
Once connected, you can enable 15-Pin Gamepad Protocol on IBM PC Card, and it should behave like a generic gamepad with 4 buttons and 4 analog axes.
With officially supported controllers, the mapping is:
-
4 face buttons to 4 gameport buttons
-
Left and right shoulder button to gameport button 3 & 4.
-
Left Stick to gameport Joystick 1.
-
Right Stick to gameport Joystick 2.
-
Left & Right Analog Triggers to Joystick 2 Y-Axis.
Unsupported USB controllers should still work, although you might need to make your own mapping (see below).
Custom Gamepad Mapping
You can also create your own USB Gamepad mapping or have it control mouse and keyboard, in order to play games that did not have native gamepad support!
Download the configurator and follow the instruction to set it up.
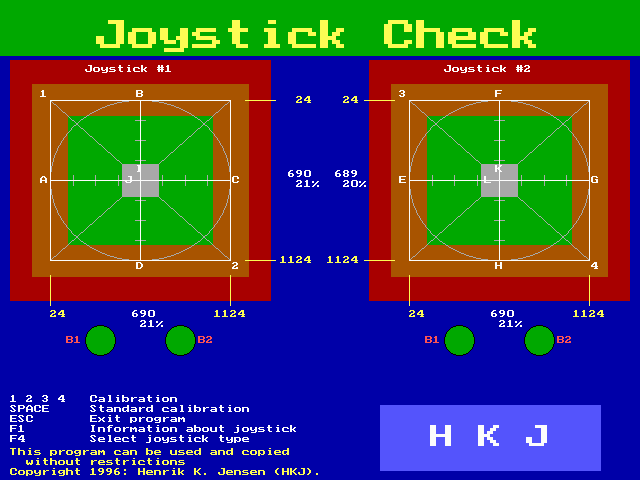
Joycheck DOS Program
You can download this DOS program to visualize what the gamepad is doing, great for troubleshooting! Found on this vogons thread.
-
It’s OK if the values are slightly off. Games will calibrate before starting anyway.
-
Careful with pressing keyboard keys, it might mess up the display.
Software Update
Connect RPi to internet. You can set up WiFi, or plug in an Ethernet cable.
Then simply select Internet Update in main menu. It will update source code and P-Card firmware to latest version.
Tinkering Guide / Making Your Own Protocol Card / Technical Details
Powering Off/On
You can turn off/reboot the Raspberry Pi by pressing the POWER OFF button.
When the RPi is off, you can press POWER ON button to turn it back on.
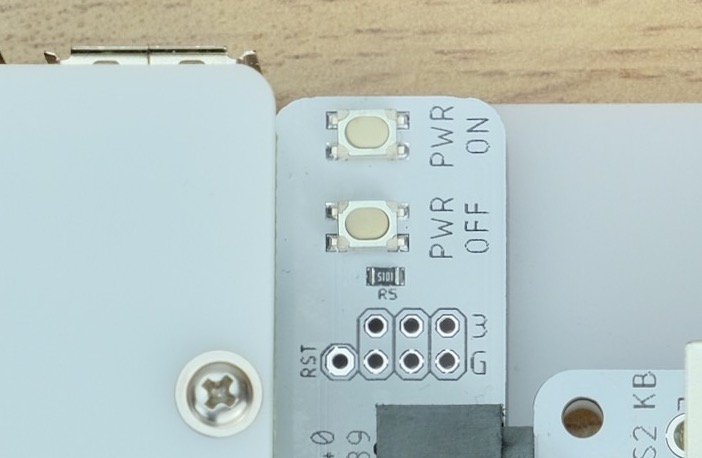
Plate Dimensions
Want to design a custom case? Click me for dimension drawings.
Known Issues
ADB Collision Resolution
-
ADB collision resolution has not been fully implemented yet.
-
Issues might arise ONLY IF you daisy-chain additional ADB devices of the same type AND use them at the same time.
-
Not a high-priority bug, might work on it when I have time.
ADB Soft-Power-On doesn’t work out-of-box
-
To power on a Mac that supports soft-power-on via the keyboard, you will need to modify your Lisa/Mac/ADB protocol card.
-
🚨 ONLY ATTEMPT THIS IF YOU KNOW WHAT YOU ARE DOING 🚨 Soldering and desoldering components is a good way to break something.
-
You must close either JP2 (pin header between the two ADB ports) or JP9 (solder jumper in same place on back of board) so the signal can reach the ADB port.
-
You must also remove R6 which should not be installed. It was removed from the design files but may still exist on shipping boards.
-
You must also map a key to act as KEY_POWER, if your USB keyboard does not have a power key (which it probably doesn’t).
Questions or Comments?
Feel free to ask in official Discord Chatroom, raise a Github issue, DM on Twitter, or email dekunukem gmail.com!
Table of Contents
(Youtube Video) USB4VC in Action
Tinkering Guide / Make Your Own Protocol Card / Technical Notes