duckyPad-Pro
duckyPad Pro Tinkering Guide
| Get duckyPad Pro | Official Discord | Getting Started | Table of Contents |
This guide shows you how to delve deeper into duckyPad and make firmware modifications.
Prerequisite
This is a fairly involved project with a lot of code, so knowledge and prior experience with MCUs would be very helpful.
- Arduino, PIC, STM32, etc
- Also RTOS Basics
MCU Info
duckyPad Pro runs on ESP32-S3 microcontroller:
- Dual-Core @ 240 MHz
- 4MB Flash Memory
- 512KB RAM
- 2MB PSRAM
- Wi-Fi and Bluetooth
Compared to STM32F072 in the original duckyPad, this MCU is much more powerful and much easier to tinker with.
Toolchain Options
There are a number of ways to program ESP32.
PlatformIO is popular with beginners, but it has a lot of abstractions, bloat, and limited control.
ESP-IDF, used by duckyPad Pro, is the official SDK with full API support, more libraries, and documentation.
Install ESP-IDF
ESP-IDF uses Visual Studio Code.
I recommend VSCodium, same thing but without tracking and telemetry.
Anyway, follow the official setup guide to install everything.
It is very text-heavy, but follow the steps and it should work.
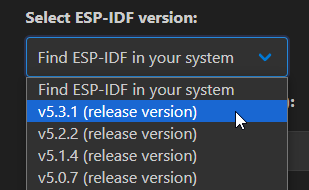
Make sure to select (at least) ESP-IDF v5.3.1:

Download Repo
Clone the repo:
git clone https://github.com/dekuNukem/duckyPad-Pro
Compile Firmware
In VSCode, select File -> Open Folder...

Go into Firmware folder, select the dpp_fw folder:

Expand main folder
All the sources file are there

To compile, press CONTROL + E, then B key.
It might take a while, but eventually it should finish.

Upload Firmware
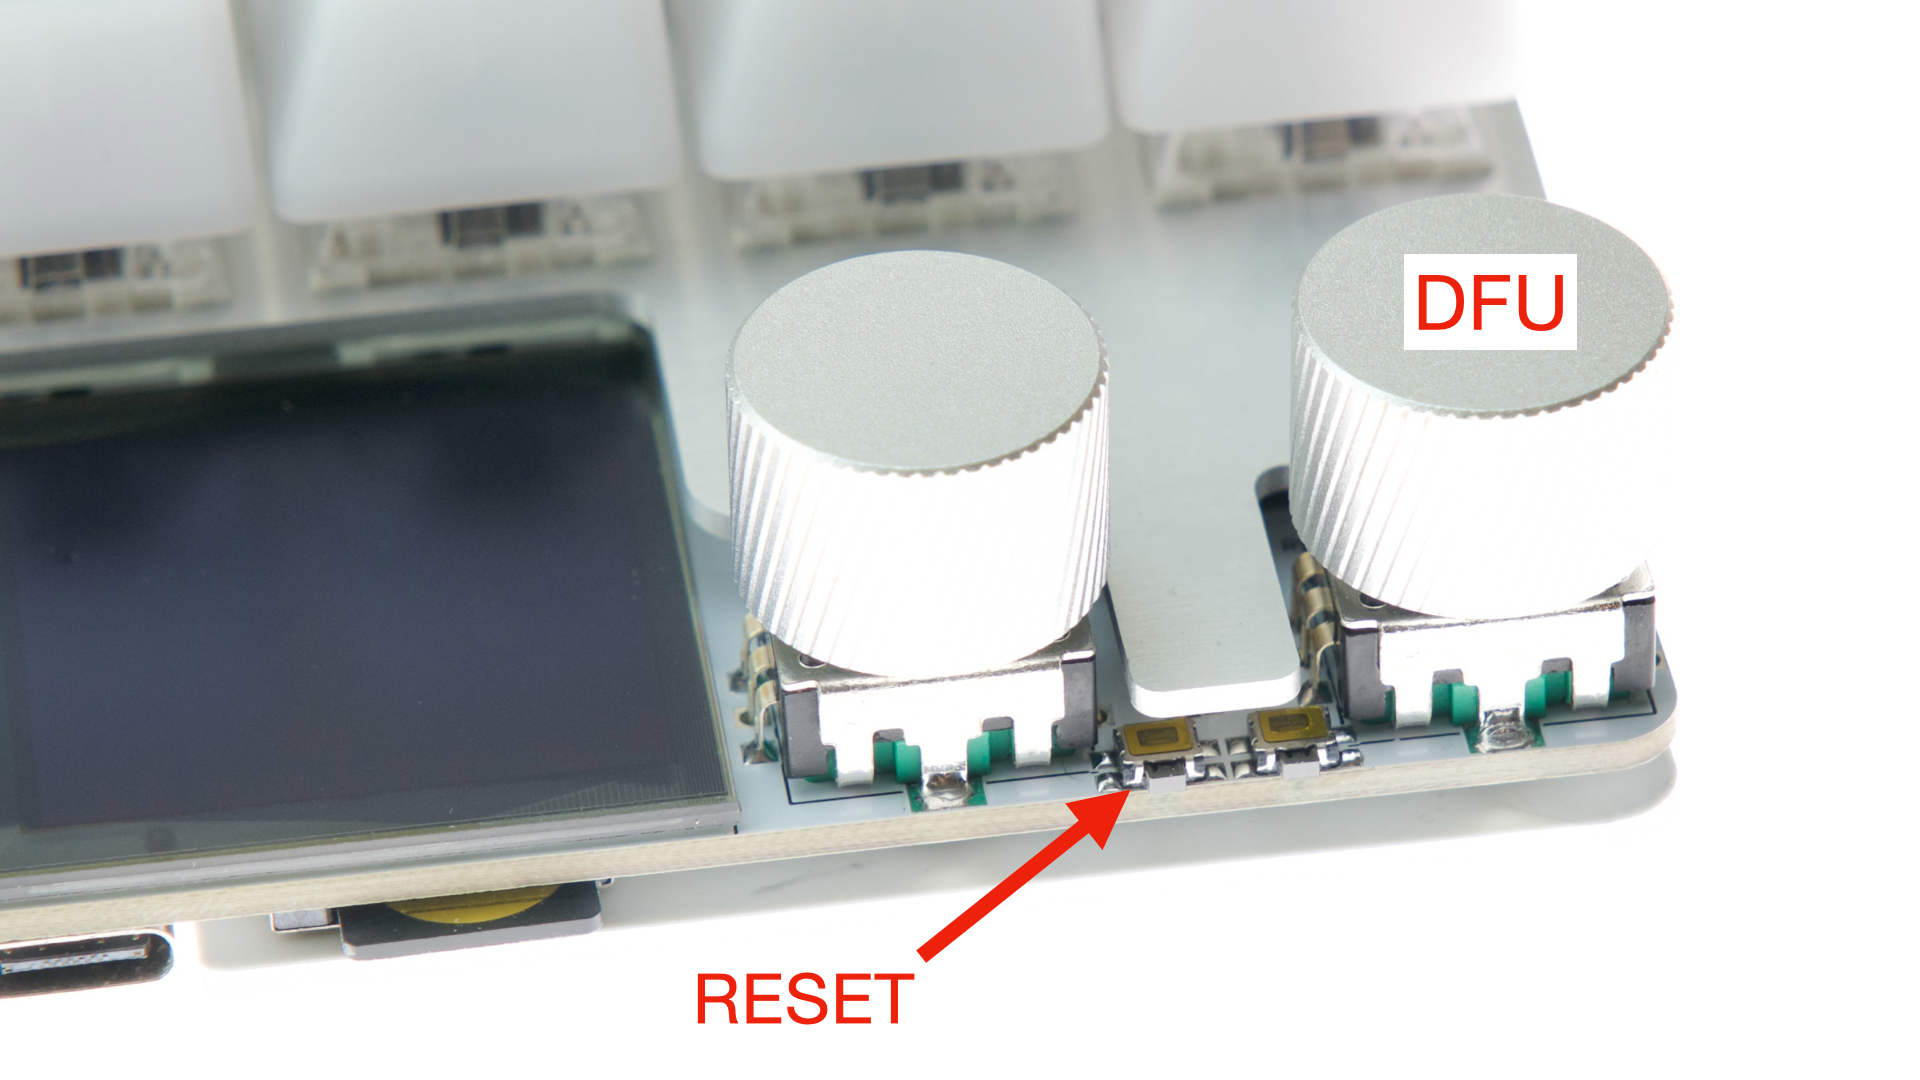
We want to put the ESP32 in DFU (Device Firmware Upload) mode.
HOLD DOWNRESET button.HOLD DOWNDFU button, aka upper encoder knob.RELEASERESET button.RELEASEDFU button.
If all goes well, the screen should stay blank.

We are now in DFU mode, and duckyPad shows up as a USB Serial device.
-
Click the
COMport number -
Select the duckyPad serial port, it should say
Microsoft.

To upload, press CONTROL + E, then F key.
It should take a few seconds.
Press RESET button to start using new FW.

Hardware Info

Questions or Comments?
Please feel free to open an issue, ask in the official duckyPad discord, or email dekuNukem@gmail.com!